
Off-Season Ski Storage: Clean, Wax, and Protect Your Gear for Next Winter
Store skis either upright or flat, with no heavy load, no tight compression, and no contact with damp floors or hot air.
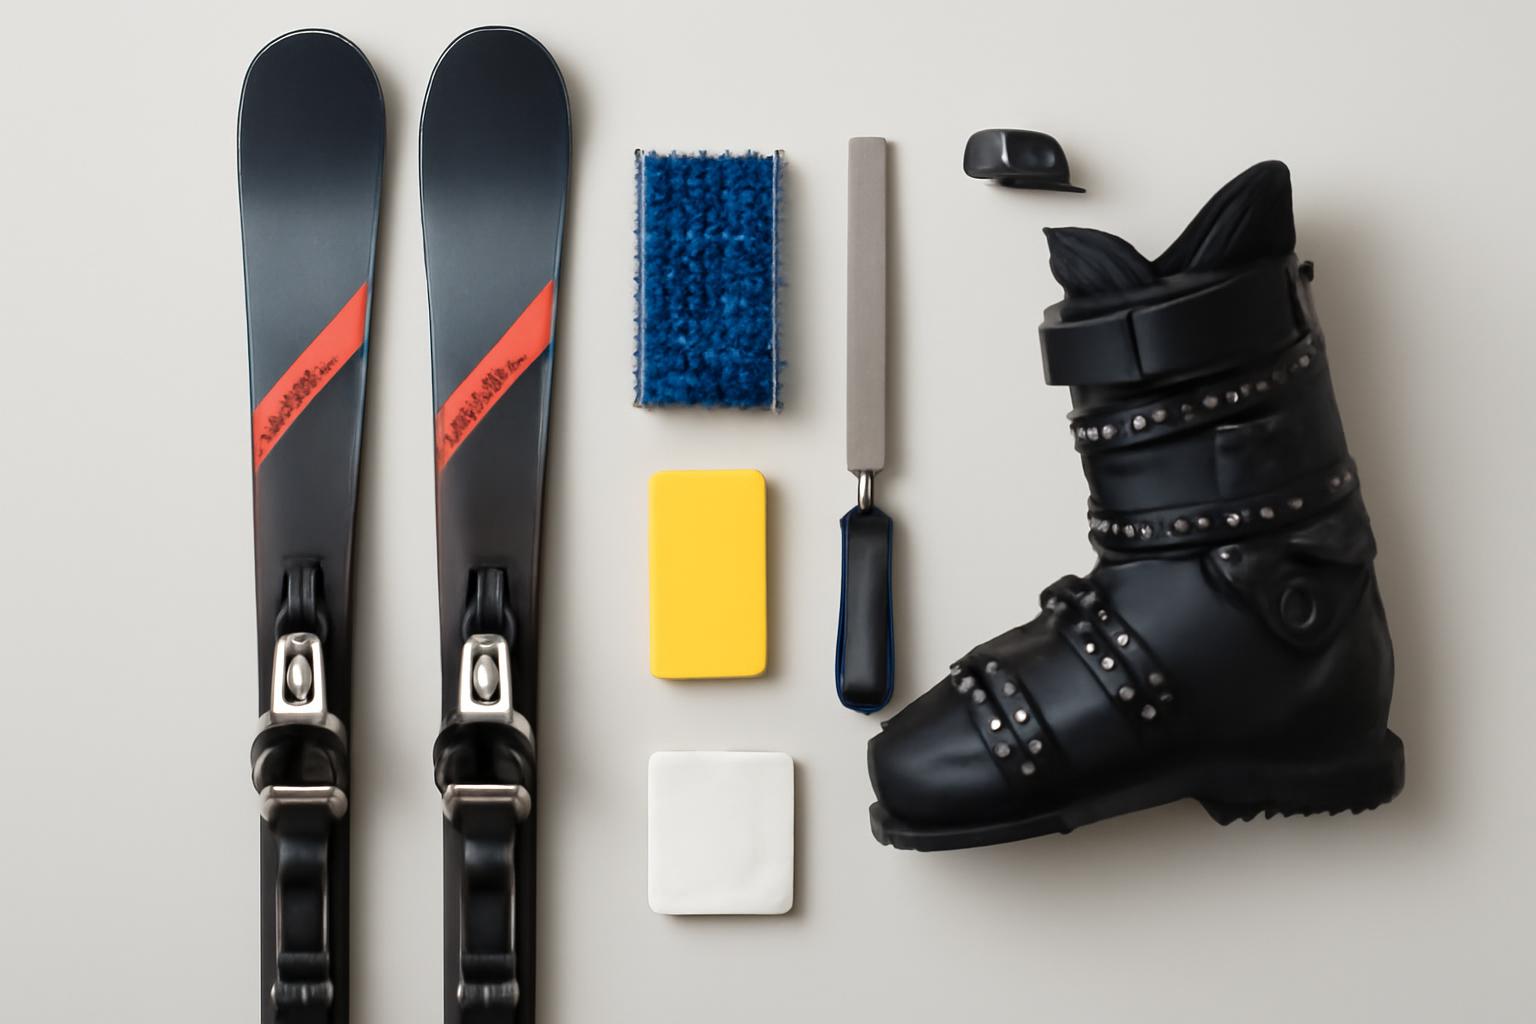
If you want to know how to store skis during off-season without finding rusty edges, dried-out bases, or misshapen boots in the fall, the formula is straightforward: clean everything, dry it fully, remove light rust, leave on a protective wax coat, and store the gear in a cool, dry, stable place.
That sounds simple because it is. But it is also one of those small maintenance jobs that prevents a lot of avoidable problems later. Spring skiing leaves behind slush grime, road salt, and moisture. Summer storage adds heat, humidity, and long stretches of neglect. Put those together, and “I’ll deal with it later” becomes tune-shop bills, delayed first days, and gear that starts the season in worse shape than it should.
The good news is that this is usually not an all-day project. SKI Magazine and Dope Mag both frame off-season prep as roughly an hour of work, and the core routine is consistent across ski-care sources such as SKI Magazine, evo, Armada, Christy Sports, FREESKIER, and Ski Butlers: clean, inspect, wax, dry the boots, and store the gear indoors in stable conditions.
One useful distinction up front: the ski-prep advice in this guide is strongly supported by ski-care publications and shop guidance. The self-storage section later is more of a practical planning guide drawn from general storage-size, cost, and facility sources. That means the “how to prep skis” steps are better-supported than the “which storage unit should I rent?” details.
Why Off-Season Ski Storage Matters
Improper ski storage does more than leave your skis dusty.
The most immediate problem is corrosion. Christy Sports, Armada, evo, and Ski Butlers all call out the same basic issue: end-of-season skis often carry dirt, road spray, salt, or de-icer residue from parking lots, roof racks, car boxes, and spring slush. Christy Sports specifically notes that spring skiing often exposes gear to road salt and magnesium chloride, both of which are corrosive. If that residue sits for months, edges can rust and bases can oxidize or dry out.
Moisture is the bigger hidden risk when the ski is already damaged. Armada warns that unrepaired core shots or significant base damage can let moisture seep deeper into the ski over the summer, potentially leading to swelling or rot. That is not something that happens to every scratched ski, but it is a real risk when damage is deep and left exposed.
Heat and humidity are the slower, more conditional problem. Ski-care sources are notably consistent on avoiding garages, attics, sheds, and other spaces with major temperature swings. Christy Sports says repeated swings can contribute over time to issues such as top-sheet delamination, base bubbling, and camber loss. Armada adds that extreme temperature cycling can make epoxy resins more brittle. These are not guaranteed outcomes from one imperfect summer, but they are plausible long-term risks when gear sits for months in hot, damp, or unstable conditions.
Boots suffer too. Christy Sports warns that damp liners can break down and that boots stored fully unbuckled can lose shape. Dope Mag, SKI Magazine, and Vail Ski Shop also stress drying liners and lightly buckling shells before storage to prevent odor, mildew, and deformation.
That is why off-season prep is worth doing even if your skis looked “fine” when you put them away last year. Proper storage helps you:
- reduce edge rust and corrosion
- keep bases from drying out
- avoid avoidable repairs next fall
- preserve boot shape and liner condition
- save time when the season starts again
And it really is a modest job. SKI Magazine and Dope Mag both describe the routine as about a one-hour process. Compared with next-season tuning, rust removal, or base repair, that is time well spent.
Step 1: Clean Skis, Edges, and Bindings Thoroughly
The first step in how to store skis during off-season is removing the stuff that causes damage while the skis sit.
Armada, Christy Sports, evo, and Ski Butlers all emphasize the same end-of-season contaminants: mud, lift-line dirt, spring slush residue, parking-lot salt, road spray from roof racks, and greasy buildup on the base. Those are the materials most often blamed for the rusty, grimy skis that show up in shops every fall.
A safe cleaning routine looks like this:
-
Wipe the skis down with a soft cloth or towel. Armada recommends using a soft towel and warm water to wipe the topsheet, sidewalls, and bindings. Christy Sports says to focus on the base, edges, and bindings too.
-
Start with warm water or a damp cloth. For many skis, that is enough to remove end-of-season grime.
-
Use mild soap or a base-safe cleaner only if needed. Christy Sports and Vail Ski Shop both mention mild soap as an option. FREESKIER mentions an optional base cleaner or conditioner. Armada and evo suggest a small amount of citrus solvent for stubborn buildup on the base.
-
Be conservative around bindings. evo specifically warns against forcing water into the bindings. In practice, that means wipe them down rather than soaking them.
-
Avoid harsh chemicals. This is one of the clearest points of agreement across sources. evo says avoid degreasers or detergent because they can affect binding lubricant. Christy Sports warns against household cleaners or solvents that can damage P-Tex bases and top sheets. Ski Butlers also says to skip degreasers and detergents.
For most home skiers, the tool list is simple:
- microfiber cloth or shop rag
- warm water
- optional mild soap
- optional small amount of citrus solvent for stubborn base buildup
- dry towel for final wipe-down
What to focus on
Pay extra attention to the parts of the ski that tend to hold corrosive grime or residual moisture:
- edges, where rust starts first
- base near the edges, where dirty moisture tends to linger
- bindings, especially after slushy spring days or road spray
- tips and tails, which often collect transport grime
If you used a roof box or rack, assume the skis are dirtier than they look. SKI Magazine, Dope Mag, FREESKIER, and Armada all note that edge rust after transport or post-trip car storage is common.
Drying is not optional
Once the skis are clean, dry them completely.
Armada puts this bluntly: make sure they are “100% dry before you even think about waxing.” Vail Ski Shop similarly warns that moisture is a major enemy of stored ski gear, including binding springs and boot liners. Christy Sports and Ski Butlers say full drying is essential to prevent rust and mildew.
Use a towel first, then let the skis air-dry before you move on to edge work or wax. If you are about to put the skis in a bag or closet and anything still feels cool-damp to the touch, wait longer.
Step 2: Polish Edges to Remove Rust and Burrs
You do not need a full edge sharpen just because the season ended.
What you do want is a quick inspection and a light cleanup.
SKI Magazine, Dope Mag, FREESKIER, and Armada all recommend checking edges for light rust, burrs, and nicks before storage. The typical causes are familiar: roof boxes, wet car transport, spring rocks, and a few too many late-season parking-lot laps.
Check the edges for:
- orange surface rust
- rough spots from rocks
- burrs or nicks
- obvious damage near tips and tails
- any spot that feels jagged instead of smooth and consistent
What to use
For storage prep, the goal is polish, not sharpen.
Use:
- a gummy stone for light rust and minor burrs
- a fine diamond file only if needed for more stubborn roughness
SKI Magazine is especially clear here: if you move to a fine diamond file, use a file guide that matches the ski’s existing bevel so you do not accidentally alter the edge geometry. Dope Mag gives similar advice, warning that the diamond file is for stubborn burrs, not casual guesswork.
That distinction matters. A sloppy off-season file session can create more work than it solves.
How much work is enough?
Usually, just enough to remove the rust and knock down the burrs.
You are not trying to perform a full tune unless the skis genuinely need one. For summer storage, light polishing is usually enough because it:
- removes places where rust can spread
- leaves less cleanup for next fall
- preserves the existing edge shape
When to send skis to a shop
If the skis have real damage, summer is actually a smart time to get the work done.
Armada and evo both point out that early off-season is a good time for shop tunes because demand is lower. That is especially useful if you find:
- deep or widespread edge rust
- major burrs or compression damage
- core shots
- separating top sheet
- base gouges exposing deeper material
- bent edge sections
Armada specifically recommends fixing core shots before storage because exposed material can absorb moisture. evo likewise notes that summer is the ideal time for a base grind or meaningful repair work because shop techs are less backed up than they are right before winter.
Step 3: Apply Protective Storage Wax
If there is one step most ski-care sources agree on, it is storage wax.
SKI Magazine, Dope Mag, Armada, evo, FREESKIER, Vail Ski Shop, and Ski Butlers all recommend applying hot wax to the base and leaving it on through the off-season. That level of agreement is unusually strong.
The purpose is not speed. It is protection.
What wax to use
An all-temperature, universal, or similar non-fluorinated hot wax is the standard choice.
SKI Magazine and Dope Mag both explicitly say to avoid fluorocarbon waxes for storage, and both note the environmental downside. For summer storage, there is no practical reason to choose fluorinated wax anyway.
How much wax?
More than a normal ski-day coat.
Dope Mag is the most specific source here, describing storage wax as roughly 2 to 4 times thicker than a typical in-season application. Armada, evo, FREESKIER, SKI Magazine, and Ski Butlers all use language like “thick,” “generous,” or “full coat.”
A sensible middle ground is:
- enough wax to fully coat the base
- enough to overlap onto the steel edges
- thicker than a normal wax-for-glide application
- not so careless that you are sealing grime under it
That last point comes from Christy Sports, which cautions that over-waxing a dirty ski can trap dirt. The lesson is not to skimp on wax. It is to clean thoroughly first.
How to apply it
For hot-wax users at home:
- make sure the skis are clean and fully dry
- melt on an all-temp or universal wax
- spread it across the full base
- let it lightly overlap onto the edges
- let it cool
- do not scrape it off before storage
evo, Armada, SKI Magazine, FREESKIER, and Ski Butlers all agree on that last point: leave the wax on for the summer.
Why you leave it unscraped
Unscraped wax acts as a protective barrier.
FREESKIER says post-season wax helps keep bases hydrated and makes preseason prep faster. SKI Magazine says wax hydrates and protects bases over the summer. evo frames it as protection against oxidation, while several sources note that extending wax slightly over the edges also helps limit rust.
What to do next season
Before your first day back:
- scrape off the storage wax
- brush the base if you normally do
- inspect the edges and base
- add a fresh in-season wax if needed
evo explicitly recommends scraping and brushing before winter use. If you stored with a warm-weather wax, rewaxing for actual snow conditions is smart. If you used an all-temp wax, you may still want a fresh coat for conditions, but you will be starting from a protected base rather than a dried-out one.
Do you absolutely have to wax?
Strictly speaking, some skiers do skip it.
A SkiTalk discussion includes experienced skiers who report storing clean, dry skis indoors without storage wax and seeing few issues. But that is user anecdote, not the strongest evidence in the pack. The more authoritative ski-care sources are much more consistent: storage wax is the lower-risk option, especially in humid areas or less-than-perfect storage conditions.
So the practical answer is simple: if you want the better-supported preventive approach, wax them.
Step 4: Dry and Store Ski Boots Properly
A lot of skiers do a decent job with their skis and then toss damp boots into a corner.
That is a mistake. Boot storage affects comfort, odor, liner life, and shell shape.
What to do with liners and footbeds
If your boots allow it, remove the liners and footbeds and let them air-dry thoroughly.
Dope Mag and Vail Ski Shop both recommend about 24 to 48 hours of drying time. SKI Magazine, Christy Sports, and FREESKIER all reinforce the same principle even when they do not give the exact window: liners and footbeds need to be fully dry before storage.
Make sure all of these are dry before reassembly:
- liner interior
- tongue area
- footbeds or insoles
- shell interior
- bootboard area if accessible
This matters because trapped moisture is what leads to mildew, odor, and liner breakdown.
Reassemble the boots
Once everything is fully dry:
- put the liners and footbeds back in
- buckle the boots loosely
- store them upright
Dope Mag says to lightly buckle the shells. Christy Sports warns that unbuckled boots can lose shape. SKI Magazine recommends buckling them snugly enough to preserve form. The common takeaway is not “crank them shut”; it is “close them enough to hold shape.”
Best way to store boots
A good setup is:
- cool, dry place
- zippered or breathable boot bag
- upright position
- away from direct heat or sun
Avoid:
- airtight plastic bags
- damp basements
- hot garages
- leaving liners loose where they can get crushed or dirty
Christy Sports and Vail Ski Shop both prefer breathable storage over sealed plastic. As with skis, only bag the boots if everything is fully dry first.
Best Storage Locations and Positions for Skis
Once your skis are clean, dry, rust-checked, waxed, and ready, where you store them matters almost as much as the prep.
Dope Mag, evo, Christy Sports, SKI Magazine, Armada, and Ski Butlers all converge on the same default answer: a cool, dry, ventilated indoor spot with stable temperatures.
That usually means places like:
- a bedroom closet
- hallway closet
- under-bed storage
- an interior storage room
- a rack inside conditioned living space
These locations protect skis from the three biggest off-season enemies:
- heat
- moisture
- repeated temperature swings
A quick decision table
If you are deciding between home spots and storage options, use this as a shortcut:
| Storage option | Humidity / temperature risk | Floor or pressure risk | Overall call |
|---|---|---|---|
| Interior closet or under-bed space | Low if conditioned space | Low if nothing heavy is stacked on skis | Best default |
| Dry, climate-controlled basement or interior storage room | Usually low if truly dry and stable | Watch for concrete-floor moisture if storing vertical | Very good |
| Typical attached garage | Often moderate to high due to heat and day-night swings | Common risk from damp floors and crowded storage | Usually not ideal |
| Attic, shed, balcony, patio | High heat, sunlight, or weather exposure | High risk of pressure, dust, and moisture | Poor choice |
| Climate-controlled self-storage unit | Lower risk if the unit stays dry and stable | Good if skis are elevated and not compressed | Good backup when home space is tight |
| Dry non-climate-controlled storage unit | Depends heavily on local climate and storage duration | Needs careful packing and elevation off floor | Case-by-case, lower certainty |
That table reflects two evidence tiers. The preference for cool, dry, stable indoor conditions is strongly supported by ski-care sources. The self-storage rows come from general storage guidance plus ski-care logic, so they are practical but less direct.
Places to avoid
Most ski-care sources warn against storing skis in:
- garages
- attics
- sheds
- utility rooms
- damp basements
- direct sunlight
- outdoor balconies or patios
Why? Because those spaces often combine humidity with temperature fluctuation. Christy Sports says those swings can contribute over time to top-sheet delamination, base bubbling, and camber loss. Armada warns against rain, sun, heat, garages, and sheds. evo recommends a cool, dry place inside the house and explicitly says not the garage.
A fair qualification: poor storage conditions do not guarantee structural damage in one summer. But they do raise the risk of rust, dried bases, and long-term material stress. That is enough reason to avoid them if you have a better option.
There is one exception. A truly dry, climate-controlled garage or basement can work. Christy Sports says as much. But that is not the same thing as a typical garage that bakes in summer and cools down at night.
Vertical or horizontal?
Both can work.
Dope Mag, Armada, evo, and storage-unit guidance all support either vertical or horizontal storage as long as the skis are supported neutrally and not forced into an unnatural bend.
Vertical storage
Vertical storage is fine if:
- the skis are stable
- they are not hanging by the tips
- the tails are not resting on bare damp concrete
- nothing heavy leans into them from the side
Armada specifically warns against damp concrete. If the floor is concrete, place a dry barrier under the tails: wood, rubber, cardboard, or a shelf.
Horizontal storage
Horizontal storage is also fine if:
- the skis lie flat
- nothing compresses the camber or rocker
- heavy items are not stacked on top
- support points do not force the ski into an unnatural shape
evo describes this as a “neutral position.” That is the right idea whether the skis are on a rack, shelf, or closet floor.
How to strap skis
If you strap them, keep it loose and minimal.
SKI Magazine recommends straps at the tip and tail. Christy Sports is even more specific: use two loose straps, one near the tips and one near the tails, and avoid a single tight strap in the middle because it can compress camber over time.
Best practice:
- use two loose straps
- padded straps are preferable
- place them near the tips and tails
- avoid one tight middle strap
You can also store skis unstrapped if they are safely supported and not knocking into each other.
Bags, racks, and small-space storage
For apartments, shared houses, and smaller bedrooms, a breathable ski bag or indoor rack can work well. Just make sure the skis are completely dry first.
Christy Sports warns against long-term storage in airtight plastic and notes that travel bags can trap moisture. Their technicians specifically caution that trapped moisture in a travel bag can lead to rust. So:
- a breathable or slightly ventilated bag is fine
- a damp travel bag is not
- never bag wet skis
- never bury skis under boxes or heavy household items
Simple rule for position
If you remember one thing, make it this:
Store skis either upright or flat, with no heavy load, no tight compression, and no contact with damp floors or hot air.
Storing Skis in Self-Storage Units
Sometimes the best place to store skis during off-season is not home. Maybe you are moving, subletting, living in a studio, clearing out a dorm, or combining ski gear with other seasonal storage.
This is the part of the topic where the evidence is less ski-specific. The prep rules remain the same: clean, dry, inspect, wax, and avoid pressure or moisture. But sizing, climate control, and cost are mostly informed by general storage guidance rather than ski-industry testing.
What size unit fits skis?
A 5x5 unit is the usual starting point for a compact ski setup.
LockerHelp’s storage-size guide describes a 5x5 unit as about 25 square feet and roughly 188 cubic feet with a standard ceiling height, and says it fits seasonal sporting equipment. That does not guarantee every ski kit fits every 5x5, but it supports a reasonable, conditional takeaway: a compact setup of skis, poles, boots, helmet, and a small amount of winter gear may fit.
A 5x10 unit is the safer step up if you are storing:
- skis plus moving boxes
- extra winter clothing
- other sports gear
- household overflow
A simple rule:
- 5x5: may fit a compact ski kit, depending on ski length, bag shape, and how much else you store
- 5x10: more practical if skis are sharing space with boxes or other belongings
Measure before you book. Ski length is not the only issue; total volume, access space, and whether you want to reach items mid-summer matter just as much.
Is climate control necessary?
Not always. But it is often the lower-risk option.
The ski-care sources are clear that skis do best in cool, dry, stable conditions. Storage-industry sources frequently push climate control, and sometimes for understandable reasons. One storage guide focused on mountain climates argues that large seasonal temperature swings make climate control especially valuable for sensitive gear. Another says non-climate-controlled storage can work for seasonal skis if they are cleaned, properly covered, and stored for shorter periods in an appropriate climate.
That leads to the most practical hierarchy:
- Best: indoor conditioned space at home
- Very good: clean, dry climate-controlled storage unit
- Potentially acceptable: dry non-climate-controlled unit in a milder, lower-humidity climate if the gear is prepared properly and the storage duration is shorter
In other words, climate control is not automatically required in every market and every season. But it becomes easier to justify when you expect:
- high humidity
- major temperature swings
- mountain or coastal weather extremes
- long storage periods
- a facility that gets hot or damp
Storage sources commonly describe climate-controlled units as holding a more stable temperature range, often around 55°F to 80°F. That is not a ski-specific magic number, but it illustrates the broader point: fewer extremes is better.
How to pack skis in a storage unit
Whether the unit is climate-controlled or not, the packing rules are straightforward:
- clean and dry skis completely first
- leave storage wax on
- elevate the gear off the floor
- store skis vertically or flat without pressure
- keep heavy items off the skis
- avoid direct contact with damp concrete
- use a padded or breathable bag only if the skis are fully dry
Elevation matters. Storage guidance and general lease guidance both warn against letting belongings sit directly on potentially damp floors. A pallet, shelf, rack, or board under the tails helps reduce concrete-moisture risk.
Are skis allowed in storage units?
Treat this as a facility-specific policy question, not a universal yes.
General prohibited-items guides usually focus on categories like food, living things, flammables, combustibles, and wet items. Sporting equipment is not singled out in the general prohibited-items guide reviewed for this article. But absence from one prohibited-items list is not the same thing as universal permission. Facilities write their own leases, so check the specific rules before move-in.
Budget for more than the advertised rent
If you use self-storage, the monthly rate is rarely the whole cost.
LockerHelp’s storage-cost guide notes that renters often pay additional charges for:
- admin or setup fees
- required locks
- insurance or contents-protection plans
- later rate increases
- late fees
Practical ways to control that:
- ask whether the admin fee can be waived
- bring your own compliant disc or cylinder lock if the facility allows it
- check whether your homeowners or renters insurance already covers stored property off-premises
- compare the true first-year cost, not just the teaser rate
That matters even for a small ski setup. A cheap unit can become noticeably more expensive once fees and insurance are added.
Common Storage Mistakes and Pro Tips
Most off-season ski damage comes from a short list of preventable mistakes.
Mistakes that cause trouble
1. Storing wet gear This is the fastest route to rust, mildew, odor, and general deterioration. Christy Sports, Vail Ski Shop, Armada, and Ski Butlers all stress complete drying for a reason.
2. Leaving spring grime on the skis Salt, magnesium chloride, dirt, and road film are all bad candidates for six months of contact with metal edges and ski bases.
3. Using tight straps Especially a single tight strap in the middle. Christy Sports specifically warns that this can compress camber over time. If you strap skis, do it loosely at tip and tail.
4. Resting tails on bare concrete Armada and experienced skiers in SkiTalk both flag concrete-floor moisture as a risk. Put a barrier under the tails if storing vertically.
5. Using hot, unstable spaces Garages, sheds, attics, and sun-exposed corners are exactly the places ski-care sources caution against.
6. Heavy stacking Do not bury skis under moving boxes, patio cushions, or bins. Neutral support matters.
7. Ignoring core shots or real damage Armada is clear that exposed core material should be repaired before storage so moisture does not make the problem worse.
The binding DIN question: what to do with conflicting advice
This is the biggest disagreement in offseason ski-storage advice.
Some sources, including SKI Magazine, Dope Mag, evo, and several storage-company guides, mention lowering binding DIN settings or reducing spring tension for storage. But Armada, Christy Sports, and Ski Butlers take the opposite view or say modern bindings generally do not need it. Ski Butlers goes further and says only a ski tech should be adjusting bindings anyway. Armada warns that the bigger real-world risk is forgetting to reset the settings correctly before skiing.
For most readers, the safest practical guidance is:
- leave DIN settings as they are
- only change them if you truly know what you are doing and can restore them accurately
- if anything is changed, record the original settings carefully
- function-check or have bindings tested before next season
That is the best conflict-resolution answer the evidence supports. A theoretical storage benefit is not worth a binding setup mistake on snow.
Smart pro tips
- Put a note on the skis or bag: “Scrape storage wax before first day.”
- Schedule repairs in summer: Armada and evo both note that tune shops are usually less busy.
- Store boots lightly buckled: enough to hold shape, not cranked down.
- Keep accessories separate and dry: goggles, helmets, and gloves last longer when they are stored clean and ventilated.
- If you use self-storage, measure first: a 5x5 may fit a compact ski setup, but do not rent by guesswork.
- If the floor might be damp, elevate the gear: even a simple board or shelf is better than bare concrete.
A practical one-hour checklist
If you want the shortest version of how to store skis during off-season, do this:
- wipe off dirt, salt, and road grime
- dry skis fully
- polish light rust and burrs
- apply a generous all-temp storage wax and leave it on
- dry liners and footbeds for 24 to 48 hours
- reassemble boots and buckle loosely
- store everything in a cool, dry indoor place or a carefully packed storage unit
That covers the biggest risks without overcomplicating the process.
Can I store skis in a garage?
Usually, that is not the best option.
SKI Magazine, Dope Mag, evo, Christy Sports, and Armada all discourage typical garage storage because garages often have heat, humidity, and temperature swings. Those conditions raise the chance of rust and can add long-term material stress. A garage is more acceptable only if it is truly dry and temperature-stable. Otherwise, a closet, under-bed space, or another conditioned indoor area is safer.
Is climate-controlled storage required for skis?
No. It is helpful, not universally required.
The strongest ski-care guidance is to store skis in a cool, dry, stable space. Climate-controlled storage is the lower-risk version of that, especially in humid areas, mountain climates, or places with major temperature swings. But some storage guidance says non-climate-controlled storage can work for seasonal skis if the gear is cleaned, dried, protected, and stored in a relatively mild environment. So the answer depends on humidity, temperature volatility, and storage duration more than on a blanket rule.
Do I need to wax skis for storage?
If you want the better-supported answer, yes.
The most consistent ski-care sources in this evidence set—SKI Magazine, Dope Mag, Armada, evo, FREESKIER, and Ski Butlers—recommend leaving on a thick, unscraped coat of storage wax. A few skiers report skipping wax with no issues in dry indoor conditions, but that is weaker evidence than the expert consensus. Storage wax is the safer preventive step.
What size storage unit fits skis and boots?
A 5x5 unit is the starting point, but treat it as a measurement question.
LockerHelp’s size guide says a 5x5 fits seasonal sporting equipment. For ski gear, that means a compact setup may fit if you are storing just skis, boots, poles, and a small amount of related gear. If you are also storing boxes, winter clothing, or other household items, a 5x10 is often the more practical choice. Measure the full gear pile before booking.
How do I prepare skis for next season after storage?
Start by undoing the storage setup.
- scrape off the storage wax
- brush the bases if you normally do
- inspect edges for rust or damage
- check bases for dryness, gouges, or repair needs
- verify bindings function properly or have them tested if needed
- confirm boots are dry, shaped correctly, and ready to ski
evo, SKI Magazine, and other ski-care guides all treat preseason prep as a quick follow-up if storage was done well. If the skis had serious damage before storage, or if you see issues now, get a tune before your first day.
Store skis well in spring and you usually buy yourself an easier fall. Clean them, dry them, polish the edges lightly, leave on protective wax, and keep both skis and boots in a cool, stable place. If home space is tight, a compact storage unit may work for a small ski setup, but measure first, elevate the gear, and budget for real storage costs beyond the advertised rent. That low-drama routine is still the best-supported way to keep gear ready for first chair next winter.