
How to Clean and Restore a Vintage Accordion Safely
Document and test it first; remove loose dust before moisture. Stop for air loss, sticking, contamination, unknown construction or changes to the finish or bellows.
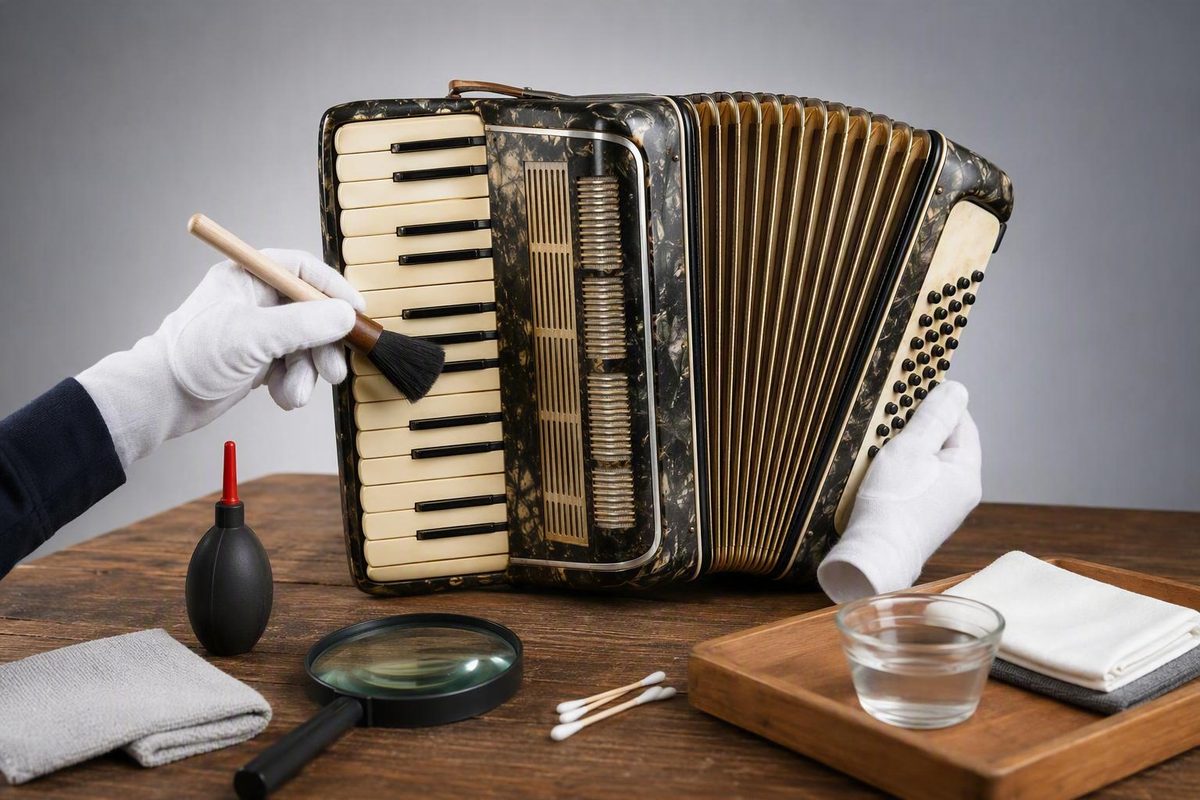
Overview
The safest way to clean and restore a vintage accordion is to document and test it first, remove loose dust before using moisture, clean only materials you can identify, and retest after every stage. Stop if you find contamination, air loss, sticking mechanisms, unfamiliar construction, or any change to the finish or bellows.
A successful first-pass cleaning makes the accordion visibly cleaner without creating new leaks, friction, sticking, discoloration, warping, loosened joints, or damage to the bellows. It does not necessarily make the instrument look new. Stable stains, age marks, and patina may be safer to leave in place than to remove aggressively.
This is an owner-level workflow, not a complete technical restoration. Vintage accordions may have out-of-tune reeds, sticking keys, cracked bellows, deteriorated internal components, or other faults that exterior cleaning cannot correct, as Hohner’s vintage accordion service guidance explains. Comprehensive work can involve disassembly, new pads or valves, replacement wax, bellows repairs, and retuning, according to Accordionology’s description of repair and restoration.
The practical sequence is simple: decide what result you need, record the starting condition, test playability and compression, remove dry debris, clean known exterior surfaces sparingly, treat bellows with particular restraint, and compare the result with your baseline. Appearance matters, but airtightness and playability are better indicators of whether further intervention is justified.
Set the restoration goal before you clean
Decide what you want the accordion to become before deciding how far to intervene. A dusty heirloom intended for display does not require the same work as an instrument expected to play reliably, and neither automatically requires a near-original mechanical restoration.
For display, the reasonable objective may be to remove loose dust, stabilize how the instrument is handled, and improve the exterior without disturbing delicate or unknown materials. A persistent bellows stain may be acceptable if attempts to remove it would threaten paper, tape, glue, or fabric. Cosmetic imperfection is not, by itself, evidence that the instrument needs structural work.
For occasional or basic playability, the relevant questions change. You need to know whether the bellows retain useful resistance, whether the keys and buttons respond consistently, whether notes sound, and whether there is obvious mechanical friction. Cleaning can reveal these problems, but it should not be presented as a cure for them.
A targeted repair addresses defined faults, such as a malfunctioning control, a problem with particular notes, tuning trouble, handling damage, or loss of airtightness. Accordionology distinguishes this fault-specific work from restoration, which it describes as a more comprehensive process involving disassembly, cleaning, replacement of worn components, and retuning.
Near-original performance is therefore a specialist goal, not a reasonable default for casual DIY cleaning. It may require work on pads, valves, wax, straps, bellows gaskets, tape, corners, reeds, and tuning. The supplied evidence describes that scope but does not establish a safe end-to-end home procedure for performing it.
Write down your intended outcome in plain terms: cleaner display condition, usable basic playability, correction of one or more known faults, or comprehensive restoration. That statement becomes a limit. If a proposed action does not contribute to your chosen result, or requires unfamiliar internal work, leave it out of the initial cleaning.
Prerequisites: prepare the workspace and document the instrument
Begin in a clean, well-lit workspace where small parts can be seen and kept in order. Keep food, drinks, household sprays, and unrelated tools away from the instrument. A soft brush and clean microfiber cloth are appropriate starting supplies for dry exterior cleaning. A controlled low-suction vacuum with a fine nozzle can be useful for accessible crevices, but only where it will not pull, displace, or draw material from the instrument.
Before touching the surface, photograph the accordion from the front, back, both sides, and across the bellows. Add close photographs of existing scratches, stains, cracks, loose trim, damaged corners, and irregular key or button positions. Record which straps are attached and how the instrument is oriented. These images provide a starting condition and a reference if anything moves.
If limited disassembly later becomes necessary, organization is part of the repair. A documented accordion-keyboard procedure recommends keeping keys in order, returning screws to their original holes, and testing a key after it is replaced. Apply that same discipline to any part you are already qualified to remove:
- Photograph each stage before changing it.
- Arrange removed pieces in their original order and orientation.
- Label locations that could be confused during reassembly.
- Keep each screw associated with its original hole.
- Test a reinstalled control before proceeding to the next one.
These practices do not make disassembly universally safe. Accordion construction varies, and an arrangement shown for one model may not apply to another. Do not force a grille, pin, key, cover, or bellows connection because an online example appears easy. Unexpected resistance is evidence to stop and reassess, not a problem to overcome with more leverage.
Preparation is complete when you have an uncluttered work area, suitable dry-cleaning supplies, photographs of the untouched instrument, written functional observations, and an orderly method for storing any parts. If those safeguards are not in place, do not begin opening the accordion.
Step 1: Assess the accordion before cleaning
Establish the accordion’s starting condition before appearance changes distract from functional problems. First identify what you are looking at: loose dust, greasy handling residue, stable staining, corrosion, moisture marks, damaged material, or evidence of pests require different decisions.
Inspect the casing, grille, keys, buttons, corners, straps, and visible bellows folds. Note gaps, cracks, lifted tape, loose trim, rust, warped areas, irregular controls, and anything that appears recently damp. Smell and storage history can add context, but they cannot reliably identify contamination on their own.
Then record the functional baseline:
- Which keys and buttons move freely, stick, scrape, or return slowly
- Which notes sound absent, uneven, or noticeably abnormal
- Whether the bellows resist gentle movement or appear to lose air
- Whether movement produces rubbing, rattling, or unexpected friction
- Whether visible cracks, holes, loose corners, or displaced parts are present
A clean exterior does not prove that the accordion is mechanically sound. Hohner identifies sticking keys, reeds going out of tune, and bellows cracks as age-related faults that can develop in vintage instruments. Community reports also describe pest damage hidden in an accordion body, reinforcing the need to assess more than visible shine.
Check playability and bellows compression
If the instrument appears stable enough to handle and there are no contamination stop signs, play it briefly before cleaning. Use this test to observe, not to force a reluctant mechanism. Listen across the treble and bass sides, note controls that do not behave consistently, and record any abnormal tones or mechanical noise.
Next, check bellows compression gently. With no keys or bass buttons pressed, apply a light pull or push and observe the resistance. An accordion-restoration assessment demonstration uses this no-note compression check before disassembly, treating substantial resistance as a sign that there may not be a major bellows hole or large air leak.
This is a comparative check, not a complete leak diagnosis. Record how the bellows feel, how quickly they move, and whether you hear or feel escaping air. Do not squeeze aggressively in an attempt to produce a definitive result. The purpose is to create a baseline that can be repeated after cleaning under similar handling.
Also note whether a possible leak appears only while playing particular notes or operating a specific control. Such observations can help a repairer distinguish a general airtightness problem from a fault associated with a mechanism. Do not open the instrument merely to confirm your theory.
The check is complete when you can describe the initial resistance, obvious air-loss symptoms, key and button behavior, and audible irregularities. If the instrument already has poor compression, severe friction, displaced parts, or controls that require force, cleaning should not be allowed to blur that evidence.
Treat moisture, mold, rust, odor, and pests as stop signs
Pause routine home cleaning if you find active moisture, suspected mold or mildew, extensive rust, strong unexplained odor, insect material, droppings, bore-like damage, or other signs of pests. These observations can be associated with poor storage or internal deterioration, but the supplied evidence does not provide a reliable protocol for identifying or remediating hazardous contamination.
A discussion of old accordion cleaning begins by distinguishing among mold, dust, food, and drink residue, because “dirt” is not a useful diagnosis by itself. The same discussion reports internal wood-mite damage in one instrument. Another bellows-cleaning discussion treats brown spots, rust, and odor as signs that the accordion had been stored for some time.
Those sources support caution, not a universal contamination test. Do not assume that wiping a visible area has addressed material inside the bellows, under the grille, in the case, or around internal wood and felt. Do not use ozone, solvent, fragrance, or another treatment based solely on an anecdotal recommendation. The evidence supplied here is not sufficient to establish that such treatment is safe for the person or the instrument.
Isolate the accordion from other instruments and storage contents without shaking or opening it unnecessarily, then seek appropriate professional assessment. Routine cleaning can resume only when you understand what the material is and how it can be handled safely.
Step 2: Remove loose dust before using moisture
Dry cleaning comes before any damp cloth or cleaning agent. Removing loose particles first reduces the amount of rubbing required and lets you see which marks are removable debris rather than stains or changes in the material.
Start with accessible exterior surfaces. Use a clean, soft brush or microfiber cloth with light strokes. Support the accordion securely so that brushing does not press on keys, buttons, decorative trim, or unsupported bellows folds. Move debris away from grilles, button openings, register switches, and gaps rather than sweeping it toward them.
Work in small areas:
- Brush or wipe one accessible surface lightly.
- Lift loosened debris away instead of driving it into an opening.
- Inspect the cloth or brush and replace or clean it if it accumulates grit.
- Check the surface for scratching, displaced trim, or a change in sheen.
- Continue only if the material remains stable.
For crevices, a fine nozzle at low suction can lift loose dirt where you can control its position. Published home-cleaning guidance for old accordions recommends gentle exterior dusting with a soft-bristle brush or microfiber cloth and describes low suction for grime around buttons and beneath an accessible grille. Keep the nozzle from contacting the finish or pulling on fabric, felt, tape, leather, or loose decorative material.
Do not treat the vacuum as a substitute for disassembly. If dust is visible behind a grille that you cannot remove without force or uncertainty, leave it for a repairer. Suction near internal reeds, valves, or loosely attached components introduces risks that cannot be evaluated from the exterior.
Dry cleaning is complete when loose surface debris has been reduced without scratching the finish, displacing parts, changing the bellows, or pushing dirt into the instrument. Photograph the cleaned area and compare it with the starting image. Anything remaining should now be classified as adhered grime, staining, corrosion, finish damage, or uncertain material before you consider moisture.
Step 3: Clean known exterior surfaces with minimal moisture
Use moisture only after dry debris is gone and only on a surface you can identify with reasonable confidence. The safe operating principle is indirect and sparing application: place a small amount of an appropriate treatment on a clean, soft cloth, not on the accordion itself.
A vintage accordion cleaning discussion specifically warns against applying cleaning agents directly to the instrument. Indirect application gives you more control and reduces the chance of liquid entering bass-button holes, key gaps, grille openings, joints, or the edge of the bellows.
Choose a small, inconspicuous test area. The cloth should not be wet enough to drip or leave liquid that can migrate into a seam. Wipe gently without prolonged rubbing, then stop and inspect both the surface and the cloth. Look for transferred color, softening, tackiness, haze, a changed sheen, swelling, lifted decoration, or residue. If any appears, do not continue.
Avoid general household cleaners. Home accordion-care guidance warns that household products can harm old finishes and that excess moisture can warp wood or loosen glued joints. Even when a source suggests a particular liquid for a particular surface, that does not establish compatibility with every vintage finish, key material, adhesive, or prior repair.
Never spray a cleaner over the instrument. Do not flood a cloth to reach around buttons, and do not work paste or residue into holes and gaps. Avoid forceful polishing intended to remove every age mark. If grime does not release with a minimal, controlled treatment, reclassify it as a specialist question rather than increasing pressure or chemical strength.
After cleaning each small area, let it remain undisturbed and inspect it again before expanding the treatment. Success means the visible grime is reduced while the finish remains the same color, shape, hardness, and sheen, with no residue or moisture at openings. If you cannot make that comparison confidently, return to dry treatment only.
Why there is no universal cleaner for every vintage accordion
Vintage accordions combine materials that may include finished or unfinished wood, metal, celluloid or other plastics, keytops, leather, felt, cloth, paper, cardboard, tape, wax, and multiple types of glue. Construction, aging, refinishing, and earlier repairs can change how any surface responds.
The supplied sources offer conflicting or narrowly contextual product suggestions. One source describes very sparing use of water or isopropyl alcohol on certain exterior areas, while a bellows-cleaning demonstration warns against acetone- or alcohol-containing solutions on bellows because of their binders. A community discussion is more conservative still, questioning how much cleaning bellows materials can withstand.
That disagreement cannot responsibly be converted into a surface-by-surface compatibility chart. The evidence does not establish one product as safe across celluloid, lacquer, wood, metal, keytops, leather, felt, bellows paper, tape, and glue. Nor does a successful treatment on one accordion prove it is safe on another.
When the material or finish is unknown, use dry cleaning or defer the treatment. When a damp test changes the surface, stop immediately. Material uncertainty is not an inconvenience to overcome. It is the deciding factor that limits safe DIY work.
Step 4: Clean the bellows conservatively
Treat the bellows as a functional assembly, not merely a dirty decorative surface. Their folds may incorporate paper or cardboard, fabric, leather, tape, glue, and reinforced corners. Cleaning that weakens any of those elements can turn a cosmetic issue into an air leak or structural failure.
Keep the bellows supported and avoid leaning or pressing on unsupported folds while cleaning. Begin with a clean, soft brush, working gently along accessible folds to lift loose debris. The accordion-cleaning discussion on Accordionists.info describes using a clean, dry household painting brush for dirt in the folds and recommends leaving stains that brushing does not remove.
Where suction can be precisely controlled, a filtered low-suction nozzle may help collect material already loosened by brushing. Keep it clear of tape edges, fabric, leather, paper, and damaged corners. Do not pull folds open farther than normal handling requires, and do not use suction to test whether an apparently loose element is still attached.
Do not use acetone- or alcohol-containing solutions on bellows. The cited cleaning demonstration warns that these can affect binders within the bellows assembly and may contribute to separation. More broadly, the evidence does not establish a liquid cleaner that is universally compatible with every bellows material and adhesive.
Distinguish loose dirt from stable discoloration. Dust that lifts with a soft brush is a reasonable cleaning target. Brown marks, embedded stains, faded paper, oxidation, and age-related patina may remain after loose debris is gone. Continued scrubbing can abrade the visible material without improving function.
Use airtightness and playability to guide the decision. In a discussion specifically about stained accordion bellows, the practical response is that if the bellows do not leak, the owner should leave them alone and play the instrument. That is not proof that every stain is harmless, particularly when moisture or contamination is suspected, but it supports prioritizing function over cosmetic perfection.
Do not patch holes, renew tape, reglue folds, replace corners, or open the bellows as part of routine cleaning. These are material-specific repairs, and the supplied evidence does not establish a complete home procedure for performing them. If you identify a leak, photograph its apparent location and seek assessment rather than experimenting with generic tape or adhesive.
This step is successful when loose debris is reduced, the folds move as they did before, tape and corners remain attached, and the compression baseline has not worsened. Resistant stains can remain. Cleaner-looking bellows are not a successful result if they have become softer, distorted, separated, or less airtight.
Step 5: Retest and verify the result
Repeat the same checks you performed before cleaning. Use comparable handling so that a difference in force does not create a misleading result. Verification should confirm both improvement and the absence of new damage.
Check the accordion in this order:
- Inspect cleaned surfaces for haze, discoloration, softening, swelling, residue, or lifted material.
- Gently repeat the no-note bellows compression check.
- Listen and feel for new air loss around folds, corners, joints, or controls.
- Operate the same keys, buttons, and switches recorded in the baseline.
- Play the same treble and bass areas and compare tone and response.
- Note new scraping, sticking, delayed return, rattling, or friction.
If limited disassembly was performed by someone qualified to do it, test each component during reassembly rather than waiting until everything is closed. The keyboard repair procedure recommends pressing a replaced key several times to confirm that it is seated correctly. This local testing makes the last change easier to identify if a problem appears.
Cleaning has succeeded when loose dirt is reduced and the instrument performs at least as well as it did at the documented baseline. Bellows resistance should not be worse, controls should not have developed new sticking, and cleaned materials should show no adverse change.
Do not excuse deterioration as part of the restoration process. If compression worsens, a control binds, a note changes unexpectedly, or a surface reacts after cleaning, stop. Photograph and record the change while the sequence is still clear. That evidence is more useful to a repairer than additional speculative cleaning.
Troubleshooting: stop instead of forcing parts
Unexpected behavior is a diagnostic signal. Do not respond to resistance, sticking, or a surface reaction by adding more force, liquid, lubricant, or disassembly.
Use the observed failure to choose the next action:
- A cover, grille, pin, or key will not move normally: Stop pulling or prying. Compare the area with your starting photographs and seek model-specific guidance or professional help.
- A key or button remains sluggish: Record whether it improved, stayed the same, or worsened after exterior cleaning. Persistent sticking may involve internal grime, worn parts, springs, warped material, or another mechanism that cannot be diagnosed from the surface.
- Bellows resistance is poorer after cleaning: Stop using the instrument and inspect only externally for a displaced corner, lifted tape, or obvious damage. Do not apply a generic patch or adhesive.
- A test area changes color, sheen, hardness, or texture: Remove no more material and use no additional product. Preserve the cloth and note what was applied so a specialist can understand the exposure.
- The instrument differs from the example you are following: Treat the difference as controlling. Do not force your accordion to match another model’s construction.
- A new scrape, rattle, or uneven response appears during reassembly: Return only to the last reversible step if you can do so without force. Otherwise stop and keep all parts organized for assessment.
“All accordions are different” is the central warning in the documented keyboard repair example. A pin arrangement, screw location, grille attachment, or key mechanism shown online may be irrelevant to your instrument. Generic instructions become especially risky when they encourage force to compensate for an unexplained difference.
Do not introduce lubricant merely because a control is sluggish. Do not bend a key or spring, sand a moving part, clean corrosion from a reed, replace wax, or remove reed blocks within this first-pass procedure. Those actions cross from conservative cleaning into fault diagnosis and technical repair.
The safest next action is to preserve evidence. Keep before-and-after photographs, write down the order of work, identify any cleaning material used, and describe the symptom precisely. “The third treble key returns slowly after dry exterior cleaning” is more useful than “the keyboard is broken.” A clear record helps a repairer focus on the fault without having to reconstruct what changed.
Choose limited DIY cleaning, targeted repair, or professional restoration
Choose the next level of work by combining your original goal with the findings from inspection and retesting. Do not assume that every old accordion should be fully restored, and do not assume that an attractive exterior means internal work is unnecessary.
Limited DIY cleaning is enough when the goal is modest, the contamination is ordinary loose dust or controllable surface grime, the materials remain stable, the bellows retain their baseline resistance, and the controls behave as they did before. Stable staining can remain if the instrument is airtight and the effort to remove it would threaten fragile materials.
Targeted professional repair fits a defined functional problem. Accordionology lists specific notes or tones, malfunctioning components, loss of airtightness, handling damage, and tuning problems among the faults that can be investigated individually. This is a better match for one sluggish key or one suspected leak than automatically commissioning comprehensive restoration.
Basic-playability work may address several practical faults without attempting near-original condition. Its scope should be established through hands-on inspection. Photographs and a recording may support a preliminary conversation, but Accordionology states that accurate repair estimates require playing and inspecting the instrument.
Comprehensive restoration is appropriate only when the desired result justifies comprehensive intervention. The work can include disassembly, cleaning, replacement of pads, valves, wax, straps, bellows gaskets, tape, or corners, and retuning. This is fundamentally different from wiping the casing or brushing dust from bellows folds.
Cost cannot be estimated responsibly from the evidence supplied here. Condition, model, fault scope, parts, and intended outcome all matter, and the cited service guidance warns that restoration expense can exceed the instrument’s market value. Market value is not the only consideration, however. Musical usefulness and sentimental or heirloom value can justify work that would not make sense as a resale calculation.
Ask a repairer to distinguish essential work from optional cosmetic improvement and comprehensive restoration. Provide your photographs, test observations, known storage history, and desired result. That gives the inspection a defined purpose and reduces the risk of paying for a scope that does not match how the accordion will be used.
Cleaning, repair, basic playability, and full restoration
These terms describe different outcomes, not interchangeable versions of the same service:
- Cleaning removes accessible dust or grime while aiming to preserve the existing mechanical condition. It does not promise corrected tuning, airtightness, or internal function.
- Targeted repair investigates and corrects identified faults, such as a sticking control, problematic note, handling damage, tuning issue, or air loss.
- Basic-playability work addresses enough functional problems for practical use without necessarily renewing every aged component or restoring the original appearance.
- Full restoration is comprehensive work intended to approach near-original performance, potentially including disassembly, component replacement, bellows work, reed-related work, and retuning.
The choice should follow the goal set at the beginning. A display instrument may need careful cleaning and stabilization but no tuning. An occasional player may need reliable controls and adequate airtightness without extensive cosmetic renewal. An instrument intended for demanding musical use may justify a broader inspection and restoration plan.
Do not confuse a cleaner surface with completed restoration. Internal pads, valves, wax, reeds, and gaskets can remain aged even when the casing shines. Conversely, visible patina does not mean the instrument is unusable if its functional condition is acceptable and no active damage is present.
Worked example: stained bellows and one sluggish control
Suppose an inherited accordion has brown staining on several bellows folds and one treble control that returns slowly. There is no confirmed active moisture or pest evidence. Before cleaning, you photograph the stains and control position, play the instrument briefly, and perform a gentle no-note compression check. The bellows offer stable resistance and there is no obvious air-loss symptom.
You brush the folds lightly and remove loose dust, but the brown marks remain. Because dry cleaning does not remove them and the bellows remain airtight, you leave the staining alone rather than escalating to liquid or solvent. This follows the evidence-supported principle that resistant bellows stains are often safer to retain than to chase cosmetically.
You then retest the sluggish control. It behaves the same as before, while the rest of the documented controls and bellows remain unchanged. The result is not a failed full restoration. It is a successful conservative cleaning plus a clearly isolated fault.
If your goal is display, you may decide that no further immediate work is necessary, provided no contamination concern emerges. If your goal is reliable playing, you document the sluggish control and request targeted professional assessment. One stable cosmetic issue and one defined mechanical symptom do not, by themselves, establish that the entire accordion needs comprehensive restoration.