
Your Step-by-Step Checklist to Pick the Perfect Self-Storage Unit Without Overpaying
A unit that technically fits everything can still be the wrong unit if every visit turns into a partial unload. Measure first, then verify fees and security.
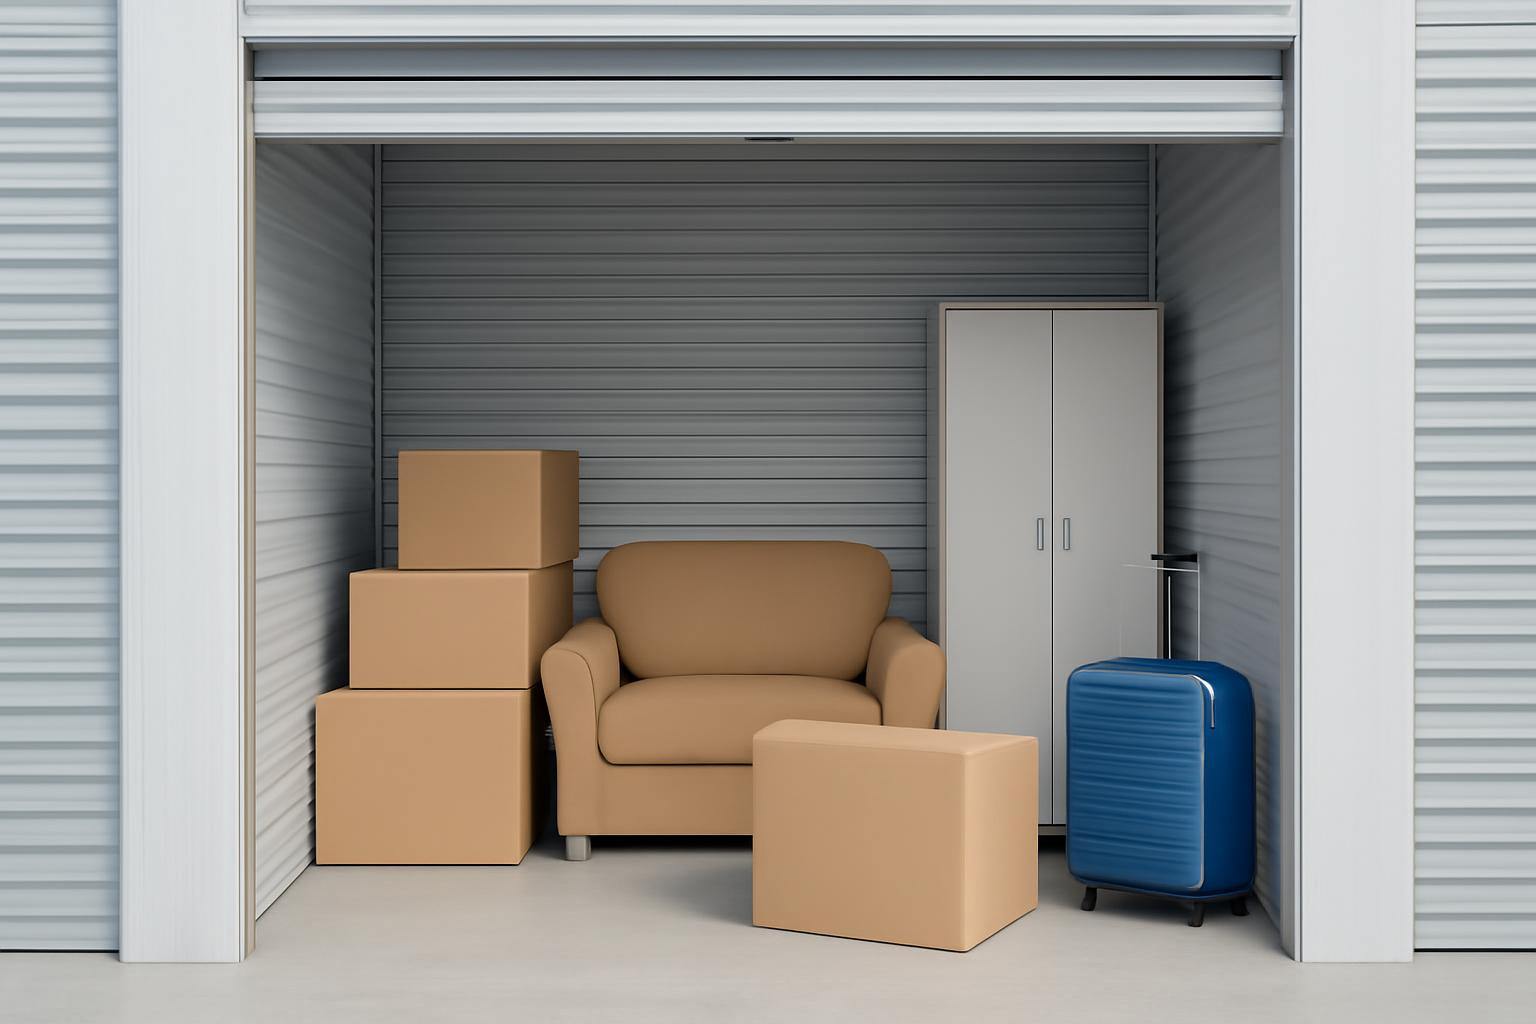
The costliest self-storage mistake is not usually dramatic. It is quiet: renting based on guesswork, an online promo, or a vague mental image of “about a closet’s worth of stuff.”
That is how people end up with units that are too small to load safely or too large to justify the monthly bill.
A better method is more boring and much more reliable: inventory what you own, estimate real volume, compare unit types based on the items themselves, inspect the facility in person, and budget the full cost instead of the teaser rate. Just as important, verify the things facilities advertise. “Climate-controlled” should mean actual maintained conditions. “Secure” should show up in the gate, lighting, cameras, locks, and cleanliness. “Low monthly rate” should survive contact with fees, insurance, and later increases.
Use the checklist below in order. It is slower than grabbing the cheapest listing online, but it is far more likely to get you the right self-storage unit the first time.
Step 1: Assess Your Storage Needs and Inventory Items
Before you compare facilities, answer the question that actually drives the rest of the decision:
What are you storing, for how long, and how often will you need it?
That one answer affects size, climate needs, drive-up versus indoor access, location, hours, and sometimes whether self-storage is the right solution at all.
Start with a real inventory, not a rough guess
Make a list of everything going into storage and group it into broad categories:
- Furniture: beds, sofas, dressers, desks, tables, chairs
- Boxes and bins: clothing, books, kitchenware, décor, files
- Appliances: mini-fridge, washer, dryer, microwave
- Electronics: TV, monitors, computers, speakers, consoles
- Documents and keepsakes: records, photos, artwork
- Seasonal or outdoor gear: bikes, skis, patio furniture, tools
- Special items: instruments, antiques, business stock, vehicles
For each category, note three things:
- Whether it is sensitive to temperature or humidity
- How often you will need access
- How long it will stay in storage
That sounds simple, but it is the difference between choosing a cheap standard drive-up unit for durable garage items and paying extra for climate control because you are storing wood furniture, electronics, photos, or instruments through a hot, humid season.
Measure the bulky items first
The items most likely to break your plan are the ones that do not compress well:
- mattresses
- sofas and loveseats
- dressers
- dining tables
- desks
- appliances
- shelving
- bikes
- exercise equipment
Measure the length, width, and height of those pieces. If something can be safely disassembled, write down the disassembled dimensions too. Bed frames, table legs, removable shelves, and detached mirrors can change the storage math more than most renters expect.
For boxes, use a planning estimate rather than a fantasy. One LockerHelp sizing guide uses about 1.2 to 1.5 cubic feet per medium moving box as a rough benchmark. That is not a universal box standard, but it is useful for estimating before you have every carton packed.
Think in cubic footage, not just floor space
Storage units are not spare bedrooms. They are vertical space.
So do not just ask, “How much floor will this take up?” Ask:
- What can be stacked safely?
- What can be nested?
- What must stay upright?
- How much aisle space will I need?
A practical sizing method is:
- total the cubic footage of your boxes
- add the rough volume of large furniture
- reduce where safe stacking or nesting is realistic
- then add a 10% to 20% buffer
That buffer covers the real-world waste that size charts skip over:
- center aisles
- awkward gaps around furniture
- future additions
- easier retrieval
If you expect frequent visits, lean toward the higher end of that buffer. A unit that technically fits everything can still be the wrong unit if every visit turns into a partial unload.
Decide whether self-storage is the right tool
Self-storage usually makes the most sense when you want:
- direct control over your items
- lower cost than full-service storage
- flexible access
- month-to-month convenience
Typical cases include:
- moving between homes
- remodeling
- home staging
- temporary decluttering
- semester or summer breaks
- business overflow
- seasonal gear rotation
But it is not always the best answer. Consider alternatives if:
- you need packing and transport handled for you
- you only need a very short bridge between moves
- the items are low-value relative to months of rent
- you already have workable storage space at home
If you cannot load and move your belongings yourself, full-service storage may make more sense. If you want lower cost and direct access, self-storage is usually the better fit.
Flag special requirements early
Some belongings immediately narrow your choices.
Common examples:
- Vehicles, boats, motorcycles, or trailers: not every facility offers the right space, and prep rules can be strict
- Electronics, wood furniture, leather, instruments, documents, and photos: often better candidates for climate-controlled storage
- Business inventory: may require extended hours, carts, elevators, or easy loading access
- Archived files and paperwork: may benefit from cleaner indoor space and better humidity control
- Dorm belongings: often fit in small units, but mattress size and move-in timing matter
This is also the point where you should double-check whether you really need a unit at all. If a garage, basement, closet, or spare room already gives you acceptable conditions and access, paying monthly rent may not be necessary.
Goal of Step 1: leave guesswork behind. If you can say, “I have one queen bed, one sofa, two nightstands, 18 medium boxes, a TV, and three bins, and I need access twice a month for six months,” you are in good shape to size intelligently.
Step 2: Calculate the Right Unit Size Using Real Cubic Footage
Once you know what you are storing, turn that list into a size decision.
This is where many renters get misled by marketing shorthand. One provider may call a unit “studio apartment size.” Another markets the same footprint as suitable for more. Often the difference is not dishonesty so much as different ceiling assumptions, packing assumptions, and optimism.
So use size charts as a starting point, not a promise.
Use common sizes as a conservative baseline
Here is a practical starting table based on a more conservative 7.5-foot ceiling assumption:
| Unit size | Approx. cubic feet | Common comparison | Conservative starting fit |
|---|---|---|---|
| 5x5 | ~188 cu ft | Large walk-in closet | Twin mattress set, 10–15 medium boxes, bicycle or small items |
| 5x10 | ~375 cu ft | Half one-car garage / large closet | Studio contents, queen bed, dresser, 20–25 boxes |
| 10x10 | ~750 cu ft | One-bedroom apartment | Full one-bedroom furniture, 30–40 boxes |
Some provider charts use an 8-foot ceiling instead and round those figures up to 200, 400, and 800 cubic feet. That is why you will see different numbers for what looks like the same unit. The footprint may match; the height assumption does not.
Confirm the ceiling height before you rent
This is one of the easiest details to miss and one of the most important.
Facility guides suggest storage ceilings commonly range from about 7.5 to 10 feet, and some facilities also offer reduced-height units. That means a 5x10 may hold very different total volume depending on where you rent it.
For example:
- 5x10 at 7.5 feet high = about 375 cubic feet
- 5x10 at 10 feet high = about 500 cubic feet
That gap is big enough to change your decision.
If your plan depends on stacking high, ask the facility:
- What is the actual ceiling height?
- Is the unit reduced height?
- Is there any roll-up door clearance issue?
- Are there beams, sprinklers, or sloped areas that reduce usable height?
This is a perfect example of marketing versus reality. The ad may show “5x10.” What matters to your boxes is whether that unit is really 375 cubic feet, 400, 500, or something less usable because of the structure.
Calculate your own volume
You do not need engineering-grade precision. You need an honest estimate.
A simple method:
-
Boxes: multiply count by a rough box volume Example: 20 medium boxes × 1.3 cubic feet = about 26 cubic feet
-
Large items: estimate the bounding-box volume of each Example: dresser 5 ft × 1.5 ft × 3 ft = 22.5 cubic feet
-
Adjust for disassembly or nesting where realistic
-
Add access space if you need to reach items later
If your total is already close to the unit’s published capacity, do not assume it will all fit neatly. Real packing always includes dead space, loading order problems, and forgotten items.
Leave room for access
A unit can fit your belongings and still be the wrong unit.
A good rule of thumb is to reserve about 20% of the space for access aisles, especially if you will visit often. Some guidance frames the same idea another way: only a portion of the floor area will be conveniently reachable at any moment once the unit is packed wall to wall.
That matters more than people think.
- Between moves: tighter packing may be fine
- Seasonal rotation: leave a walkway
- Business stock, tools, or files: visible access often justifies extra space
A slightly larger unit is not wasteful if it prevents damage, reshuffling, and repeated unloading.
Test the footprint with tape
One of the cheapest ways to avoid a sizing mistake is to map the unit on your floor, garage, or driveway with painter’s tape.
Mark out:
- 5x5
- 5x10
- 10x10
Then place the large items within that outline, or represent them with measured rectangles.
This exposes common errors fast:
- the mattress blocks the only path
- the sofa and dresser cannot sit side by side
- the desk fits only if disassembled
- your “few boxes” are actually a full wall of boxes
Tape testing is especially helpful when you are deciding between sizes that sound close in conversation but are very different in practice, such as 5x5 versus 5x10.
Be conservative when charts disagree
Provider size charts do not always agree. For example, some 10x10 guides market that size toward two-bedroom contents when using an 8-foot ceiling and efficient packing. A more conservative fit, especially under a 7.5-foot assumption, is one-bedroom furniture plus 30 to 40 boxes.
The safest approach is:
- use charts for a starting point
- use your inventory for the actual decision
- confirm the ceiling height
- leave room for retrieval
- size up only when your access needs justify it
Avoid oversizing by habit
People often over-rent because they imagine living space, not packed storage space.
To avoid paying for empty cubic feet:
- inventory first
- total your own estimate
- compare against several size guides
- confirm actual ceiling height
- tape-test the footprint
- size up only for access, future additions, or awkward furniture
A little extra room can be smart. Renting far more space “just in case” usually just means higher rent for unused air.
Step 3: Pick the Best Unit Type for Protection and Convenience
Once you know the size range, choose the unit type that matches your belongings and how you will use them.
This decision is really about three tradeoffs:
- protection
- convenience
- cost
And again, this is a place where advertised categories need verification. “Indoor,” “drive-up,” and “climate-controlled” are useful labels, but the real question is how the specific facility delivers them.
Indoor units: typically cleaner and better protected from the elements
Indoor units are located inside a larger building. In most facility guides, they are described as:
- cleaner
- more protected from weather
- somewhat more sheltered from dust and outdoor swings
- better suited to household goods and sensitive belongings
That makes indoor space a strong default for:
- documents
- electronics
- photos
- décor
- wood or upholstered furniture
- anything you do not want exposed to outdoor dust or wider temperature changes
The tradeoffs are usually:
- more walking from vehicle to unit
- hallways and doorways to navigate
- reliance on carts and elevators in multi-story buildings
- sometimes higher cost than exterior units
If a facility markets its indoor units as “premium,” check the reality: are the hallways clean, the elevators working, and the loading route practical for the items you actually have?
Outdoor or drive-up units: easiest loading, more exposure
Exterior units with drive-up access are often the most convenient option for loading and unloading.
They make sense for:
- heavy furniture
- contractor tools
- business stock
- short-term moving use
- bulky household overflow
- durable garage-type items
The appeal is obvious: you can usually park close to the door and unload directly.
The tradeoff is that exterior access exposes the unit and loading process more directly to outdoor conditions. Even if the unit is enclosed, drive-up space is generally less sheltered than indoor space.
So if your main priority is loading ease, drive-up is hard to beat. If your main priority is protection for sensitive items, indoor space is often the safer default.
Climate-controlled units: pay for them when the items and duration justify it
Climate-controlled storage commonly carries a roughly 25% to 50% premium over standard space in published guides. That extra cost can be worth it, but it is not automatically worth it for everyone.
It is most defensible when you are storing:
- wood furniture
- electronics
- leather
- delicate fabrics
- documents
- photos
- antiques
- musical instruments
It becomes easier to justify when:
- storage will last more than about three months
- your area has hot or humid summers
- your area has freezing winters
- the items would be costly or difficult to replace
Standard units are often fine for sturdier belongings such as:
- tools
- plastic bins
- patio furniture
- many garage items
- some seasonal gear
A useful framing is this:
- short-term + durable items = a standard unit may be enough
- longer-term + sensitive items + harsher weather = climate control becomes much easier to justify
Heated or air-cooled units: ask what the label really means
Not every facility offers full climate control. Some advertise heated units or air-cooled units instead.
Those options can still be useful, but only if you know what the facility means by the term. “Heated” may simply mean protection against freezing. “Air-cooled” may reduce peak heat without promising tightly controlled humidity.
So ask:
- What conditions does the facility actually maintain?
- Is the control year-round or seasonal?
- Is humidity managed, or only temperature?
Do not assume the label means the same thing everywhere.
Choose floor level based on the load and visit pattern
Floor level matters more than many renters expect.
Ground-floor or drive-up space is usually easiest for:
- sofas
- mattresses
- appliances
- many boxes
- anything you will move often
Upper-floor indoor units can still work well for lighter loads or longer-term storage, and some storage checklists treat indoor and upper-floor locations as somewhat less exposed than exterior ground-level space. But the convenience cost is real: elevator time, hallway turns, and more maneuvering.
A simple rule of thumb:
- heavy load + frequent access = ground floor or drive-up
- lighter load + longer-term storage = upper floor can work
If a facility pitches an upper-floor unit as equivalent to ground-floor convenience, test that claim in person. Walk the route. Check the elevator. Imagine moving your largest item through it.
Step 4: Prioritize Location, Access, and Amenities
The cheapest unit on paper is not always the cheapest in practice.
If the route is miserable, the parking is bad, the loading zone is cramped, or the gate closes before you can get there, the “deal” can become expensive in time, stress, or repeated trips.
Choose location based on how often you will visit
A nearby facility matters most when storage is part of your routine.
Close-in storage is especially useful for:
- business inventory
- renovation materials
- frequent seasonal swaps
- students moving around school schedules
- items you may need on short notice
If you are storing things for a move, a long decluttering project, or a months-long pause and expect to visit rarely, a farther facility may be worth the lower rent.
That tradeoff is straightforward:
- more convenience often costs more
- less convenient locations often cost less
The right answer depends on how often you will actually make the drive.
Test the route, not just the map pin
A facility can look perfect online and still be annoying in real life.
Before renting, check:
- traffic at the time you would usually visit
- parking ease
- truck or van access
- loading-zone space
- tight turns
- steep ramps
- whether unloading there feels comfortable after dark
This is another point where facility reality beats marketing. “Convenient location” on a website may mean very little if the last turn is awkward with a rental truck or the loading area is constantly blocked.
Confirm access hours in writing
Some renters truly need flexible access. Others only think they do.
If you may need odd-hour access, ask whether the facility offers:
- true 24/7 access
- extended gate hours but not overnight access
- office assistance only during business hours
- different schedules for gate access versus customer service
Do not assume 24/7 access is standard. Many facilities do not offer it.
If you will rarely visit, this may not matter much. If you may show up at 8:30 p.m. with a truck full of furniture, it matters a lot.
Focus on amenities that reduce moving-day friction
Amenities are easy to ignore until they are the reason a move takes two extra hours.
The most useful ones are often the least glamorous:
- carts and dollies
- elevators large enough for furniture
- loading bays
- online account management
- online bill pay
- packing supplies on site
Indoor upper-floor storage without good carts or a functional elevator is not a minor inconvenience. It can reshape the entire move.
On-site supplies can also save a trip if you realize you need tape, covers, or boxes mid-load.
Read reviews for recurring problems, not random praise
Reviews are most helpful when they reveal patterns.
Look for repeated mentions of:
- billing surprises
- access glitches
- broken elevators
- pest issues
- dirty hallways
- unreturned calls
- gate problems
- poor management response
One glowing review does not prove much. Several unrelated reviewers describing the same problem usually does.
Step 5: Vet Security Features During Your Site Visit
Storage facilities love the word secure.
Treat that as an invitation to inspect, not a promise to trust.
A site visit tells you much more than a webpage can. You can see whether the lighting works, whether the gate actually closes, whether the hallways are clean, and whether the unit door looks like it has been battered for years.
Start with the minimum security basics
At a minimum, most renters should want to see:
- gated entry
- controlled access or keypad entry
- security cameras
- good lighting
Those features do not guarantee safety, but they are a reasonable baseline.
If a facility markets itself as highly secure and is missing one of those basics, treat that as a warning sign.
Look for the better signs beyond the brochure
More reassuring facilities often also have:
- perimeter fencing
- motion-sensitive lighting
- on-site staff or a resident manager
- clean common areas
- clearly marked unit numbers
- visible fire-prevention systems
Again, verify in person. A website can show cameras. Your visit tells you whether the cameras appear well placed, the lighting actually works, and the gate stands open all afternoon.
Inspect the actual unit door and lock setup
The perimeter is only part of the security picture. The unit itself matters just as much.
Check:
- Does the door open and close smoothly?
- Is the latch bent, rusted, or loose?
- Is there visible damage around the hasp?
- Does the facility require a disc lock or cylinder lock?
- Does your chosen lock fit properly?
Cost and security guides commonly favor disc or cylinder locks over basic padlocks. If the facility sells one at the counter, compare the requirement against what you can bring yourself. A worn latch or damaged door is a bad sign regardless of the marketing language outside.
Check fire safety and pest-control signs
Two overlooked questions during a tour:
- What fire detection or suppression is present?
- What is the pest-control routine?
Look for visible signs of sound maintenance:
- detectors
- sprinklers where applicable
- clean corners
- clean door tracks
- no droppings
- no insect debris
- no strong musty odors
A polished leasing office proves very little if the actual storage hall smells damp or the door tracks are full of debris.
Keep your own security habits tight
Even a good facility cannot cover careless behavior.
Do not:
- share your gate code casually
- leave the unit open while you walk away
- label boxes “jewelry” or “laptop”
- assume the facility’s lock is automatically the best one available
Also pay attention to neighboring units. Overflowing or poorly maintained adjacent units can signal pest, management, or enforcement problems.
Use reviews here too
Security problems often show up in reviews as operational complaints before they show up as obvious crime warnings.
Repeated reports of:
- gate malfunctions
- access-code failures
- broken exterior doors
- poor lighting
- management not responding to security issues
are worth taking seriously.
Step 6: Budget Real Costs Beyond Advertised Rates
The number on the listing is usually the smallest number involved.
In self-storage, the advertised monthly rate is often just the entry point. Your real cost depends on setup fees, lock requirements, insurance, late-fee risk, and how likely the facility is to raise rates after a few months.
Build your budget from every line item
Common add-ons include:
| Cost item | Common range | Notes |
|---|---|---|
| Administrative fee | $15–$35 | Often one-time; frequently waivable during online promotions |
| Lock purchase | $15–$25 on site | Bringing your own compatible disc lock can be about $9–$14 |
| Facility insurance | $12–$20/month | Common in-house coverage range |
| Standalone storage insurance | $8–$12/month | May be cheaper than a facility plan |
| Late fee | $10–$20 or 5%–10% of rent | Often triggered after a short grace period |
Those are not universal prices. They are common cost-guide ranges. Actual totals vary by market, facility, promotions, taxes, and unit type.
Treat the teaser rate as the floor, not the budget
A realistic cost example from a mid-size market shows how fast totals change: an advertised $89/month 5x10 climate-controlled unit can work out to roughly $107 per month across the first year, with later increases pushing the effective monthly figure closer to $124.
That example should not be treated as a universal 5x10 price. It is useful because it shows the pattern:
- ad rate
- setup fees
- lock
- insurance
- later rent increase
In other words, the facility’s website rate is not the same thing as your storage budget.
Check whether your existing insurance already helps
Insurance is one of the most common surprises.
Before buying the facility’s plan, check your existing policy. Many homeowner’s and renter’s policies cover off-premises stored property at about 10% of your personal property limit, commonly somewhere around $5,000 to $15,000, with no added premium.
But do not assume. Verify.
A smart process:
- call your insurer
- ask specifically about off-premises coverage for stored goods
- ask about exclusions and sublimits
- get written confirmation
- bring that confirmation to the facility
If you do not have enough coverage already, compare the facility’s plan with a standalone storage policy instead of automatically taking the in-house option.
Expect month-to-month flexibility—and possible rate increases
Month-to-month leasing is common and convenient. It also means the facility can usually raise the rent with notice.
Cost guidance on national chains suggests increases of about 20% to 40% after 3 to 6 months are not unusual for existing tenants. Local operators may raise rates less aggressively, but you should not assume an introductory rate will last.
Ask before signing:
- When can the rent increase?
- How much notice is required?
- What happens when the promo rate expires?
- Can you prepay at the current rate?
- Is there a fee to transfer to another unit size?
This is one of the clearest marketing-versus-reality gaps in the category. The promo gets you in. The lease tells you what it may cost to stay.
Negotiate where negotiation is most realistic
The best savings usually happen before move-in.
Good questions to ask:
- Are there online specials?
- Is there a no admin fee promotion?
- Is there a first month free or reduced-rate offer?
- Can the listed rate be discounted for the first few months?
- If I book online, will I keep that web rate at sign-in?
Some cost guidance suggests the first three months are the most negotiable, especially if that unit type has been sitting empty.
Use autopay to avoid preventable charges
Late fees are rarely huge, but they add insult to a bill that is already easy to underestimate.
If you are in the middle of a move or juggling multiple expenses, set up autopay. It is one of the simplest ways to avoid turning a manageable monthly cost into a messy one.
Read the lease for the expensive details
Before signing, review the parts people often skim:
- move-out notice requirements
- late-fee timing
- insurance requirements
- access-hour limits
- rate-increase language
- promotion expiration
- transfer rules
- lock specifications
The cheapest listing is not the best deal if the lease makes transfers, cancellations, or ordinary mistakes unusually expensive.
Step 7: Avoid Prohibited Items and Secure Insurance
Some storage mistakes are not about size or money. They are about storing the wrong thing.
That can lead to damage, denied claims, or lease termination.
Commonly prohibited items
Across many facilities, the most commonly banned categories include:
- food and perishables
- flammables and combustibles
- explosives
- propane tanks
- living things such as animals or plants
- illegal items
- firearms and ammunition, depending on the facility and state
Do not assume every lease uses the same list. Firearms are a good example: some facilities ban them outright, some may have exceptions, and state rules can affect what is allowed. Verify the actual lease language.
Why facilities care so much about food and flammables
These are not arbitrary rules.
Food and perishables attract pests and can spread problems to nearby units. Flammables, explosives, and propane raise obvious fire and liability concerns. Facilities inspect for these categories because the risk extends beyond your unit.
If you are storing equipment like a lawnmower or motorcycle, ask what preparation rules apply.
Some items are dangerous to your belongings even if not explicitly banned
A few things may not always appear clearly on a prohibited list but still create obvious damage risk:
- wet or damp items
- unboxed electronics
- pressurized aerosols in hot units
- documents stored in weak cardboard
- leather wrapped improperly for long periods
This matters because standard units can get extremely hot. LockerHelp’s prohibited-items guidance notes that non-climate-controlled units can reach roughly 130°F to 140°F in summer conditions, and aerosol cans can rupture above sustained temperatures around 120°F.
A safer approach:
- dry everything fully before storage
- pack electronics in original or equivalent protective packaging
- avoid storing heat-sensitive aerosols in standard summer units
- use sealed, sturdier containers for documents
Do not store your true valuables in a storage unit
Self-storage is generally the wrong place for items that are small, irreplaceable, and highly theft-prone, such as:
- cash
- jewelry
- passports
- original legal documents
- rare collectibles
- family heirlooms you cannot emotionally replace
For small irreplaceable valuables, a bank safe deposit box is usually a better fit.
Confirm insurance before move-in, not after a loss
The time to figure out insurance is before the first load goes into the unit.
Verify:
- whether off-premises storage is covered
- the coverage limit
- any sublimits for valuables or electronics
- exclusions that could matter
- whether the facility requires proof in a specific format
Then keep that proof.
A very common mistake is assuming that having renter’s or homeowner’s insurance automatically means everything in storage is fully covered. Sometimes it does. Sometimes the coverage is capped or conditional.
Get the prohibited-items rules in writing
Do not rely on a verbal “that should be fine.”
Ask for the written lease language covering:
- prohibited items
- insurance
- access
- late fees
- causes for lease termination
That one step helps prevent two of the most expensive storage problems: denied insurance claims and avoidable lease violations.
Bottom line: the right sequence is still the simplest one:
- inventory precisely
- measure bulky items
- size by cubic footage, not instinct
- choose the unit type that matches the items
- visit the facility
- budget the full cost, not the ad
- confirm prohibited items and insurance in writing
That is how you get a unit that fits your belongings, your access needs, and your budget—without paying for space or features you do not actually need.
FAQ
What fits in a 5x5 vs 5x10 unit?
A 5x5 is the better fit when you truly need only a modest amount of extra space. Using a conservative 7.5-foot ceiling assumption, it offers about 188 cubic feet and is commonly described as similar to a large walk-in closet.
A practical planning range is:
- twin mattress set
- 10 to 15 medium boxes
- bicycle or a few small items
A 5x10 gives you about 375 cubic feet under that same ceiling assumption and is a common starting point for:
- studio apartment contents
- queen bed
- dresser
- 20 to 25 boxes
Some 8-foot-ceiling guides round those figures up to 200 and 400 cubic feet, so you may see slightly larger numbers elsewhere. The safer move is to confirm the facility’s actual height and test your layout with tape before renting.
Do I need climate control and when?
Climate control is easiest to justify when you are storing wood furniture, electronics, leather, delicate fabrics, documents, photos, antiques, or instruments, especially if:
- storage will last more than about three months
- your area gets very hot, humid, or freezing
- the items would be expensive or difficult to replace
A standard unit is often fine for tougher items like:
- tools
- plastic bins
- patio furniture
- many garage-type belongings
The cost premium commonly cited in storage guides is about 25% to 50%, so this should be an item-based decision, not a fear-based one. If a facility offers only “heated” or “air-cooled” space, ask what conditions are actually maintained before assuming it gives the same protection as full climate control.
How can I waive fees and negotiate rates?
The easiest savings usually happen before move-in.
Try this order:
- Check web specials first
- Ask whether there is a no admin fee promotion
- Bring your own compatible disc lock, which may cost about $9 to $14 instead of $15 to $25 on site
- Ask directly about move-in specials, first-month-free offers, or a reduced rate for the first three months
- Confirm whether your existing homeowner’s or renter’s policy satisfies the insurance requirement
Also ask what happens after the promo period. A small discount up front can disappear quickly if the rent rises a few months later.
What prohibited items risk lease termination?
The most common lease-risk categories are:
- food and perishables
- living things
- flammables and combustibles
- explosives
- propane
- illegal items
- firearms and ammunition, depending on the facility and state
Food is especially risky because it attracts pests and can affect neighboring units. Beyond outright bans, some items also create obvious damage risk even if the lease wording is less explicit, including wet items, heat-sensitive aerosols, and poorly packed electronics.
Always read the facility’s written prohibited-items section instead of relying on a generic list or a verbal answer.
Does my homeowner’s insurance cover storage?
It often may, but you need to verify it.
Many homeowner’s and renter’s policies cover off-premises stored property at about 10% of the personal property limit, commonly around $5,000 to $15,000. For many renters, that is enough. For others, it is not.
Before move-in:
- call your insurer
- ask about off-premises stored property coverage
- ask about exclusions or sublimits
- get written confirmation
- provide that proof to the facility if needed
If your existing policy does not provide enough coverage, compare a standalone storage policy with the facility’s in-house option before choosing one.