
Choose the Right Cover or Extension for the Job Your Fence Must Do
It may be an edge cover, visibility marker, impact padding, height extender, privacy support, animal-containment arm or security device.
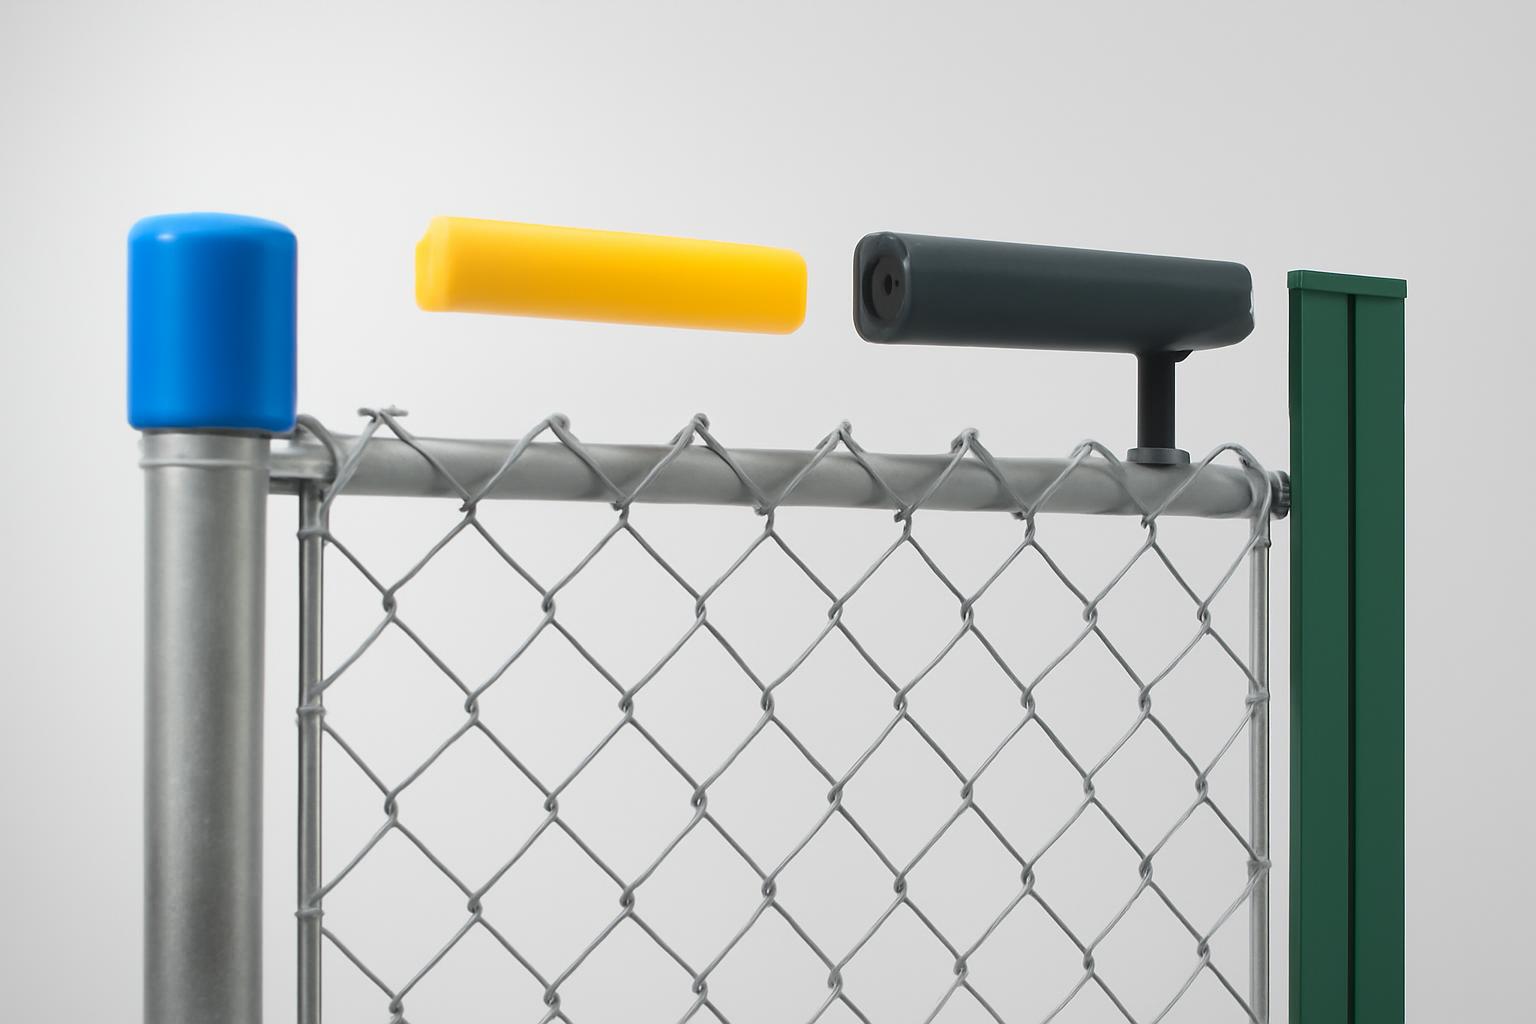
A chain link fence topper may be a plastic cover over exposed wire, a high-visibility marker, impact padding, height-extension hardware, a support for privacy material, an animal-containment arm, or a security device. These products often appear in the same search results, but they perform different functions and should not be treated as interchangeable.
This guide is limited to seller-documented product specifications, cost planning, installation questions, and pre-purchase checks. Commercial listings do not establish structural adequacy, code compliance, injury reduction, animal-containment effectiveness, or suitability for a particular site. Where those outcomes matter, obtain the governing requirements and advice from the appropriate manufacturer, authority, or qualified professional.
Start with function. Then verify physical fit, package coverage, attachment method, required accessories, freight, and any performance documentation the project requires. A low advertised price per foot means little if the product does not fit, requires separate fasteners or tools, incurs substantial freight charges, or lacks documentation required for the intended application.
First Decide What You Mean by a Fence Topper
Use this decision tree before comparing products:
-
Do you need to cover exposed knuckles, barbs, or the upper rail? Compare flexible corrugated covers, rigid caps, and short sectional covers.
-
Do you mainly want the fence line to be easier to see? Compare available colors and profiles, but do not treat visibility or color as evidence of impact protection.
-
Could athletes or other users collide with the fence? Research purpose-built impact padding separately. Request product-specific testing and acceptance documentation for the identified player-contact area.
-
Do you need to increase total fence height? Evaluate compatible post extenders or extension arms. Ask a qualified professional to assess the existing framework, and confirm how the local authority measures permitted fence height.
-
Will the addition carry privacy slats, mesh, or screening? Ask whether the added material requires a wind-load assessment or changes to posts, spacing, framework, or foundations.
-
Is the goal to contain a dog or cat? Evaluate a complete animal-containment system. A product title that mentions pets does not prove that the product will safely or reliably contain a particular animal.
-
Is the goal to deter climbing or improve perimeter security? Take the proposed hardware, layout, access requirements, and total height to a qualified fence professional and the authority having jurisdiction before purchase.
A top-rail cover or safety cap is generally a plastic product placed over the upper rail or exposed edge of chain-link fabric. Documented formats include pre-slit corrugated polyethylene coils, long rigid plastic sections, and shorter sectional kits. Depending on the model, the cover may grip through tension or attach to the mesh with ties or hog rings.
That definition has an important limit: an ordinary plastic edge cover is not automatically impact-absorbing padding. CoverSports expressly describes its FenceCrown polyethylene topper as an edge cover rather than impact padding. A bright or wide cover can conceal an exposed edge and visually define the fence line without providing documented cushioning for a collision.
Fence extensions are another category. Straight extenders and vertical or angled arms change the barrier’s geometry and total height. Before selecting them, ask whether the proposed connection, existing posts, foundations, gates, and added material require structural review.
Likewise, pet-related product titles establish how an item is marketed, not whether it will contain a particular dog or cat. Fence condition, gaps, digging, jumping, climbing, attachment strength, entanglement potential, and supervision must be assessed separately.
The quickest way to route a project is:
- Long sports-field run needing edge coverage or visibility: compare coils and rigid caps.
- Player-contact location: conduct a separate impact-padding review.
- Added height: evaluate extension hardware, framework condition, and applicable restrictions.
- Privacy: evaluate screening, connections, and wind exposure as a system.
- Animal containment: obtain evidence specific to the animal and complete installation.
- Anti-climb security: obtain professional, access, safety, and local-authority review before selecting hardware.
Flexible Coils, Rigid Caps and Short Sections Compared
The useful comparison is format-based rather than a universal ranking. Coils can cover long runs with relatively few joints. Rigid and short sections divide the work into smaller pieces but introduce repeated alignment and fastening points.
The following commercial listing information was checked on July 30, 2026. Prices, stock, package contents, shipping terms, and options can change.
| Product format | Documented material | Package coverage | Listed dimensions | Attachment method | Included hardware | Displayed price | Shipping caveat | Best-supported application |
|---|---|---|---|---|---|---|---|---|
| FenceCrown pre-slit flexible coil | Corrugated HDPE | 100 or 250 ft | 4.5-in diameter; packaged dimensions vary by length | Open the slit and place over the upper edge or rail; optional ties and tool offered | None documented as included | $187.45 estimate; configuration not confirmed | Comprehensive quote requested; seller warns freight may be costly | Continuous edge coverage on long outfield or perimeter runs |
| PolyTube Cap flexible coil | Corrugated polyethylene | 100 or 250 ft | 4.5-in diameter | Open slit, place over rail, and secure with zip ties at seller-specified intervals | Ties and installation tool sold separately | $159 for 100 ft; $269 for 250-ft yellow; $279 for 250-ft black | Freight-truck shipment; separate quote required | Long, continuous sports-field or recreation-fence runs |
| Rigid Safety Top Cap | Rigid HDPE plastic | 40 ft per bag: five 8-ft pieces | 5.5 in high by 2.75 in wide | Snap over fence and fasten through pre-drilled holes and mesh | Steel hog rings listed as included | $151.25–$197.43 | Shipping excluded | Sectional edge coverage where repeated mechanical fastening is suitable |
| Fenpro sectional kit | HDPE | 50 ft: ten 5-ft sections | 600 in total listed length by 2.5 in wide | Position sections and secure with zip ties | 20 black zip ties | $168.98, displayed as $3.38/ft | Shipping and return terms vary by seller and destination | Smaller projects or runs suited to short sections |
Flexible corrugated products are practical candidates for long, uninterrupted runs because their listed coil lengths reduce the number of section joints. That does not make a coil automatically easier or less expensive to install. A large coil needs suitable storage, staging space, and a work plan for guiding it onto the fence. Freight may also outweigh an attractive material price.
Rigid and short sectional products divide the installation into smaller units. This may simplify staging or make it possible to replace one damaged section, depending on the model and installation method. The tradeoff is more joints, alignment points, and repeated fastening.
The documented examples include HDPE, corrugated polyethylene, rigid HDPE plastic, and PVC. Sellers also make claims about ultraviolet exposure, fading, weather, temperature changes, vandalism, or long-term deterioration. Treat those as seller claims unless the supplier provides the applicable test method, tested specimen, results, and acceptance criteria.
Color ranges differ substantially. Some coil products list yellow and black, while the rigid-cap listing names ten colors. A wider palette may support field branding or contrast, but color availability does not establish colorfastness, continuing visibility, accessibility compliance, or impact performance.
A practical comparison should ask:
- How many joints will the layout create?
- Can the crew stage and handle the package at the site?
- Does the product rely on tension or require ties, hog rings, or clips?
- Are all fasteners and tools included?
- Can a damaged area be repaired without replacing a long run?
- Will the shipment arrive as a parcel or by freight truck?
- Does the supplier document fit for the measured rail and fence edge?
- Are required performance claims supported by relevant reports?
Measure the Fence and Calculate How Much to Order
Do not order from the property perimeter alone. Measure each fence run separately and create a layout showing:
- Straight runs
- Gates and gate clearances
- Inside and outside corners
- Terminal and line posts
- Top-rail joints
- Elevation changes
- Slopes or stepped sections
- Existing repairs
- Bent, loose, corroded, or misaligned rail
- Knuckled, barbed, or mixed fabric edges
- Braces, signs, netting, hinges, and other interruptions
Separate measurements prevent material intended for one uninterrupted run from being counted across a gate or other break.
The base calculation is:
Packages required = measured linear feet ÷ coverage per package, rounded up to the next whole package
This establishes the mathematical minimum, not necessarily the final order. The evidence does not support one universal waste percentage for every product and layout. Ask the supplier how the selected model handles trimming, joints, corners, transitions, damaged pieces, and replacement stock.
Consider a 240-foot outfield using the coil sizes documented in the comparison table:
- One 250-foot coil leaves 10 feet before trimming or layout losses.
- Three 100-foot coils provide 300 feet and leave 60 feet before adjustments.
The single longer coil uses fewer packages and creates fewer potential joins, but it is not necessarily the cheapest final choice. Compare availability, freight, handling, crew requirements, site access, and the usefulness of leftover material.
For a rigid-cap example, a 120-foot straight run using the documented 40-foot bags requires exactly three bags:
120 ft ÷ 40 ft per bag = 3 bags
That leaves no surplus for trimming, damaged pieces, installation errors, or later repairs. Before ordering the mathematical minimum, confirm whether sections must butt together, overlap, or be cut in a prescribed way.
Measure fit, not just length
A listed outer diameter or profile does not prove compatibility with every chain-link fence. Record at least:
- Actual outside diameter of the top rail
- Profile and condition of the exposed fence edge
- Whether the fabric terminates in knuckles, barbs, or a mixture
- Distance and alignment between the rail and mesh
- Corner and terminal fittings
- Braces, hinges, latches, signs, or netting
- Whether the rail is level, bowed, dented, spliced, or loose
Ask the manufacturer or supplier for a compatibility chart or written confirmation tied to those measurements. Broad “universal fit” language is not a substitute for documented compatibility with the installed fence.
This distinction is especially important with extension hardware. Marketplace listings reference nominal components of 1 3/8, 1 5/8, and 2 inches, while one 2-inch nominal extender listing specifies a 1 7/8-inch outside diameter. The discrepancy illustrates why buyers should measure the actual component rather than ordering from its nominal label alone; the listed formats appear in the Plum Fittings extension storefront.
Finally, inspect the underlying fence before covering it. Document corrosion, failed ties, bent rail, unstable posts, protruding wire, prior repairs, and alignment problems. A cap should not be used as a substitute for evaluating defects that may require separate repair.
Calculate Delivered Cost per Protected Foot
Advertised price per foot is useful for initial screening, but it is not the project cost. Use a worksheet that includes everything required to deliver and install the selected product:
| Cost item | Calculation |
|---|---|
| Base material | Whole packages required × current package price |
| Fasteners | Required ties, hog rings, clips, or approved alternatives |
| Tools | Installer, zipper, hog-ring, cutting, or other model-specific tools |
| Extra material | Supplier-supported allowance for cuts, transitions, damage, or replacement stock |
| Labor | Crew size × labor hours × loaded hourly rate |
| Freight | Carrier charge for oversized coils or long rigid packages |
| Delivery services | Lift-gate, appointment, limited-access, or other applicable charges |
| Taxes | Applicable sales or use taxes |
| Total project cost | Sum of all line items |
| Delivered cost per protected foot | Total delivered project cost ÷ installed linear feet |
If labor is included, call the result installed cost per protected foot. If it includes material and delivery but not labor, call it delivered material cost per protected foot. Neither figure should be presented as equivalent to a listing’s advertised product price.
Time-stamped listing examples
On July 30, 2026, PolyTube was displayed at $159 for a 100-foot roll, $269 for a 250-foot yellow roll, and $279 for a 250-foot black roll. Those prices produce arithmetic material rates of $1.59, about $1.08, and about $1.12 per advertised foot, respectively. The PolyTube retailer listing also says matching ties and an installation tool are sold separately and that the product ships by freight quote, so these rates are not delivered-cost comparisons.
FenceCrown’s displayed $187.45 should be handled more cautiously. The page identifies the amount as an estimate, asks buyers to request a comprehensive quote, and warns that freight may be costly. Because the displayed amount cannot confidently be assigned to a particular length-and-color configuration, it is unsuitable for a firm cost-per-foot calculation.
Whole-package rounding also matters. If a project requires 65 feet and the selected product comes in 50-foot kits, the buyer needs two complete kits. The correct project calculation uses the price of both packages divided by the 65 feet actually installed. Unused material should be identified as remaining stock rather than treated as installed coverage.
Do not compare value using claimed service life unless competing suppliers provide credible, comparable evidence. A warranty headline also does not establish how long a product will remain functional or whether labor, freight, fading, fasteners, or prorated replacement costs are covered.
Schools, municipalities, parks departments, and other institutional buyers should request line-item quotations showing:
- Exact model, material, length, profile, and color
- Number of packages and total nominal coverage
- Included and separately priced fasteners
- Required tools
- Freight and delivery-service charges
- Lead time and inventory status
- Taxes and payment terms
- Warranty documents
- Return, cancellation, and damaged-shipment conditions
Normalizing bids to these categories is more useful than selecting the lowest displayed package price.
Install Each Cap According to Its Attachment System
Follow the instructions for the exact product purchased. The workflows below explain the basic difference between a tension-fit coil and a mechanically fastened rigid cap; they do not replace model-specific directions.
Before installation, lay out the run beside the fence where practical. Confirm the shipment, color, package count, fasteners, and tools. Identify gates, corners, slopes, rail joints, obstructions, and damaged framework before opening or cutting all packages.
Workflow 1: Tension-fit Poly-Cap
A general tension-fit sequence is:
- Lay the coil beside the fence in the direction of installation.
- Insert the manufacturer-specified installer or zipper tool into the pre-slit opening.
- Open the cap as the crew lifts and guides it toward the upper rail.
- Place the opened profile over the rail or fence edge.
- Press it fully into the intended position.
- Add ties wherever the selected manufacturer specifies them.
- Trim excess material according to the product instructions.
The BaseballFenceTopper.com installation guide describes Poly-Cap as relying on tension, with ties used when necessary. PolyTube’s product-specific listing instead specifies zip ties at 3-foot intervals. Instructions for the exact product should control whenever generic and model-specific guidance differ.
An installation tool may be optional for some products, but that does not mean every crew or layout can dispense with it. Ask whether the slit can be opened and guided correctly without the tool. Do not rely on unverified claims that a tool will reduce labor by a particular percentage.
Workflow 2: Rigid Fence Guard or Safety Top Cap
A general rigid-cap sequence is:
- Confirm the required orientation.
- Place the section over the rail and exposed chain-link edge.
- Align its pre-drilled holes with the specified attachment points.
- Fasten through the holes and mesh using the model’s required ties or hog rings.
- Check alignment and attachment before placing the next section.
- Form joints only as directed by the manufacturer.
For a D-shaped Safety Top Cap, the retailer guide instructs installers to place the rounded side toward the rail and the flat side flush with the chain-link mesh.
Fasteners are not interchangeable by default. The general retailer guide describes plastic ties for Fence Guard and Safety Top Cap, while the separate rigid Safety Top Cap listing includes steel hog rings. Use the fastener specified for the exact model rather than substituting a similar-looking tie, clip, or ring.
Plan the crew and accessories
The retailer guide recommends two to three people for Poly-Cap and at least two for Fence Guard or Safety Top Cap. That is retailer guidance, not a universal staffing rule. Actual crew needs depend on package length, fence height, site access, weather, obstructions, and the installer’s work plan.
Package contents also vary:
- Fenpro lists black zip ties as included.
- The rigid Safety Top Cap lists steel hog rings as included.
- FenceCrown offers color-matched ties and an installation tool as options.
- PolyTube sells matching ties and its installation tool separately.
Do not assume a product described as a “kit” contains every required tool or enough fasteners for the full run. Calculate attachment points from the model-specific spacing instructions and compare the result with the quoted package contents.
For corners, gates, slopes, rail splices, braces, or misaligned framework, request drawings or written instructions. Do not improvise cuts, heating, unsupported gaps, overlaps, or alternative fastening patterns when the manufacturer has not approved them.
Treat Sports-Field Safety Claims with Care
Plastic fence caps are marketed for baseball and softball fields, parks, playgrounds, and recreation facilities. Seller-documented functions include covering exposed chain-link edges, adding color, visually defining a fence line, and creating decorative trim.
The supplied evidence does not independently quantify injury reduction or establish an impact-attenuation rating for the listed edge covers. Product names containing words such as “safety,” “guard,” or “protection” do not provide the missing test data.
CoverSports makes the distinction explicit: FenceCrown is described as an economical polyethylene edge cover rather than impact-absorbing padding. The same seller says NCAA Rule 2.15 may require impact-absorbing padding at player-contact points. Because the evidence pack does not contain the governing rule text, treat that statement only as a seller warning and verify the current rule directly with the governing organization.
Bright yellow, gold, blue, or another contrasting color may visually define the fence in a particular setting. Color availability is not evidence of impact protection, continuing visibility, accessibility compliance, or conformity with a sports rule.
A school, league, parks department, or facility operator should first identify the governing requirement. Depending on the project, the relevant documentation may come from a league, district, insurer, facility specification, contract, or other authority. Then request:
- Product-specific impact-test reports, if impact protection is required
- The test method and acceptance threshold
- The tested model, thickness, density, and configuration
- Required substrate and attachment method
- Approved installation details
- Manufacturer inspection or replacement instructions
- Written suitability confirmation for the identified application
- Acceptance documents required by the governing organization
Do not infer compliance merely because a seller markets a product for athletic fields. The supplied commercial sources do not establish compliance with NCAA, school-district, insurer, playground, accessibility, or league requirements.
A practical approach is to divide the fence into risk zones. Evaluate a long outfield run that needs edge coverage or visual definition separately from a dugout rail, gate opening, foul-territory corner, or other foreseeable contact point. A contact location may require purpose-built padding or a different fence detail rather than the same cap used along the general perimeter.
Height Extenders, Privacy Additions and Security Arms Need Separate Review
Post extenders and barbed-wire arms are not substitutes for top-rail caps. A cap covers an existing upper edge; extension hardware changes the fence geometry and total barrier height.
Documented extension formats include:
- Straight post extenders
- Products marketed as dog-fence extensions
- Vertical barbed-wire arms
- Angled barbed-wire arms
- Bolt-on sleeves
- Welded extensions
These labels describe configurations or intended markets. They do not establish structural capacity, animal-containment performance, safety, or legality for a particular property.
United Fence & Construction describes a common three-strand barbed-wire arm as adding approximately 1 foot. Its example combines 7 feet of chain-link fabric with a roughly 1-foot arm for about 8 feet of total barrier height. The contractor also advises reviewing post condition, corrosion, diameter, concrete foundations, and the proposed sleeve or welded connection before retrofitting an extension. These are commercial contractor recommendations, not project-specific engineering conclusions; see its discussion of chain-link fence height and extension options.
For planning and quote comparison, distinguish:
- Fabric height: the vertical height of the chain-link mesh
- Framework height: the posts and rails supporting it
- Extension height: the additional post, sleeve, or arm
- Total barrier height: the complete installed height, including extension hardware
Ask the local authority how it measures fence height before purchasing hardware. Do not assume that a limit applies only to the fabric.
Privacy slats and screening require separate scrutiny because the added material presents a different condition from an open chain-link fence. A retailer’s chain-link planning manual recommends considering closer post spacing or heavier framework when privacy additions increase wind load. It also directs installers to check permits, deed or zoning restrictions, height limits, setbacks, and property lines. These are general planning recommendations; they do not establish what a particular fence can support.
Before adding height or privacy material, ask a qualified party to review:
- Actual post and rail outside diameters
- Post wall thickness and condition
- Corrosion, bends, cracks, and previous repairs
- Concrete footing condition
- Gate-post and hinge capacity
- Proposed sleeve, clamp, bolt, or weld details
- Added material and site wind exposure
- Total finished height
- Applicable permits or restrictions
- Setbacks and property lines
- Emergency, maintenance, and authorized-access needs
Barbed wire, razor ribbon, concertina wire, and outward-facing arms warrant site-specific review of access, injury exposure, neighboring property, authorized entry, and local restrictions. The supplied marketplace and contractor sources do not establish that any such configuration is legal or appropriate for a particular site.
Pet-containment claims require the same restraint. A product marketed as a dog-fence extension may add height or a projection, but the supplied evidence does not verify escape-prevention effectiveness, animal safety, entanglement risk, or structural capacity. Obtain application-specific advice when failure could expose an animal, the public, or neighboring property to harm.
Use a Documentation-First Buying Checklist
Use this checklist before issuing a purchase order or authorizing installation.
Function and site
- [ ] State the intended function: edge coverage, visibility, impact padding, added height, privacy, animal containment, or security.
- [ ] Measure each fence run separately.
- [ ] Mark gates, corners, slopes, rail joints, braces, and interruptions.
- [ ] Identify exposed knuckles, barbs, and mixed edge configurations.
- [ ] Photograph corrosion, bends, failed ties, loose rail, and misalignment.
- [ ] Identify player-contact and public-contact locations separately.
Physical compatibility
- [ ] Measure the actual outside diameter of the rail or post.
- [ ] Record the distance and alignment between rail and mesh.
- [ ] Confirm the product’s profile and required orientation.
- [ ] Obtain written compatibility confirmation for the measured configuration.
- [ ] Request instructions for corners, gates, joints, slopes, and transitions.
- [ ] Verify whether cutting is permitted and how cut ends are handled.
- [ ] Confirm whether the product fits knuckled edges, barbed edges, or both.
Package and attachment system
- [ ] Confirm package length and the number of pieces or coils.
- [ ] Calculate whole packages from measured installed footage.
- [ ] Ask how trimming, joints, damage, and replacement stock affect quantity.
- [ ] Identify whether the product is tension-fit or mechanically fastened.
- [ ] Confirm fastener type and spacing.
- [ ] Calculate the total number of fasteners required.
- [ ] Verify which fasteners are included.
- [ ] Identify every separate tool or accessory.
- [ ] Obtain model-specific installation instructions.
- [ ] Confirm recommended staffing and site-access needs.
Appearance and performance
- [ ] Confirm current color options and inventory.
- [ ] Request a physical sample when color matching or contrast matters.
- [ ] Do not assume colorfastness from a color chart.
- [ ] Request reports supporting impact-attenuation claims.
- [ ] Request reports supporting ultraviolet, fading, weather, stress-cracking, temperature-cycling, pull-off-strength, or vandal-resistance claims.
- [ ] Confirm that the tested model and installation match the proposed purchase.
- [ ] Obtain acceptance documentation required by the governing organization.
Commercial terms
- [ ] Obtain the current package price.
- [ ] Confirm lead time and inventory status.
- [ ] Identify parcel versus freight shipment.
- [ ] Obtain the freight amount in writing.
- [ ] Confirm lift-gate, appointment, limited-access, or other surcharges.
- [ ] Verify package contents.
- [ ] Confirm taxes and payment terms.
- [ ] Obtain return, restocking, cancellation, and damaged-shipment terms.
- [ ] Request the complete warranty rather than relying on a headline.
Warranty language deserves particular attention. FenceCrown’s page contains conflicting references to one- and three-year warranty periods. The rigid cap advertises a 25-year limited pro-rata warranty, but the supplied listing does not provide all terms. Ask the seller to identify the controlling document, covered failures, exclusions, prorating method, claim procedure, and responsibility for labor and freight. The package information and warranty headline appear on the Safety Top Cap listing.
Institutional buyers should place these requirements in the quote request rather than trying to resolve them after award. Include quantity, exact color, custom branding if applicable, accessories, freight terms, delivery location, lead time, warranty documentation, payment terms, and required performance evidence.
Purchasing arrangements vary by supplier. National Sports Products says it accepts formal purchase orders from recognized schools, businesses, and other institutions on its baseball fence-cap category page. BaseballFenceTopper.com advertises Net 30 terms for qualifying schools, universities, and government institutions. Confirm eligibility and current terms directly.
The final comparison rule is simple: reject any option that cannot document physical fit or a required performance characteristic. Compare the remaining products by delivered cost, package efficiency, attachment system, crew requirements, freight, repair practicality, and complete warranty terms—not by marketing superlatives.
Is a chain-link fence topper the same as impact padding?
No. A typical chain-link fence topper is a plastic edge or rail cover. It may conceal exposed knuckles or barbs, add color, and visually define the fence line. Impact padding is a separate product category for locations where documented cushioning performance is required.
Do not use a product name or sports-field imagery as evidence of impact attenuation. Request product-specific test results and written suitability documentation for any player-contact area.
How many feet of fence topper should I order?
Measure each uninterrupted run and record gates, corners, joints, slopes, braces, damaged areas, and other breaks.
Divide the installable footage by the package coverage and round up to the next whole package. Then ask the supplier how the selected model handles cuts, joints, transitions, damaged pieces, and replacement stock. Do not apply an arbitrary universal waste percentage.
Are zip ties, hog rings and installation tools included?
It depends on the product. Some sectional packages list ties or hog rings as included, while the documented flexible-coil listings offer ties or installation tools separately.
Confirm the required fastener type, spacing, total quantity, and tool requirements on the final quote. An included accessory count does not necessarily prove that the package contains enough fasteners for the complete project.
Can one person install a chain-link top-rail cap?
Do not assume that one installer is sufficient for a complete project. Package length, fence height, site access, weather, obstructions, tools, and attachment method all affect staffing.
One retailer recommends two to three people for Poly-Cap and at least two for rigid Fence Guard or Safety Top Cap. Treat that as retailer guidance and confirm the work plan for the selected model and site.
Can I use a fence topper to add privacy, contain a dog or improve security?
An ordinary plastic edge cover does not create a complete privacy, animal-containment, height-extension, or anti-climb system.
Those goals require separate evaluation:
- Privacy normally requires screening or slats and review of the resulting installation.
- Animal containment requires an application-specific assessment; pet-oriented marketing does not prove effectiveness or safety.
- Added height requires compatible extension hardware and review of the existing framework, connections, total height, and applicable restrictions.
- Anti-climb security hardware requires site-specific review of access, safety, neighboring property, and local requirements.
Choose by function first. Verify fit and required performance in writing, calculate the full delivered or installed cost, and follow the selected product’s attachment instructions. For impact protection, added height, privacy screening, animal containment, or sharp security hardware, obtain the applicable technical and local-authority documentation before purchase.