
How to Choose the Bands That Hold Chain-Link Fabric to a Terminal Post
Identify every fabric termination, measure each terminal post's outside dimensions and shape, and use the height-based quantity formula only as an estimate.
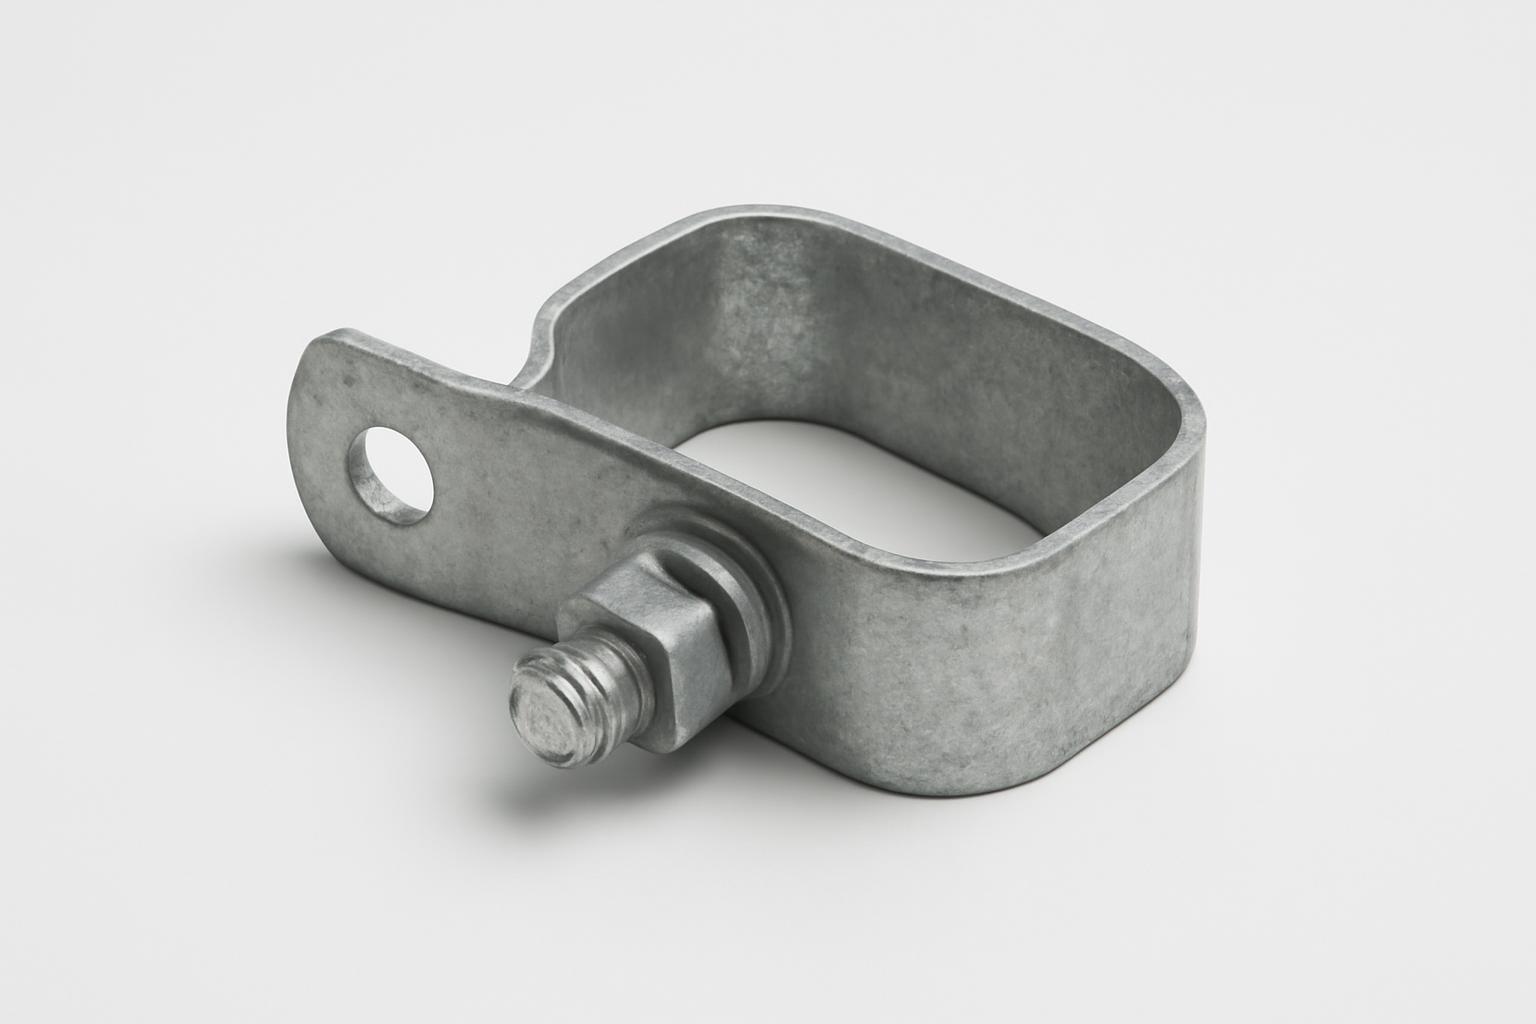
A chain link fence tension band is a small fitting, but ordering the wrong one can stop an installation. The band must match the terminal post’s dimensions and shape, work with the tension bar, and accept the intended fastener. Fence height helps estimate quantity, but it does not determine band size.
Use a measurement-first buying process:
- Identify every point where the chain-link fabric terminates.
- Measure each terminal post’s outside dimensions and record its shape.
- Estimate the bands needed for each fabric-to-post connection.
- Select the appropriate style, gauge, material, and finish.
- Confirm tension-bar and fastener compatibility.
- Verify exactly what the package includes.
A band that looks approximately right is not necessarily a correct fit. The selected product’s instructions, the fence design, and any project specifications should take priority over general retailer guidance.
What a chain-link fence tension band does
A tension band is an offset metal fitting that wraps around a terminal post. Its projecting ends, often called tangs, receive a compatible carriage bolt and nut. Together, these parts connect a vertical tension bar—and therefore the edge of the chain-link fabric—to the post.
The load path is easier to understand by following the parts from the mesh to the frame:
- The edge of the chain-link fabric is woven around or through a tension bar.
- The vertical tension bar aligns with several tension bands distributed along the post.
- A carriage bolt and nut close each band and capture the tension bar.
- The bands transfer the pull at the fabric edge to the terminal post.
Tension bands do not normally clamp loose mesh directly to the post. They hold the tension bar running through the fabric edge. A fencing terminology reference defines a tension band as an offset strip fitted around a terminal post and identifies the tension bar, bands, fasteners, and post as the assembly securing a fabric termination (chain-link fencing terminology).
Terminal posts are the posts at points where fabric begins, ends, changes direction, or is otherwise terminated. They can include:
- End posts at the beginning or end of a fence run
- Gate posts beside an opening
- Corner posts where the fence changes direction
- Pull posts where the design creates an additional fabric termination
These differ from ordinary line posts, which support the fence between terminal locations. A line post does not ordinarily receive the same tension-bar-and-band assembly because the fabric continues past it rather than terminating there.
Similar assemblies can appear on gate-frame uprights, temporary fence panels, and kennel panels. Hoover Fence catalogs tension bands for these applications as well as for end, corner, and gate posts (tension-band applications and product options). That does not make an ordinary fence band compatible with every gate or panel; the tubing dimensions, shape, tension bar, fasteners, and connection design still must match.
When preparing a shopping list, treat the following as separate components unless the product listing expressly says otherwise:
- Tension band
- Tension bar
- Carriage bolt
- Nut
A package containing several bands does not necessarily include the bars or fasteners needed to install them.
Tension band vs. brace band, tension bar, and tension wire
Several chain-link fittings have similar names or appearances. Confirm each part’s function before ordering.
| Part | Typical location | Primary function |
|---|---|---|
| Tension band | Around a terminal post | Connects the tension bar and fabric edge to the post |
| Brace band | Around a terminal post, often near a rail end | Connects a rail end or brace-related component to the post |
| Tension bar | Vertically through the fabric edge | Provides a continuous edge that can be fastened to the post |
| Bottom tension wire | Horizontally along the bottom of the fabric | Reinforces the lower edge of the fence |
| Rail end | At the end of a top rail or brace rail | Seats the rail at a terminal post |
A tension band secures the tension bar. Its offset profile allows the bar to sit beside the post and align with the band’s tangs.
A brace band generally connects part of the frame rather than the fabric edge. It commonly holds a rail end that receives a top rail or brace rail. In a typical terminal-post arrangement, a brace band may sit above the tension bands, but the exact location depends on the fence design.
A tension bar is the long, narrow vertical bar woven through the final row of mesh. Several tension bands secure that one bar to the post, spreading the connection along the fabric’s height instead of concentrating it at one wire loop.
Bottom tension wire is different again. It runs horizontally near the bottom of the fence to reinforce the lower edge. It does not replace the vertical tension bar at the end of a fabric run and may require separate attachment hardware.
A fence supplier’s component guide likewise distinguishes tension bands, which connect tension bars, from brace bands, which connect rail ends to terminal posts (chain-link parts and fittings guide). Although both fittings may appear on the same post or in the same hardware category, they are not interchangeable.
Measure the terminal post before choosing a band
Post fit is the first buying decision. Do not begin with fence height, finish, or a broad label such as “residential.” Begin by measuring the post that the band must wrap around.
For a round post, measure straight across the widest outside points. This is the outside diameter.
For square tubing, record the outside width of one face. For rectangular tubing, record both outside dimensions as width by depth. A band shaped for rectangular tubing is not equivalent to one intended for a round post, even when the fittings look similar in a small product photograph.
The dimension in a product name refers to the post size identified by that seller—not the post’s height. A band described as fitting a four-inch post is not a fitting selected for a four-foot-tall fence.
Retail catalogs separate products by round, square, and rectangular tubing and offer multiple dimensions within each category. That variety is a warning against choosing by appearance alone.
Before ordering, determine whether the listing identifies:
- The post’s actual outside diameter
- A nominal trade size
- A size label that the seller associates with a stated outside diameter
- Outside width and depth for square or rectangular tubing
Informal descriptions can be ambiguous. Someone may call a post “two inch,” while its measured outside diameter and the seller’s product label use a different figure.
For example, measure before buying a band labeled 2-3/8 inches. Menards identifies one product specifically as a 2-3/8-inch band for chain-link fence posts, illustrating how narrowly a listing can define its intended fit (2-3/8-inch tension-band specification). Do not assume it fits every terminal post informally described as two inches.
Compare all of the following before buying:
- Measured outside diameter, or measured width and depth
- Round, square, or rectangular post shape
- Product’s stated post size
- Whether the seller describes that size as nominal or actual
- Band profile
- Tang-hole configuration
- Any model-specific compatibility statement
When replacing an existing fitting, use the post measurement and current product specification rather than relying only on the old band’s appearance.
How many tension bands to buy
A commonly published seller rule of thumb is:
Estimated bands per fabric-to-post connection = fence height in feet minus one
Hoover Fence presents this as a general quantity rule and also suggests approximate spacing of 12–18 inches between bands (quantity and spacing guidance). Neither the formula nor the spacing range is established here as a code, engineering standard, or universal manufacturer requirement.
Using that rule produces this purchasing estimate:
| Fence height | Estimated bands per tension bar or fabric termination |
|---|---|
| 4 feet | 3 bands |
| 5 feet | 4 bands |
| 6 feet | 5 bands |
| 7 feet | 6 bands |
| 8 feet | 7 bands |
Treat the table as an ordering estimate. The selected fitting’s instructions and the project specification control the final quantity and placement.
Count connections, not just posts
Apply the estimate to each tension bar or fabric termination, not automatically once per physical post.
An end post at the end of one fence run ordinarily represents one connection. A corner post joining two independent runs commonly represents two connections because each fabric run terminates at its own tension bar. In that arrangement, the corner receives two band sets.
This explains why one set of instructions may state a normal count per post while a materials list doubles the corner quantity. The doubled count reflects two tension bars, not a different formula for each connection. Home Depot’s guide, for example, lists two tension bars and doubled band quantities for a typical corner arrangement (chain-link installation and material-count guide).
Use this method:
- Determine the estimated bands for one fabric-to-post connection.
- Count the separate fabric terminations or tension bars.
- Multiply the two figures.
For a six-foot fence, the table estimates five bands per connection. If a location has two independent fabric terminations, the estimated total is:
5 bands × 2 terminations = 10 bands
Worked example: straight run with two end posts
Consider one uninterrupted four-foot fence run between two end posts:
- First end post: one termination
- Second end post: one termination
- Total terminations: two
- Estimated bands per termination: three
- Estimated purchase quantity: 2 × 3 = 6 bands
Line posts between the ends do not add tension-band sets because the fabric does not terminate at those posts.
Worked example: run interrupted by a gate
Suppose a five-foot fence approaches a gate and continues on the other side. If each gate post receives fabric on its outward side, the layout can have four relevant terminations:
- First outer end post
- First gate post
- Second gate post
- Final outer end post
Using the table’s estimate of four bands per five-foot connection:
4 terminations × 4 bands = 16 bands
This count covers the stationary fence fabric terminations. It does not automatically include hardware used to attach fabric to the moving gate frames.
Worked example: L-shaped layout with one corner
Consider a six-foot L-shaped fence with two outer end posts and one corner post:
- First end post: one termination
- Corner post: two terminations, one in each direction
- Second end post: one termination
- Total: four terminations
At an estimated five bands per connection:
4 × 5 = 20 bands total
Of those, approximately 10 bands would be at the corner—five for each tension bar.
A visual change in direction does not by itself prove that two sets are needed. The deciding question is whether two fabric runs terminate independently at that post.
Verify exceptions
Seller-specific instructions can depart from the height-minus-one formula. One 14-gauge product listing specifies three bands for a four-foot fence but also calls for three bands on three-foot and 3.5-foot fences rather than applying the subtraction formula literally (product-specific quantity instructions).
Use the table to estimate an order, then compare the result with the instructions for the selected fitting and the fence plan. Unusual fabric, special framing, or specified projects may require a quantity or arrangement that a general retail formula cannot determine.
Choose the style, gauge, material, and finish
Once post fit and quantity are known, compare the construction of the available bands. Catalogs include standard, heavy, beveled, boltless, and snap-fit styles, but these names are not substitutes for model-specific specifications.
Standard, heavy, and beveled bands
One specialist seller documents the following examples:
- Standard bands: 14 gauge
- Heavy bands: 11 gauge
- Beveled bands: 12 gauge
Within the steel products being compared, a lower gauge number denotes thicker material. Thus, the listed 11-gauge band is thicker than the listed 14-gauge band. These gauge and application descriptions come from a commercial seller rather than an independent performance standard (standard, heavy, and beveled band comparison).
Gauge alone does not establish a load rating, wind resistance, permitted fence height, or suitability for a specified project. Nor does a thicker band compensate for the wrong post size.
Sellers commonly market standard or flat bands for residential and ordinary commercial fencing, while heavier or beveled products are positioned for industrial, institutional, or security-oriented work. Treat those descriptions as product positioning, not proof that a band satisfies an engineering requirement or provides anti-climb performance.
Do not assume that:
- “Heavy-duty” proves a particular load capacity.
- “Industrial” makes a band appropriate for every commercial project.
- A beveled edge establishes anti-climb performance.
- Gauge determines the required fastener.
- A thicker band permits wider spacing.
- A style name overrides the drawings or written specification.
For specified work, compare the exact product with the project documents rather than choosing solely by its marketing category.
Materials and finishes
Documented catalog options include:
- Galvanized steel
- Aluminum
- Mill finish
- Black
- Brown
- Green
A matching finish can make the fittings less visually conspicuous. For example, black bands may coordinate more closely with a black fence than bright metal fittings. Visual matching does not establish that the metals or coatings are compatible or suitable for a particular exposure.
The available retailer evidence does not establish which material or finish should be selected for coastal conditions, chemical exposure, or another highly corrosive environment. For those installations, obtain specifications for the complete assembly rather than making a decision from color or general coating names alone.
Boltless and snap-fit bands also appear in catalogs. Their availability does not make them universal replacements for conventional bolted bands. Verify the required post profile, tension bar, connection method, and approved application before substituting one style for another.
| Style | Cataloged gauge example | Available post shapes | Documented materials or finishes | Seller-described use | Questions to verify |
|---|---|---|---|---|---|
| Standard or flat | 14 gauge | Round; some square and rectangular products | Galvanized steel, aluminum, mill, black, brown, green | Residential and ordinary commercial | Correct post size? Required bolt? Project specification? |
| Heavy | 11 gauge | Multiple round-post sizes | Commonly galvanized steel | Heavy-duty or industrial | Published thickness? Approved fastener? Required placement? |
| Beveled | 12 gauge | Multiple round-post sizes | Galvanized or colored examples | Industrial or security-oriented | Is the profile required? Is any performance claim documented? |
| Boltless or snap-fit | Varies by model | Model-specific | Varies | Specialized assembly | Is substitution approved? What post and bar profile does it require? |
The figures in this table describe cataloged examples, not every product sold under each style name. Always read the individual listing.
Check the tension bar and fasteners before ordering
A tension-band order can arrive without enough parts to complete the connection. Documented listings sell some bands separately from the tension bar, carriage bolt, and nut.
The conventional assembly described here requires a compatible tension bar. It is the vertical member woven through the fabric edge and captured by the bands. Unless a different specified connector system is being used, bands without the correct tension bar do not complete the fabric termination.
A 5/16-inch carriage bolt appears in multiple product descriptions, and some products specify 5/16 by 1-1/4 inches. One specialty retailer, for example, states that its listed bands accept that bolt dimension (tension-band fastener specification). That does not prove the same fastener fits every band.
For the exact model, confirm:
- Bolt diameter
- Bolt length
- Head and neck compatibility
- Hole dimensions in the band tangs
- Clearance within the intended assembly
- Nut type and thread compatibility
- Required material or finish
- Whether the fasteners are included
Also verify package quantity. Bands may be sold:
- Individually
- In fixed multipacks
- In full boxes
- With a minimum purchase quantity
- As part of a larger fitting kit
For example, one marketplace listing describes a three-inch tension band as a 10-pack while expressly excluding the carriage bolts and nuts (three-inch tension-band multipack). A photograph showing several components is not a reliable package list.
Pre-purchase parts checklist
Before ordering, confirm that the project list includes:
- Correctly sized tension bands
- One compatible tension bar for every fabric termination
- A second tension bar at each corner where two runs terminate independently
- Compatible carriage bolts
- Matching nuts
- Brace bands and rail ends required by the frame design
- Separate hardware required for bottom tension wire
- Suitable fittings for any gate frames, temporary panels, or kennel panels
- Quantities adjusted for the way each product is packaged
Prices, rebates, stock, seller ratings, delivery dates, and shipping terms can change. Establish fit and quantity first, then compare current purchasing terms among products meeting those requirements.
Basic installation sequence and limits of general guidance
The exact process depends on the fence design and selected hardware, but a conventional tension-band connection follows this bounded sequence:
- Confirm the post and band match. Compare the measured outside dimensions and shape with the band specification before assembly.
- Place the bands on the terminal post. Conventional bands generally go over or around the post before the fabric is attached. Allow for the planned positions of brace bands, rail ends, and other fittings.
- Distribute the bands along the connection. Use the selected model’s instructions or the project specification for final quantity and placement.
- Prepare the fabric edge. Weave the correct tension bar vertically through the terminal row of chain-link fabric.
- Align the tension bar with the band tangs. Position each band at its intended connection point on the bar.
- Install the specified carriage bolts and nuts. Use fasteners compatible with the exact bands and assembly.
- Complete the opposite termination. After the fabric is positioned using the applicable installation method, insert the final tension bar and connect it to the last terminal post.
- Inspect the fabric condition. The mesh should appear snug and uniform without distorting its diamond pattern.
A commercial installation guide similarly describes placing bands around the terminal post, inserting a tension bar vertically through the fabric edge, bolting the bar to the bands, and leaving the mesh snug without deforming the diamonds (chain-link installation sequence).
This overview does not establish a universal:
- Bolt orientation
- Tightening torque
- Fabric-stretching force
- Final band spacing
- Fastener-reuse rule
- Procedure for removing a loaded fitting or releasing tensioned fabric
Use the hardware instructions and project documents for those details. Work involving damaged wire, a fitting under load, or the release of tensioned fabric falls outside this general buying and assembly overview.
Final buying checklist and common ordering mistakes
Use this checklist before submitting an order.
Post and layout
- [ ] Measure the actual outside diameter of every relevant round terminal post.
- [ ] Record outside width and depth for square or rectangular tubing.
- [ ] Confirm whether the seller uses actual dimensions or nominal trade sizing.
- [ ] Identify each end, gate, corner, and pull post.
- [ ] Record the fence height.
- [ ] Count fabric terminations, not merely physical terminal posts.
- [ ] Count the required tension bars.
- [ ] Treat a two-direction corner as two connections when two runs terminate independently there.
Band quantity and construction
- [ ] Calculate an estimated band count for each connection.
- [ ] Multiply the per-connection estimate by the number of fabric terminations.
- [ ] Compare the estimate with the selected model’s instructions and project documents.
- [ ] Select standard, heavy, beveled, or another specified style.
- [ ] Confirm the band gauge.
- [ ] Confirm the material and finish.
- [ ] Match the finish to the fence only after dimensional and functional compatibility is established.
Fasteners and package contents
- [ ] Confirm carriage-bolt diameter and length.
- [ ] Confirm nut thread and material compatibility.
- [ ] Verify that the bolt fits the band holes and intended assembly.
- [ ] Check whether bolts and nuts are included.
- [ ] Check whether tension bars are included.
- [ ] Confirm whether bands are sold individually, by the box, or as a multipack.
- [ ] Add brace bands, rail ends, and bottom-wire hardware if the layout requires them.
Avoid these common ordering mistakes:
- Counting terminal posts instead of terminations. A corner joining two fabric runs can require two tension bars and two complete band sets.
- Confusing tension bands with brace bands. Both wrap around terminal posts, but they connect different components.
- Confusing a tension bar with bottom tension wire. One runs vertically through a fabric termination; the other runs horizontally along the lower edge.
- Assuming every band is galvanized steel. Catalogs also include aluminum, mill-finish, and colored products.
- Assuming every band uses the same bolt. A common fastener dimension is not a universal specification.
- Assuming every advertised size follows the same convention. Determine whether the seller is describing an actual dimension, nominal size, or model-specific fit.
- Selecting by gauge alone. Thickness does not establish complete suitability or load capacity.
- Relying on marketing labels. Terms such as “residential,” “industrial,” “heavy-duty,” and “high-security” must be checked against actual specifications.
- Forcing a poor fit. A band that cannot fit the measured post is not the correct size.
- Ordering from the photograph. Similar-looking bands can differ in post shape, dimensions, gauge, tang design, and included hardware.
Frequently asked questions
How many tension bands do I need for a 6-foot chain-link fence?
The common height-minus-one estimate gives five bands per fabric-to-post connection for a six-foot fence. Multiply five by the number of fabric terminations.
A straight run with one termination at each end would therefore be estimated at 10 bands total. A corner with two separate tension bars would also be estimated at 10 bands at that corner. Confirm the result against the selected product’s instructions and the fence design.
Do corner posts need twice as many tension bands?
Often, but not automatically. A corner joining two independent fence runs commonly has two tension bars—one for each fabric termination. Each tension bar receives its own band set.
The corner does not need a doubled quantity merely because it is called a corner post. The additional set follows from the presence of a second fabric termination.
What is the difference between a tension band and a brace band?
A tension band connects the tension bar and fabric edge to a terminal post. A brace band generally connects a rail end, top rail, or brace-related component to that post.
The fittings may look similar and can appear together on the same terminal post, but they perform different jobs and should not be ordered as substitutes.
Do chain-link tension bands come with bolts, nuts, and a tension bar?
Sometimes, but many products are sold as bands only. Listings may expressly exclude the bolt, nut, and tension bar even when those parts appear in installation descriptions or photographs.
Read the package-contents section and confirm the number of bands, required tension bars, and whether compatible bolts and nuts must be purchased separately.
What size carriage bolt fits a chain-link fence tension band?
A 5/16-inch carriage bolt appears in several listings, and some products specify a 5/16-by-1-1/4-inch bolt. That dimension is not universal.
Check the exact band specification for the required diameter and length. Confirm compatibility with the tang holes, tension bar, post, nut, and complete assembly rather than selecting a fastener because it fits another band on the fence.
The final decision should remain measurement-first: identify every fabric termination, measure each terminal post’s outside dimensions and shape, and use the height-based quantity formula only as an estimate. Then verify the selected band’s style, gauge, material, finish, tension-bar compatibility, fasteners, placement, and package contents. A correct-looking band is not necessarily a correct-fitting band, and model-specific instructions or project specifications should override general retailer guidance.