
Choose the Right Bar, Hardware, and Quantity for Every Fabric Edge
Count one for every chain-link fabric edge that terminates at a post, upright, or applicable frame in the finished layout.
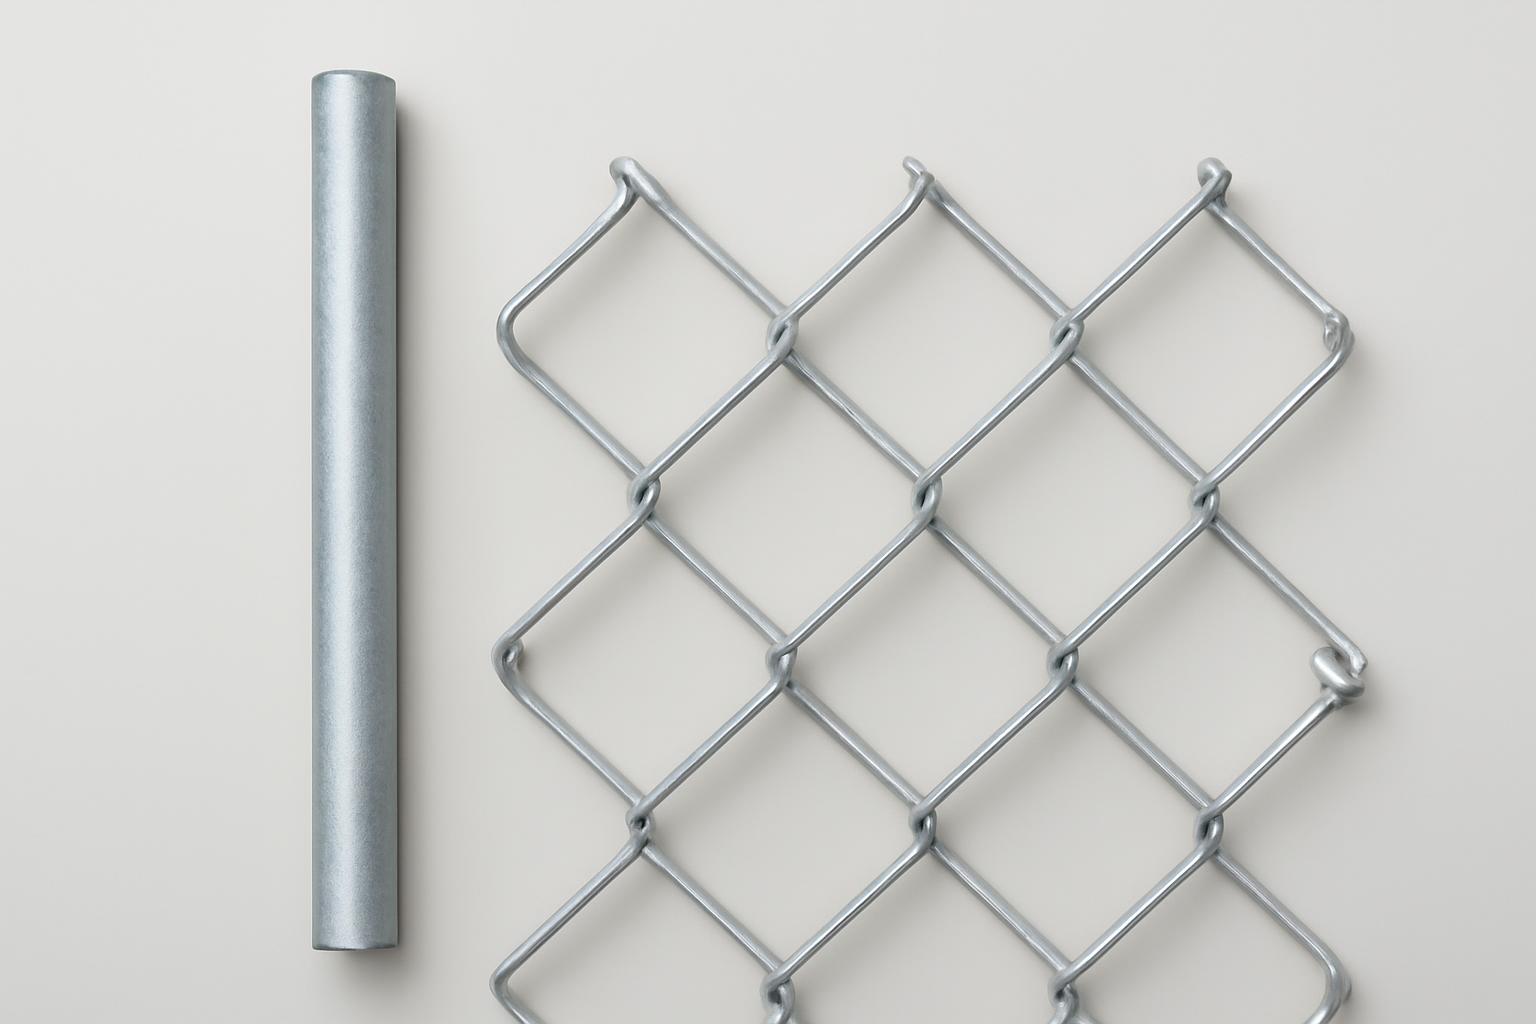
The key is to buy by fabric edge, not by fence footage. Each chain-link fabric edge that terminates at an end post, corner, gate post, gate upright, or applicable panel frame generally needs its own permanent tension bar. The bar must suit the fence’s nominal height and available installation space, while the tension bands and fasteners must fit the terminal post.
This guide explains how to identify the part, compare nominal and actual dimensions, calculate quantities, complete the hardware order, and install the bar without confusing it with similarly named tools.
What a chain-link tension bar does and where it belongs
A chain-link tension bar is a flat metal bar installed vertically through the terminal edge of chain-link fabric. Once threaded through the complete edge diamonds, it is connected to a terminal post with tension bands, carriage bolts, and nuts.
The bar is a permanent attachment component. It stays in the finished fence; it is not the temporary tool used to pull an entire roll of fabric taut.
Without a bar, the loops at the end of the fabric remain separate, flexible attachment points. Threading a bar through the terminal weave creates one continuous attachment edge. The tension bands can then connect that edge to the terminal post rather than fastening isolated strands of mesh.
Common locations include:
- End posts: One bar at each end of a continuous fabric run.
- Gate posts: One bar wherever stationary fabric terminates beside a gate opening.
- Corner posts: A separate bar for each direction from which fabric terminates.
- Gate uprights: A bar may secure fabric within a chain-link gate frame.
- Freestanding panel frames: Applicable frame edges may use bars to attach the fabric.
- Replacement sections: Each new terminating edge created by a repair may require a bar.
Specialist product guidance identifies terminal posts, gate uprights, and panel frames as tension-bar locations and recommends one bar for each terminal fabric edge (Signet Fence tension-bar guidance).
The governing rule is:
Use one tension bar for every chain-link fabric edge that terminates at a post, upright, or applicable frame.
That distinction matters at corners. A normal end post receives one terminating fabric edge and ordinarily needs one bar. A corner post can receive two separate fabric edges—one from each direction—and therefore normally needs two bars.
It also matters around gates. Stationary fabric does not continue across the opening, so it terminates at each gate post. Those gate-facing edges each add a bar. The gate leaf may require additional bars at its uprights if its frame uses that attachment method.
Figure: Terminal-post attachment
A terminal connection can be read from the fabric toward the post as follows:
- Chain-link fabric: The woven field of diamond mesh.
- First full edge diamond: The complete terminal weave through which the bar passes.
- Tension bar: The flat vertical bar threaded continuously through that edge.
- Tension bands: Multiple bands wrapped around the terminal post.
- Carriage bolts: Fasteners passing through the projecting ends of the bands beside the bar.
- Nuts: Hardware securing the carriage bolts.
- Terminal post: The larger post supporting the fabric termination.
- Fabric-run direction: Away from the terminal post and along the fence line.
At a two-direction corner, the same post has a separate bar-and-band attachment for each terminating fabric edge.
Match nominal fence height to actual bar length
Tension bars are generally marketed for a nominal fence height. A bar advertised for a 5-foot fence is intended for that installation category, but the physical bar is not necessarily exactly 60 inches long.
The evidence shows several supplier conventions. Some product ranges offer bars at the full nominal dimension, while other listings disclose physical lengths one or two inches shorter. The listings do not establish a universal reason for that difference, so buyers should not assume that every fence needs either a full-height or shortened bar.
| Nominal fence height | Nominal designation | Documented product examples | Buying interpretation |
|---|---|---|---|
| 4 feet | 48 inches | A 47-inch physical bar is sold for a 4-foot fence; another seller offers a selectable 48-inch bar | Confirm whether the stated dimension is nominal or physical |
| 5 feet | 60 inches | Documented physical lengths include 58 inches and 59 inches | “5-foot” or “60-inch” may describe compatibility rather than exact length |
| 6 feet | 72 inches | A 71-inch physical bar is sold for a 6-foot fence; full 72-inch listings also exist | Check the specifications rather than relying on the title |
| 8 feet | 96 inches | A product carrying a 96-inch designation states a 94-inch physical length | Verify the actual end-to-end dimension |
The full-length selectable examples include 48-, 60-, and 72-inch options in one specialist product range (Hoover Fence colored tension-bar range). Separate galvanized listings identify 47- and 71-inch physical bars for nominal 4- and 6-foot fences (Plum Fittings tension-bar listings).
For 5-foot fences, one black powder-coated product states an actual length of 58 inches (Everguard Materials 5-foot black tension bar), while a galvanized product states an actual length of 59 inches (59-inch bar for a 5-foot fence). At 8 feet, a product titled as a 96-inch bar gives an actual length of 94 inches (America’s Fence Store 96-inch-designation bar).
These examples document listing differences; they do not establish one correct deduction from nominal height.
How to size a replacement bar
Check four measurements or specifications before ordering:
- Installed fabric height: Measure the mesh rather than relying only on the fence description.
- Available vertical clearance: Check the usable space within the terminal assembly.
- Existing bar length: If the original bar appears appropriate for the system, measure it end to end.
- Seller’s physical dimensions: Look for an explicit actual-length statement, specifications table, or drawing.
Also check the fence-system manufacturer’s requirements. Do not assume that the labels 5-foot, 60-inch, and fits a 5-foot fence are interchangeable. One may be a nominal compatibility label while another is intended as a physical dimension.
For a new installation, start with the product designated for the nominal fence height, then verify its stated physical size. For a repair, compare both the designation and actual dimensions with the existing assembly. Ordering by title alone is especially risky when replacing a single bar.
If a listing does not distinguish nominal size from physical length, ask the seller to confirm the end-to-end measurement before purchasing.
Choose bar width, thickness, material, and finish
Commonly sold widths include 5/8 inch and 3/4 inch. Several specialist sellers describe 5/8-inch bars as typical for residential work and the stiffer 3/4-inch width as typical for commercial or heavier applications (Hoover Fence sizing guidance).
That residential-versus-commercial distinction is retailer guidance, not a universal building-code or engineering rule.
Before buying, verify:
- Actual bar length
- Bar width
- Thickness or steel gauge
- Material
- Finish
- Terminal-post outside diameter
- Compatible tension-band size
- Required carriage bolts and nuts
- Fence-system requirements
Documented products illustrate the variation. One seller describes 47- and 71-inch bars as 3/16 inch by 5/8 inch and made from 12-gauge steel. Another 59-inch listing states a 3/16-inch-by-5/8-inch cross-section and also describes the material as 12-gauge pressed steel.
Treat those as seller-stated specifications. Do not assume that a gauge label and a decimal thickness are equivalent, or convert between them, without manufacturer confirmation. Retailer terminology may not be consistent across product lines.
Finish options
Documented finishes include:
- Galvanized steel with a silver appearance
- Black powder-coated steel
- Black colored coating
- Brown colored coating
- Green colored coating
For an existing fence, matching the fabric and fittings is usually the practical starting point. A silver galvanized bar will be conspicuous in an otherwise black system, while a mismatched colored bar can make a repair look pieced together.
Finish names alone do not establish service life or suitability for coastal, industrial, or other demanding environments. If exposure conditions matter, obtain the applicable material and coating specification from the fence-system or component manufacturer rather than relying only on labels such as “galvanized,” “powder-coated,” or “rust-resistant.”
Compact compatibility matrix
Complete this matrix for each candidate before ordering:
| Compatibility field | Candidate specification | What to confirm |
|---|---|---|
| Nominal fence height | Seller’s compatibility designation | Matches the installed fabric or planned system |
| Actual bar length | Explicit end-to-end measurement | Fits the available vertical space |
| Width | Common listings include 5/8 or 3/4 inch | Meets system requirements and works with the attachment arrangement |
| Thickness or gauge | Use the seller’s exact stated specification | Do not infer equivalence between gauge and decimal thickness |
| Material | Often listed as steel or pressed steel | Matches the required system specification |
| Finish | Galvanized silver or a matching colored finish | Matches the fabric and fittings as intended |
| Terminal-post diameter | Measured outside diameter | Do not infer it from fence height or bar width |
| Compatible band size | Manufacturer or supplier specification | Fits the terminal post and bar arrangement |
| Fastener requirements | Carriage-bolt and nut specifications | Confirm diameter, length, finish, and quantity |
| Package quantity | Single piece, minimum quantity, or bundle | Covers the project without an unintended bulk order |
One 59-inch product, for example, states a 3/16-inch-by-5/8-inch cross-section, describes the steel as 12 gauge, and imposes a minimum order of 25 pieces (Chain Link Fittings product specifications). Those are specifications and purchasing terms for that listing, not universal requirements.
Do not infer terminal-post diameter, band size, or bolt dimensions from bar width. These parts operate as an assembly, and a bar labeled “residential” or “commercial” is not automatically compatible with every post and hardware set in that category.
Calculate how many tension bars and bands you need
Tension-bar quantity is determined by terminating fabric edges, not total linear footage.
A 20-foot run and a 100-foot run may each need two bars if each is one uninterrupted stretch between two terminal posts. A shorter layout with corners, gate openings, and separate panels may need considerably more.
The core calculation is:
Total tension bars = total number of terminal fabric edges
Straight-run example
For one continuous stretch between two end posts:
- First end-post fabric edge: 1 bar
- Second end-post fabric edge: 1 bar
- Total: 2 bars
The run’s length does not change that count unless the layout introduces another fabric termination.
Corner example
Suppose one fabric section approaches a corner from the west and another continues north. Each section terminates at the corner post:
- West-facing fabric edge: 1 bar
- North-facing fabric edge: 1 bar
- Corner total: 2 bars
This is why “one bar per terminal post” can be misleading. One physical corner post can have two separate fabric hookups.
Gate example
A gate opening normally interrupts the stationary fabric:
- Fabric terminating at the left gate post: 1 bar
- Fabric terminating at the right gate post: 1 bar
- Gate-leaf upright edges: add bars if the gate-frame design uses them
Count the stationary fence and gate-frame edges separately. Do not assume that two bars beside the opening account for every component of the gate assembly.
Panel-frame example
For freestanding chain-link panels, count each frame edge where the design uses a tension bar to terminate the mesh. Some frames use different attachment methods, so inspect the panel design rather than automatically adding bars to all four sides.
Terminal-edge worksheet
Walk the layout and mark each applicable edge:
| Layout feature | Number of features | Bars per feature or edge | Subtotal |
|---|---|---|---|
| Normal end-post fabric edges | 1 | ||
| Corners receiving separate fabric from two directions | 2 | ||
| Gate-facing stationary fabric edges | 1 | ||
| Gate-upright fabric edges using bars | 1 | ||
| Applicable freestanding panel edges | 1 | ||
| Other separate fabric terminations | 1 | ||
| Total bars required |
A simple verification method is to sketch the fence as individual fabric sections. Put a dot at both ends of every section. Each dot ordinarily represents one tension bar.
Do not use the bar count as the band count
Each bar is normally attached with multiple tension bands, so the band quantity will be greater than the bar quantity.
As a retailer-authored installation example, Home Depot calls for three tension bands on a 4-foot fence, four on a 5-foot fence, and five on a 6-foot fence. The same guide identifies one bar at end and gate posts and two at a corner when fabric terminates from both directions (Home Depot chain-link installation guide).
Those band counts are planning examples, not universal specifications. Confirm the required band quantity, size, orientation, and spacing for the selected fence system.
At a two-direction corner, each fabric edge has its own bar and attachment arrangement. Counting bands only once for the post can leave the second side without enough hardware.
Complete the order with bands, bolts, nuts, and installation tools
A bare tension bar does not complete the terminal connection. The documented attachment arrangement also uses:
- Properly sized tension bands
- Carriage bolts
- Nuts
- A compatible terminal post, gate upright, or frame
The bands wrap around the terminal post. The bar sits within the terminal fabric edge beside the projecting ends of the bands, and the carriage bolts and nuts close the connection.
Do not assume that this hardware comes with the bar. Product listings may expressly state that bands, carriage bolts, and nuts are sold separately.
Match the bands to the post
The tension band must fit the terminal-post outside diameter and suit the intended attachment arrangement.
Before ordering, record:
- Terminal-post outside diameter
- Number of fabric edges attaching to that post
- Bar width and thickness
- Required bands per edge
- Required carriage-bolt diameter and length
- Nut and finish requirements
The available evidence does not establish one universal bolt size. Obtain fastener dimensions from the fence-system instructions, band manufacturer, or hardware supplier.
Stretching equipment is separate
The permanent tension bar should not be confused with equipment used to pull the fabric taut. A basic installation may use:
- A stretcher bar, inserted temporarily through the fabric
- A fence puller or come-along, used to pull the fabric
- Connections and anchoring suitable for that pulling setup
The pulling equipment positions the mesh. The permanent tension bars and bands then secure the terminal edges in the completed fence.
Pulling-equipment safety: Follow the tool and fence manufacturers’ instructions, including their requirements for anchoring, connections, inspection, personal protective equipment, and operator positioning. Do not improvise a pulling setup. If the anchoring method, equipment capacity, load, or procedure is uncertain, stop and use an appropriate fencing professional.
Pre-purchase parts audit
Before checkout, verify that the project includes:
- [ ] One correctly sized tension bar for every terminal fabric edge
- [ ] Correctly sized tension bands in the required quantity
- [ ] Compatible carriage bolts
- [ ] Compatible nuts
- [ ] Terminal posts, gate uprights, or panel frames
- [ ] Chain-link fabric in the required height and length
- [ ] Stretcher bar
- [ ] Fence puller, come-along, or system-approved pulling equipment
- [ ] Required ties, rails, braces, caps, and fittings
- [ ] Any specified matching or repair coating
- [ ] Manufacturer’s installation instructions
Check the unit of sale as well. Some bars are sold individually, while other listings impose minimum quantities or offer contractor-size bundles. Confirm whether the displayed quantity means one bar, one package, or a bulk lot.
Do not base a long-term purchasing decision on temporary prices, inventory counts, pickup estimates, or a small number of reviews. Compatibility, package format, and complete specifications are more important than momentary storefront information.
Install the tension bar without distorting the mesh
The following is a basic sequence, not a substitute for the fence-system manufacturer’s instructions or applicable project requirements. Post bracing, gate construction, fabric handling, and pulling arrangements may require additional procedures.
1. Put the tension bands on the terminal post
Slide the correctly sized tension bands onto the terminal post before bringing the fabric into its final attachment position. Orient the bands toward the side where the fabric edge and bar will sit.
At a corner receiving fabric from two directions, arrange the required bands for both terminal edges before the mesh restricts access.
Do not establish final spacing by guesswork. Use the layout specified for the selected fence system and hardware.
2. Position the fabric edge
Stand or unroll the chain-link fabric beside the terminal post. Identify the first full diamond or final complete weave at the terminal edge.
The bar should pass through a consistent vertical sequence of complete edge openings. If the edge is damaged, twisted, or partially unwoven, stop and identify the correct terminal weave before proceeding.
3. Thread the tension bar vertically
Starting at one end of the fabric edge, slide the bar vertically through the first full diamond. Continue through the corresponding edge openings while keeping the bar parallel to the fabric edge.
Do not skip unpredictably between interior diamonds or force the bar diagonally across the weave. The objective is a continuous, straight attachment edge.
If threading becomes difficult:
- Check whether the fabric edge is twisted.
- Confirm that the bar started in the complete terminal weave.
- Keep the bar parallel to the edge.
- Inspect for bends, burrs, coating buildup, or incompatible dimensions.
- Reposition the fabric instead of forcing the diamonds out of shape.
4. Align the bar with the tension bands
Move the bar and fabric edge into position beside the terminal post. Align the bar with the open ends of the tension bands, then install the specified carriage bolts and nuts.
Confirm that each band engages the intended attachment area and that the bar remains vertical. Correct misalignment before fully tightening the hardware.
5. Tighten the hardware evenly
Tighten the fasteners progressively rather than fully tightening one connection while the others remain loose. One specialist product guide recommends working evenly from the bottom upward (Signet Fence installation directions).
Watch the fabric edge as the bands close. The bar should remain straight and the diamond pattern should remain regular. Use the fastener requirements supplied for the system; there is no universal bolt torque established here.
6. Stretch the fabric before securing the opposite edge
After attaching the first edge, position the remaining fabric along the fence line. A fence puller or come-along connected to a stretcher bar can be used to tension the mesh before the final permanent bar is installed.
The visual check is that the fabric should be taut without distorting its diamond pattern. General DIY guidance also distinguishes the temporary stretcher-bar pulling operation from installation of the permanent tension bar and bands (Fence Armor installation sequence).
Once the fabric is correctly positioned and tensioned, insert the final permanent bar through the terminal weave and secure it with the specified bands and fasteners.
Obtain project-specific guidance for tall fences, screened fabric, commercial perimeters, unusual gate frames, or other heavily loaded configurations. Do not extrapolate universal band spacing, bolt torque, pulling force, or anchoring requirements from a basic installation sequence.
Do not confuse a tension bar with a stretcher bar or tension wire
Several chain-link components use the word “tension,” but they are not interchangeable.
| Component | Orientation | Purpose | Remains installed? | Typical location |
|---|---|---|---|---|
| Tension bar | Vertical | Creates a permanent terminal attachment edge | Yes | End post, gate post, corner, gate upright, or applicable frame |
| Stretcher bar | Typically vertical while in use | Provides a temporary gripping point for pulling the mesh | No; it is a reusable tool | In the fabric near the end being pulled |
| Tension wire | Horizontal | Reinforces or supports a horizontal fabric edge | Yes | Commonly along the bottom or another specified horizontal edge |
The working sequence makes the difference clear:
- A permanent tension bar secures the first terminal fabric edge.
- A temporary stretcher bar is inserted farther along the run.
- Pulling equipment acts through the stretcher bar to position and tension the mesh.
- A second permanent tension bar is inserted at the final terminal edge.
- Tension bands and fasteners secure that edge to the post.
- The temporary pulling equipment and stretcher bar are removed.
Tension wire is different again. It runs horizontally and does not replace the vertical bar-and-band connection at a terminal post. Retailer installation guidance distinguishes the vertically woven terminal bar from tension wire used along a horizontal fence edge (Home Depot explanation of chain-link components).
When shopping, verify the function:
- Is the part left in the finished fence?
- Does it attach to tension bands?
- Is it intended to pass through the terminal fabric weave?
- Or is it a reusable tool designed to connect to pulling equipment?
The word tension alone does not identify the correct product.
Inspect the bar and use a final buying checklist
Inspect the specifications before ordering and the physical bar after delivery. This is particularly important because nominal product names can differ from actual dimensions.
Final buying checklist
Confirm:
- [ ] Nominal fence height
- [ ] Stated actual bar length
- [ ] Bar width
- [ ] Thickness or seller-stated gauge
- [ ] Material
- [ ] Finish and color
- [ ] Package quantity
- [ ] Minimum order quantity
- [ ] Number of terminal fabric edges
- [ ] Required tension-band quantity
- [ ] Terminal-post outside diameter
- [ ] Compatible band size
- [ ] Required carriage bolts and nuts
- [ ] Whether hardware is included or sold separately
- [ ] Whether gate or panel-frame edges need additional bars
- [ ] System-specific installation requirements
Inspect the delivered bar
Compare the received item with the order and listing. Check:
- End-to-end length
- Width and thickness
- General straightness
- Finish and color
- Coating continuity
- Edges and ends for sharp burrs or damage
- Quantity received
- Included hardware, if any was promised
Pause the installation and contact the seller or fence-system manufacturer if the bar is bent, badly corroded, sharply burred, significantly coating-damaged, or dimensionally incompatible. The available evidence does not provide a universal threshold for accepting or rejecting damage.
The evidence also does not determine when an old bar can safely be reused. A used bar may appear straight but still be incompatible with new fabric, bands, or system dimensions. Inspect it and obtain project-specific guidance rather than assuming it is suitable.
Do not improvise a cutting procedure for an oversized bar. Cutting and deburring requirements depend on the material, coating, tools, and manufacturer’s instructions. Ask the supplier whether the component may be modified or whether a different listed size is required.
If the bar appears too short
Check these questions in order:
- Was it sold for the correct nominal fence height?
- Did the listing disclose a shorter physical length?
- Does that length match the system’s required clearances?
- Is the installed fabric actually the assumed nominal height?
- Is the bar passing through the correct terminal weave?
- Was the correct product variant shipped?
A 5-foot designation can accompany a 58- or 59-inch physical dimension in some product lines. That does not prove the bar fits every 5-foot system; it means the disclosed physical length must be checked against the installation.
If the bar is difficult to thread
Verify that:
- The bar is entering the first complete terminal diamond.
- The fabric edge is straight and untwisted.
- The bar is parallel to the edge.
- The bar is not bent.
- The weave is not damaged or obstructed.
- The bar’s width and thickness are compatible with the fabric and system.
Avoid excessive force that deforms the diamonds. Difficulty can indicate misalignment or incompatibility rather than a need for more pressure.
If the fabric edge looks uneven
Recheck:
- Whether the bar passes through a consistent sequence of terminal openings
- Whether every band aligns with the bar
- Whether the bar remains vertical
- Whether the bolts were tightened progressively and evenly
- Whether the fabric was correctly positioned before final attachment
Correct the source of the misalignment while preserving the regular diamond pattern.
Frequently asked questions
Why is a tension bar for a 5-foot fence only 58 or 59 inches long?
“Five-foot” may describe the nominal fence height or intended compatibility rather than the bar’s exact manufactured length. Documented listings include a 59-inch bar for a 5-foot fence and a product carrying a 60-inch designation whose stated physical length is 58 inches (Shop Chain Link nominal 60-inch product details).
That variation reflects supplier conventions, not a universal rule that every 5-foot bar should be one or two inches short. Measure the fabric and available space, then compare those measurements with the product’s stated physical dimensions and the fence-system requirements.
Does each corner post need one tension bar or two?
A corner generally needs two tension bars when separate fabric sections terminate there from two directions. Each terminal fabric edge receives its own bar.
If fabric does not terminate from both directions—or the assembly uses a different frame-specific arrangement—count the actual terminating edges instead of automatically assigning two bars to every post called a corner.
Are tension bands, carriage bolts, and nuts included with a tension bar?
Not necessarily. These parts are commonly sold separately, and a listing for one tension bar should not be treated as a complete terminal-attachment kit.
Read the package contents and unit of sale. If the listing is unclear, confirm what is included before ordering.
Can I use a tension bar instead of a stretcher bar when pulling chain-link fabric?
Do not treat them as interchangeable. A tension bar is a permanent component installed through the terminal edge and fastened to the post. A stretcher bar is a reusable installation tool that provides a temporary pulling point.
The stretcher bar helps position and tension the mesh. Permanent tension bars secure the terminal edges after the mesh is correctly positioned.
Is a 5/8-inch or 3/4-inch tension bar right for my fence?
Retailers commonly describe 5/8-inch bars as suitable for residential installations and the stiffer 3/4-inch width as suitable for commercial or heavier work. That is a purchasing convention, not a universal rule.
Choose only after confirming the system requirements, actual bar length, thickness or gauge, post dimensions, band compatibility, fabric configuration, and project conditions. Match the finish to the existing fabric and fittings, and verify all required bands and fasteners before installation.
Before ordering or installing, follow this final sequence:
- Identify every terminating fabric edge.
- Select a bar for the nominal fence height.
- Verify the actual end-to-end length.
- Confirm width, thickness or gauge, material, and finish.
- Match the tension bands to the terminal-post diameter.
- Confirm carriage bolts, nuts, and package quantities.
- Inspect the shipment before installation.
- Use separate, manufacturer-approved stretching equipment to position the mesh.
- Install the permanent bars at the terminal edges.
- Follow system-specific instructions for spacing, fasteners, pulling procedures, and structural requirements.