
Essential Shed Ventilation: Prevent Mold, Heat, and Rot in Your Backyard Storage
In practice, that usually means aiming for about half the net free area low in the shed and half high in the shed.
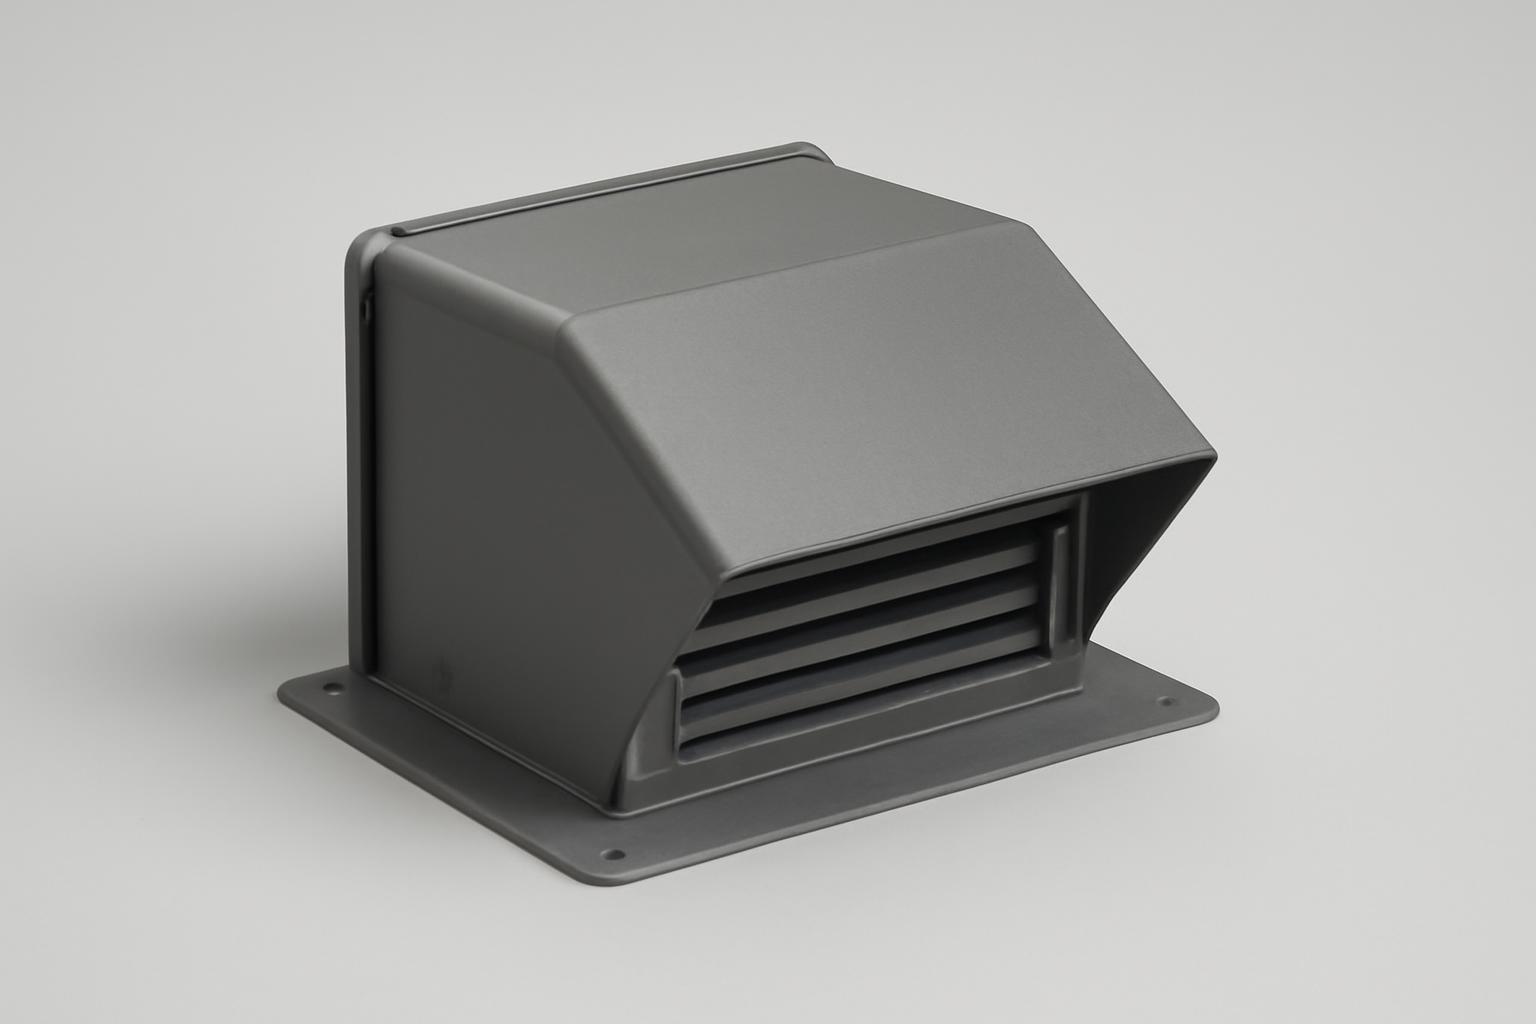
A shed vent system has one job: keep air moving through a space that otherwise spends long stretches shut tight. That matters more than many owners expect. Backyard sheds sit through sun, cool nights, rain, humidity swings, and long idle periods. Without steady airflow, even a well-built shed can hold heat, collect condensation, and trap stale or chemical-laden air.
A commonly cited rule of thumb in shed-ventilation guidance is 1 square foot of net free vent area for every 150 square feet of shed floor space, with that total divided between low intake and high exhaust. Treat that as a starting point, not a universal answer. Climate, shed material, roof shape, sun exposure, and what you store inside all affect how much airflow you really need.
This guide explains what a shed vent does, how to size a basic system, which vent types fit different sheds, when passive airflow is enough, and when active exhaust is worth considering.
Why Shed Ventilation Matters for Storage
Poor shed ventilation usually causes three overlapping problems: heat, moisture, and fumes.
Heat buildup can be severe. Shed-industry guides routinely warn that closed sheds can run much hotter than outdoor air. Some commercial sources describe interior temperatures rising roughly 20 to 25°F above outside conditions, and in extreme sun exposure some report 130 to 140°F interiors. Those figures are best treated as directional rather than guaranteed, but the practical point is solid: a closed shed can get hot enough to damage what you store.
That kind of heat can speed up wear on:
- plastics and vinyl
- paint and finishes
- adhesives and sealants
- photos and paper goods
- fabrics and cushions
- some chemicals and lawn products
Moisture is often the more expensive long-term problem. Rain does not have to leak in for a shed to get damp. Daily temperature swings can create condensation inside. Warm air holds moisture; when the shed cools, that moisture can settle onto roof framing, wall panels, tools, and stored items. Over time, repeated damp-dry cycling can lead to:
- mold and mildew on boxes, wood, or fabrics
- rot in framing or paneling
- rust on tools, fasteners, and metal furniture
- swollen doors and warped shelves
- a persistent musty odor
This is why a shed can look weather-tight from outside and still be unhealthy for storage inside.
Fumes matter too. Multiple sources warn against keeping gasoline, fertilizers, pool chemicals, paint products, and similar materials in an unventilated shed. Ventilation can reduce buildup of stale or hazardous air, especially when low vents help move out heavier fumes that may settle near the floor.
But this point needs caution: ventilation reduces risk; it does not make any hazardous-storage setup automatically safe or code-compliant. If you keep flammable or reactive products, follow the label, keep quantities minimal, and check local fire rules and manufacturer guidance.
Common signs your shed needs better airflow
If you are not sure whether your current shed vent setup is doing enough, look for repeating warning signs:
- musty smell
- visible condensation
- rust on tools or fasteners
- warped wood or sticking doors
- mildew spotting on stored items
- heat that lingers after the outside air cools
- humidity staying above about 60%
That last one is worth measuring. Several guides use 60% relative humidity as a practical warning level. A cheap hygrometer will tell you more than guesswork can.
Why opening the door is not enough
Opening the door occasionally does help. So do windows, if your shed has them. But neither replaces permanent ventilation if the building stays closed most of the time.
A shed used only on weekends may sit sealed for the other six days. That is plenty of time for heat and humidity to build up again. Permanent vents keep some air exchange happening when nobody is around.
For most people using a shed for tools, garden gear, patio cushions, or household overflow, that steady background airflow is the simplest way to reduce slow, preventable damage.
Sizing Ventilation for Your Shed
The most common sizing guideline in shed-ventilation advice is:
1 square foot of net free vent area per 150 square feet of floor space
That rule is useful, but two details matter.
First, it refers to net free vent area, not the face size of the vent. Louvers, screens, and internal framing reduce actual airflow area. A vent sold as 8x8 inches does not necessarily provide 64 square inches of open area.
Second, the total works best when it is balanced between intake and exhaust. In practice, that usually means aiming for about half the net free area low in the shed and half high in the shed.
Baseline sizing examples
| Shed size | Floor area | Baseline total vent area | Intake / exhaust target |
|---|---|---|---|
| 8x8 | 64 sq ft | about 0.43 sq ft | about 0.21 sq ft each |
| 10x12 | 120 sq ft | 0.8 sq ft | 0.4 sq ft each |
| 10x16 | 160 sq ft | about 1.07 sq ft | about 0.53 sq ft each |
If you prefer square inches, multiply square feet by 144.
So a 10x12 shed needs about 0.8 square feet total, which is about 115 square inches of net free area. Split evenly, that is about 58 square inches low and 58 square inches high.
For very small sheds, some guides suggest treating roughly 0.4 square feet total as a practical minimum target rather than relying on “just open the door now and then.”
How to translate net free area into actual vent choices
This is where many shed owners get stuck. The formula sounds simple, but you still have to turn it into real vents.
Use this worksheet:
-
Calculate total required net free area. Floor area ÷ 150 = total vent area in square feet.
-
Split it between intake and exhaust. Aim for roughly half low and half high.
-
Check the manufacturer’s net free area listing. Do not guess from face size alone.
-
Divide your target by the vent’s rated net free area. That tells you how many vents you need.
-
Round up, not down. Slightly more airflow is usually safer than landing short, especially in hot or humid conditions.
For example, if your shed needs 0.8 square feet total, your low vents should add up to about 0.4 square feet, and your high vents should add up to about 0.4 square feet. Whether that becomes two vents, four vents, or a ridge-plus-soffit layout depends on each product’s rated net free area.
If the packaging or spec sheet does not list net free area, you do not really know how much airflow capacity you are buying.
When to go above the baseline
The 1:150 rule is best understood as a minimum rule of thumb for ordinary storage. Many sources recommend going beyond it when a shed is harder to cool or more likely to hold moisture.
Common cases include:
- hot or humid climates
- full sun exposure
- metal sheds
- workshop or hobby use
- chemical or odor-producing storage
- insulated or tightly finished sheds
- larger sheds, especially once they become more room-like than box-like
The exact increase is not consistent across sources, which is a good reason not to present a single uplift as universal. The safe takeaway is simpler: if your shed runs hot, stays damp, or holds sensitive contents, do not stop thinking once you hit the bare minimum.
Placement matters as much as size
Vent area alone will not fix a poor layout.
A system works best when it creates an air path:
- low intake near the floor or under the eaves
- high exhaust near the top of the wall or roof peak
That arrangement supports natural convection. Cooler air enters low, warmer air rises, and the hottest, stalest air has a high escape point.
If both vents sit at the same height, airflow is usually weaker. If you install only a high vent, replacement air may not enter efficiently. If you install only low vents, hot air can still collect near the roof.
A practical sizing reality check
A single decorative vent high on one wall often looks like ventilation, but it may not amount to much.
For a shed that stays closed regularly, a balanced intake/exhaust setup is usually more effective than one lonely opening. Think in terms of system design, not just adding a vent-shaped object.
Passive Shed Vent Types Explained
Passive ventilation moves air without electricity. For many storage sheds, it is the right place to start because it is simple, quiet, and low-maintenance.
The real question is not which shed vent is “best” in the abstract. It is which layout fits your shed’s:
- roof shape
- wall layout
- size
- climate
- use
Gable vents
Gable vents sit high on the gable ends of a pitched-roof shed. They are one of the most familiar options and one of the easier retrofits.
Why they are popular:
- they support cross-ventilation when placed on opposite ends
- they are usually a straightforward DIY project
- they suit many small to medium sheds
- some how-to guides describe a simple install as roughly 30 to 60 minutes
That time estimate is not a guarantee; framing, siding type, and trim details matter. But relative to roof work, gable vents are widely treated as one of the easier vent upgrades.
Tradeoffs:
- performance can be weaker on still days
- airflow improves if there is a clear path through the shed
- they may be enough for ordinary storage, but not always for hot, humid, or larger sheds
For many backyard storage sheds, a pair of screened gable vents is a sensible starting point.
Ridge vents
Ridge vents run along the roof peak. Since hot air rises, the ridge is a natural place for exhaust.
Why people choose them:
- they place exhaust at the highest point
- they can provide steady roof-level venting
- they pair well with soffit vents or other low intake
Tradeoffs:
- they are usually harder to retrofit
- installation needs more care than a basic wall or gable vent
- some sources warn about maintenance, blockage, or wind-driven rain
- they are not a stand-alone solution; they still need intake air from below
On a new shed with usable eaves, ridge plus soffit can be an excellent passive system. On an existing shed with no soffits and no roof work planned, gable vents may be the more practical choice.
Wall vents
Wall vents are installed directly in the shed walls, usually low enough to bring in intake air.
Why they help:
- they are a practical way to add low-level intake
- they are often easier to place exactly where needed
- they work well with high gable or ridge exhaust
- screened models help limit insects and debris
Tradeoffs:
- poor placement can admit rain or drafts
- one wall vent alone rarely moves enough air
- low vents need periodic cleaning and pest screening
Wall vents are especially useful when a shed has little or no soffit area. In many retrofits, they are the easiest way to create the missing intake side of the system.
Soffit vents
Soffit vents sit under the eaves. Their usual job is intake, not exhaust.
Why people like them:
- they are well placed for cooler incoming air
- they stay tucked under the roof edge
- they naturally complement a ridge vent
Tradeoffs:
- they do not complete the system by themselves
- effectiveness depends on roof design and a clear air path
- passive performance can be limited in calm conditions
If your shed has good overhangs, soffit vents are often the cleanest way to add intake. Just remember that intake needs a corresponding high exit.
A practical passive rule
For most sheds, passive ventilation works best as a combination, not a one-part fix:
- low wall or soffit intake
- high gable or ridge exhaust
- screens to block insects
- weather-conscious placement
- enough total net free area
That is the difference between adding vents and building a vent system.
Active Ventilation Options for Tough Conditions
Passive airflow is often enough for basic storage. It becomes less dependable when a shed is large, heavily sun-exposed, insulated, used as a workshop, or located in humid, stagnant conditions.
That is when active ventilation can help.
Turbines and whirlybirds
A turbine vent, often called a whirlybird, is a wind-driven roof exhaust.
Strengths:
- no household wiring required
- can improve high-level exhaust in breezy locations
- may help sheds with heat or condensation gathering near the roof
Limits:
- performance depends heavily on wind
- results drop sharply in calm weather
- it still needs intake air
- roof penetration increases the importance of good flashing
- some sources note occasional lubrication needs
This is a vent type with obvious conditions attached. Some guidance treats whirlybirds as useful. Other advice is skeptical, especially when low intake is missing. Those views are not really contradictory. A turbine can help in the right setting, but it is not a cure-all.
Solar-powered fans
Solar shed fans actively pull hot air out using a solar panel, often with a thermostat or temperature trigger.
Strengths:
- no household wiring in many setups
- stronger exhaust than passive vents alone
- good fit for sun-exposed sheds
- commonly recommended for larger sheds or very hot sites
Some shed guides report sizable cooling benefits and cite temperature drops in favorable conditions. Treat those figures cautiously. Actual results depend on sun, intake capacity, shed tightness, roof color, and how much heat the building gains in the first place.
Limits:
- performance may fall on cloudy days
- they still need adequate intake vents
- upfront cost is higher than passive venting
If your passive system is close but not quite enough, a solar fan is often the most practical step up.
Power gable vents
A power gable vent uses an electric fan mounted high in a gable or wall.
Strengths:
- more predictable airflow than wind-driven options
- often adjustable or thermostat-controlled
- useful for sheds with seasonal or changing use
Limits:
- needs an electrical source
- adds noise and moving parts
- if intake is too small, performance suffers
These are most useful when the shed is functioning less like simple storage and more like a workspace, hobby room, animal shelter, or semi-finished outbuilding.
When active ventilation is worth it
Powered or wind-assisted ventilation is worth considering when:
- passive vents still leave the shed too hot or humid
- the shed is larger than about 150 square feet
- the shed is metal and gains heat quickly
- you use it as a workshop or office
- you store items that create odors or fumes
- your site has long stretches of humid, still air
Even then, active exhaust works best when added to a sound passive layout. A fan without good intake is trying to move air that has no easy way to enter.
Best Setups by Shed Size and Use
The best shed vent arrangement depends on both size and what the shed is doing. A basic tool shed has different needs from a workshop or a shed holding chemicals.
Small sheds under 64 square feet
Very small sheds usually do not need complicated vent systems.
A practical starting setup is:
- two opposed wall vents, or
- two gable vents, one on each end
That gives simple cross-ventilation and keeps the project manageable.
Best fit:
- garden tools
- hand tools
- low-value seasonal items
- outdoor gear that is not climate-sensitive
If you can add some height difference between intake and exhaust, performance improves, but even simple two-point ventilation is better than a sealed box.
Medium sheds, such as 10x12
This is where layout starts to matter more.
Two common passive approaches are:
- a pair of gable vents, or
- ridge vent plus soffit vents
A 10x12 shed is a useful reference point because it is large enough to hold trapped heat but still small enough that a well-planned passive system often works.
Choose a gable-based setup if:
- you want the simpler retrofit
- your shed already has gable ends
- the building has little or no soffit area
- use is mainly ordinary storage
Choose ridge plus soffit if:
- the roof design supports it
- you want high exhaust at the peak
- you are venting during construction rather than cutting into a finished shed later
Large sheds over 150 square feet or workshop use
As sheds get larger, their ventilation needs become more sensitive to use, occupancy, and climate.
A practical upgrade path is:
- build a balanced passive system first
- monitor heat and humidity
- add a solar fan or powered exhaust if needed
This is often the right track for:
- workshops
- hobby sheds
- backyard offices without full HVAC
- larger storage sheds in full sun
Chemical storage
This is the area where shed-vent advice needs the most restraint.
If you store gasoline, fertilizers, pool chemicals, paints, or similar products:
- do not rely on an unventilated shed
- include low vents, since some fumes may settle low
- include high exhaust
- keep quantities as limited as possible
- separate incompatible products
- check product labels and local fire or building rules
Most important: a vented shed is not automatically an approved hazardous-material storage solution. Ventilation is only one control. Labels, compatibility, ignition sources, cabinet requirements, and local code still matter.
Quick setup guide
| Shed situation | Good starting setup |
|---|---|
| Small storage shed under 64 sq ft | Two opposed wall or gable vents |
| 10x12 everyday storage shed | Two gable vents, or ridge plus soffit |
| Large shed over 150 sq ft | Balanced passive vents, then consider solar or powered exhaust |
| Workshop or hobby shed | Passive intake/exhaust first, then active exhaust if heat or humidity persists |
| Shed holding chemicals | Low wall intake plus high exhaust, with added safety review of labels and local rules |
How to Install Shed Vents DIY
Adding a shed vent is often a manageable DIY project, especially for wall and gable vents. Roof penetrations are more demanding because leak risk rises as soon as you cut into roofing.
The exact steps vary by vent type, but the basic process is similar.
1. Plan the airflow path before cutting
Decide which vents are intake and which are exhaust.
Look for:
- a low location where incoming air can enter
- a high location where hot air can exit
- framing members to avoid
- positions that will not funnel rain straight inside
For gable vents, some guides also suggest considering prevailing wind direction. That can help, but do not rely on wind alone; the system should still work on calmer days.
2. Measure the opening carefully
Use the vent’s cutout dimensions or template, not just the outside face.
Before cutting, check for:
- studs or blocking
- rafters or roof battens
- wiring in finished sheds
- trim details that could interfere with the flange
This matters especially in retrofits. A poorly placed opening can weaken framing, complicate flashing, or create an ugly repair job if you need to move it.
3. Cut the opening
Use tools suited to the material:
- jigsaw or reciprocating saw for wood panels
- metal-cutting tools for metal sheds
- roof-safe methods for roof penetrations
Go slowly. On roof penetrations, neat cutting and correct placement do a lot to prevent future leaks.
4. Secure the vent frame
Most wall and gable vents are fastened with:
- screws
- exterior-grade adhesive
- or both
Set the vent squarely so the flange sits flat and tight against the shed surface.
5. Seal the edges properly
Use exterior-grade sealant where the manufacturer calls for it.
For wall and gable vents, sealing the flange area helps keep water out. For roof vents, proper flashing matters more than extra caulk. Sealant helps, but it is not a substitute for correct roof detailing.
6. Add insect screening if needed
Many guides recommend screened or mesh-backed vents. That is especially important for low wall intake, where insects and nesting debris are common.
Fine mesh can reduce airflow somewhat, but the tradeoff is usually worth it for storage sheds.
7. Check intake and exhaust as a system
After installation, step back and look at the whole airflow path.
You want:
- low intake plus high exhaust
- roughly balanced net free area
- no blocked interior path
- no obvious rain-entry problem
A vent can be installed perfectly and still disappoint if the overall layout is unbalanced.
Retrofit cautions
Retrofit work deserves extra care.
Keep these points in mind:
- framing patterns may not be obvious from outside
- roof cuts create leak risk if flashing is sloppy
- some manufacturers attach warranty conditions to modifications
- poor placement can solve one problem while creating another
If you are unsure about cutting the roof, low wall vents plus gable vents are often the safer DIY route.
Maintenance and Troubleshooting Vents
A shed vent system is low-maintenance, not no-maintenance. Dirt, nests, blocked screens, and rain intrusion can quietly reduce performance.
Basic maintenance checklist
Inspect vents regularly for:
- dust, leaves, and cobwebs
- insect nests
- clogged or torn screens
- cracked sealant
- loose fasteners
- signs of rain entry
If you use a turbine or other moving vent, check whether the maker calls for occasional lubrication.
A seasonal routine is usually enough for most storage sheds:
- spring
- midsummer
- fall
- after major wind or storm events
Use humidity as your test
A hygrometer is one of the most useful troubleshooting tools for a shed.
If relative humidity repeatedly stays above about 60% with the shed closed, that is a sign your current setup may be undersized, blocked, or poorly balanced.
Also watch for:
- morning condensation on tools or windows
- musty odor after wet weather
- rust appearing faster than expected
- wood swelling or sticking
- trapped heat near the ceiling
Common problems and fixes
Problem: The shed still smells musty. Possible fixes:
- clear dirty screens
- add more low intake
- improve high exhaust
- stop storing damp items before they dry
Problem: Condensation continues in cool weather. Possible fixes:
- increase total vent area
- rebalance intake and exhaust
- check for ground or slab moisture
- consider active exhaust if passive venting is already substantial
Problem: Insects keep getting in. Possible fixes:
- add or replace screens
- repair torn mesh
- clear nesting debris
- inspect around flanges and trim for gaps
Problem: Rain blows in through the vents. Possible fixes:
- use better hooded or louvered covers
- relocate especially exposed low vents if practical
- verify flashing and sealing
- avoid oversized openings with no weather protection
Problem: A fan or turbine does not seem to help. Possible fixes:
- confirm enough intake air exists
- clean the unit
- check for stalled bearings or shaded solar panels
- remember that wind-driven units underperform in calm weather
Most disappointing vent systems fail for one of four reasons:
- too little total vent area
- bad placement
- blocked airflow
- missing intake
Shed Vents vs Self-Storage Units
This comparison is useful only at the decision edge: when ventilation helps, but the item itself may still be a poor fit for a backyard shed.
A ventilated shed usually makes sense for:
- yard tools
- garden equipment
- patio gear
- short-term overflow
- everyday items that can tolerate normal outdoor temperature swings
A self-storage unit is often the better choice for:
- long-term storage
- climate-sensitive items
- wood furniture
- electronics
- leather
- fabrics you need to keep in steadier conditions
LockerHelp’s storage guidance notes that climate control is often worth considering for wood furniture, electronics, leather, and fabric stored longer than a few months. Better shed ventilation may reduce damage risk, but it does not turn a backyard shed into climate-controlled storage.
There is another important limit: self-storage is not a workaround for prohibited items. LockerHelp’s guidance on prohibited storage categories says many facilities ban:
- flammables and combustibles
- food and perishables
- living things
- many hazardous materials
So if your real problem is gasoline, paint thinner, or other risky materials, the answer is not automatically “move it to self-storage.” That may violate the lease there too.
If you do move belongings from a shed into a storage unit, dry them first. Damp cushions, cardboard, leather, or fabric can still mildew after transfer if packed away wet.
FAQ
Do all backyard sheds need vents?
Not every tiny, frequently opened utility box needs an elaborate vent system. But most backyard sheds benefit from some form of permanent ventilation, and multiple sources say wood and metal sheds generally should be vented.
The need rises quickly when the shed:
- stays closed for long periods
- sits in direct sun
- stores household items rather than just yard tools
- is made of metal
- is insulated or tightly finished
Gable vents vs ridge vents: which is better?
Neither is universally better.
Gable vents are usually easier to retrofit and often sufficient for small everyday storage sheds. Ridge vents put exhaust at the highest point and can work very well on pitched roofs when paired with soffit or other low intake.
If you want a simpler retrofit, gable vents often make more sense. If you are planning a new shed and can build in proper soffit intake, ridge plus soffit can be a strong passive system.
Can I ventilate a metal shed the same as wood?
Use the same basic principles:
- low intake
- high exhaust
- balanced airflow
- adequate net free vent area
But metal sheds often heat up faster and can condense moisture more readily, so they commonly need more deliberate airflow than a comparable wood shed.
In practice, that may mean larger passive venting, better placement, or an earlier move to active exhaust.
What if my shed is insulated?
Insulation and ventilation usually work together, not against each other.
Several sources note that tighter, more finished sheds often need more careful ventilation planning, not less. If you insulate a shed, especially one with a heater or year-round use, pay closer attention to:
- permanent vent paths
- humidity monitoring
- insect screens
- whether passive airflow is enough in winter and summer
For some insulated sheds, especially workspaces, a controlled fan can make more sense than relying entirely on wind and temperature differences.
How do I know if ventilation is enough?
Look for results, not just hardware.
Your setup is probably doing its job if:
- humidity usually stays below about 60%
- you do not notice a recurring musty smell
- condensation does not keep appearing
- tools are not rusting unusually fast
- wood is not swelling or warping
- heat does not stay trapped long after the air cools outside
If those signs keep showing up, the usual next step is to improve or rebalance intake and exhaust, not just add a random extra opening.
A good shed vent system does not need to be complicated. Start with the 1:150 rule of thumb, verify actual net free area, create a low-to-high airflow path, screen and seal the openings properly, and then check the result with a hygrometer and your own observations. If the shed still runs hot or damp, increase vent capacity or step up to active exhaust.