
Choose a Wall-Mounting System That Supports Your Rug Without Stressing It
The choice turns on the rug's actual condition, complete installed weight, wall construction, rod stiffness, bracket design and documented fastener ratings.
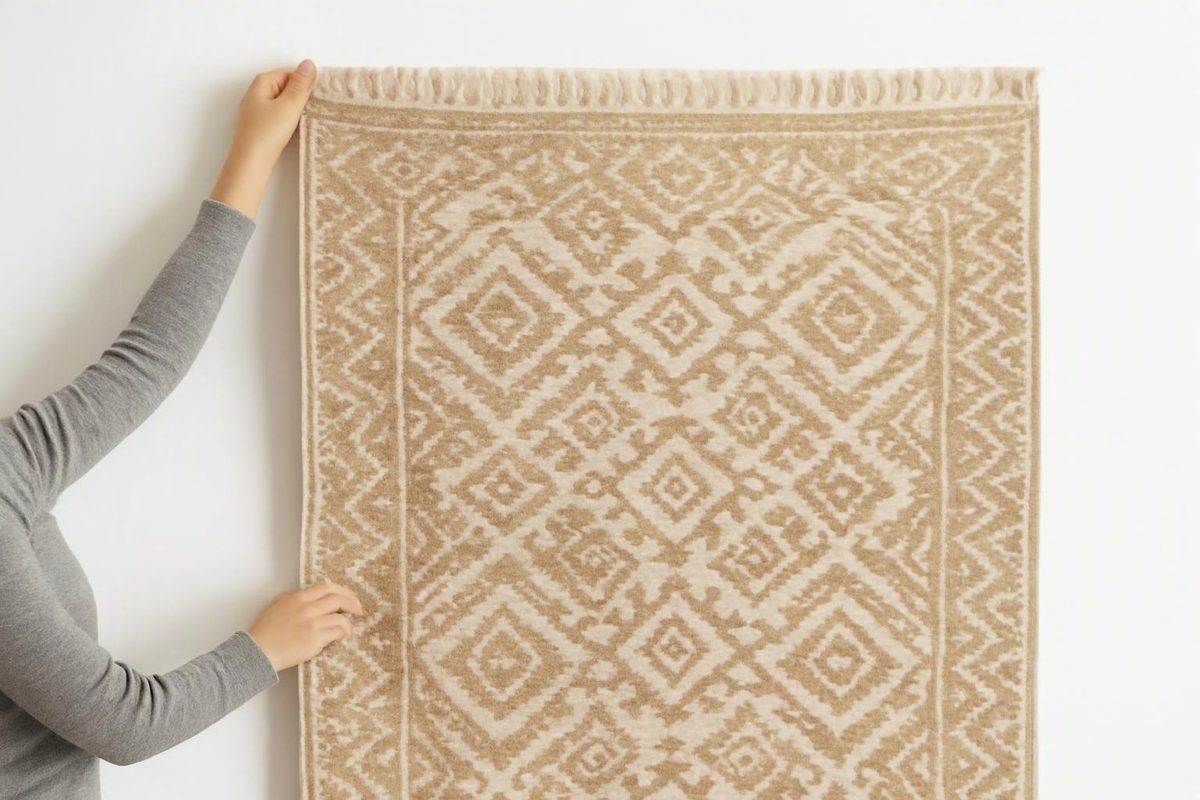
Learning how to hang a rug from a wall begins with assessing the textile and the mounting surface—not buying clips or choosing a decorative rod.
Treat the project as two separate but connected decisions:
- Textile support: How will the rug transfer its weight into a sleeve, fabric-backed fastener, clips, or a clamp without concentrating stress?
- Wall support: How will the rod, batten, rail, or hanger transfer the complete installed load into suitable wall structure?
This guide is limited to method selection, general installation sequences, and risk reduction. It does not establish conservation-safe stitch placement, specify anchors for a particular wall, or verify the capacity of any product. Exact stitching for a valuable textile and exact fastening for a heavy assembly require assessment by a textile conservator, experienced rug professional, qualified installer, or other appropriate specialist.
The general aim is to distribute support across as much of the rug’s upper width as practical, keep adhesive and puncturing hardware away from valuable fibers, and use wall-side components documented for the complete installed load.
Start With the Rug, Not the Hanging Hardware
Record the rug’s width, height, measured weight, construction, condition, and intended orientation. Do not choose hardware from dimensions alone. Rugs of the same size can differ substantially in weight, stiffness, weave, and ability to tolerate stitching or compression.
Determine whether the rug is:
- Flatwoven or piled
- Low-pile, thick-pile, or shag
- Tightly or loosely woven
- Handmade or machine-made
- Repaired, patched, lined, or previously mounted
- Regular or irregular in shape
- Finished with fringe, binding, or unusual seams
- Made from wool, cotton, silk, synthetics, or mixed materials
Obtain a measured weight without folding, rolling, or lifting the textile in a way that could stress it. If the rug is too large or awkward for suitable weighing equipment, ask an experienced rug handler or installer to determine the weight. Do not improvise a weighing method for a brittle, valuable, or unwieldy rug.
Inspect the structure
Place the rug on a clean, protected surface and inspect both sides under good light. Examine:
- The foundation threads behind the pile
- The entire edge that would become the top
- Fringe attachment points
- Bindings, hems, and seams
- Old mounting holes or stitch lines
- Tears, splits, worn channels, or missing yarn
- Brittle, powdery, or unusually dry fibers
- Loose pile or foundation threads
- Previous repairs and the areas around them
Do not assume that the proposed upper edge can carry the hanging load merely because there is no obvious face-side tear.
Choose the final orientation before sewing a sleeve or support fabric. Rotating the rug afterward changes which edge carries the load and may leave an unnecessary attachment on another side.
Clean, dry, and flatten it carefully
The rug should be clean and fully dry before installation. Use only cleaning methods known to suit its materials and dyes. Do not apply an improvised spot cleaner, steam treatment, fabric spray, or direct heat to an antique, silk, unstable, or otherwise valuable rug.
Commercial rug-care guidance similarly recommends beginning with a clean, dry rug and avoiding damp or poorly ventilated walls because moisture may contribute to mildew or distortion (Rug Masters’ hanging and care guidance).
If the rug’s material, dye stability, or treatment history is uncertain, consult a qualified rug cleaner or textile conservator rather than testing a treatment during mounting preparation.
Identify the wall and location
Determine whether the mounting surface is:
- Drywall over wood framing
- Hollow drywall without framing at the desired attachment points
- Plaster and lath
- Brick, stone, block, or poured concrete
- Tile over drywall, backer board, or masonry
- Wood paneling or another construction
Do not identify the substrate by appearance alone. The visible finish may conceal a different supporting material, especially behind tile or paneling. This guide cannot determine which anchor is appropriate for a particular wall; use the exact fastener manufacturer’s documentation or a qualified installer.
Evaluate the proposed location for direct sunlight, radiators, fireplaces, heating vents, dampness, plumbing risks, and poor ventilation. Leave enough access to inspect and remove the rug without dragging it across furniture.
Avoid placing a heavy rug-and-frame assembly above a bed, crib, desk, sofa, or another routinely occupied area unless a qualified professional has verified the support. A commercial wooden-hanger manufacturer likewise warns against installing its heavy framed assembly above sitting or sleeping areas and notes that supplied wall hardware may not suit every wall or combined load (Quilt Hangers’ installation limitations).
Stop-work checklist
Pause the DIY project if:
- An active tear or opening is present.
- Foundation threads are loose, weak, or missing.
- Fibers are brittle, powdery, silk, or unusually fragile.
- A previous repair lies in the proposed support area.
- The rug’s value or historical importance is uncertain.
- The rug is unusually heavy or difficult to handle safely.
- The wall is damp, cracked, soft, or deteriorating.
- You cannot identify the wall construction.
- The rod, bracket, anchor, or hanger lacks applicable documentation.
- You cannot verify a continuous load path from the textile into suitable wall structure.
Match the Mounting Method to the Rug and Display
Four systems cover many practical installations, but none is universally appropriate.
| System | Load distribution | Sewing required | Wall drilling usually required | Visibility | Position | Removal | Main textile concern | Fragile or valuable rugs |
|---|---|---|---|---|---|---|---|---|
| Sewn sleeve and rigid rod | Broad support across much of the width | Yes | Yes | Rod ends and brackets may show | Usually offset | Straightforward when supported | Stitching into a weak foundation; rod bowing | Only after specialist assessment |
| Buffered hook-and-loop on batten | Broad, close-to-continuous support | Yes, through support fabric | Yes | Mostly concealed | Close to wall | Convenient if separated gradually | Poor stitch placement, catching fibers, uneven tension | May be possible with a specialist-designed interface |
| Padded clips on rod or rail | Multiple concentrated points | No | Usually | Clips and rail often show | Offset | Easy | Slipping, compression, scalloping, edge distortion | Generally not a default choice |
| Wooden clamp or quilt hanger | Compression along part or most of the upper edge | No | Yes | Hanger is visible | Slightly offset | Usually easy | Pile crushing, finish transfer, pressure, added weight | Often unsuitable |
A sewn sleeve and rigid rod can provide broad support for a sound rug whose structure can accept suitable hand stitching. A continuous casing transfers weight across much of the width instead of suspending the rug from a few isolated points. It is not automatically safe for an antique or weakened textile.
A buffered hook-and-loop batten creates a relatively flush display. The soft loop material is sewn to a wider strip of muslin or canvas, that support fabric is hand-sewn to the rug, and the rough hook side is secured to a wooden batten. Neither adhesive nor the rough hook surface should touch the rug’s fibers. The textile must still tolerate stitching, and the wall must still support the batten.
Padded clips avoid sewing but create individual pressure points. Too few clips, inconsistent positioning, or unsuitable contact surfaces can lead to slipping, scalloping, compression, or edge distortion. Commercial spacing suggestions vary and are not independent standards, so use the documentation for the chosen system and assess the textile itself.
A wooden clamp hanger sandwiches the upper edge between planks. Its connecting screws tighten the planks rather than passing through the rug, but the system still holds the textile by pressure. Compression can flatten pile or deform the edge, and the frame adds to the wall load.
Keep the terminology precise:
- No-sew means no stitching is added to the rug.
- No-puncture means nails, staples, screws, and similar hardware do not pass through it.
- No-drill means the wall receives no drilled fasteners.
- Removable means the display can be taken down.
- Reversible is a stronger claim implying that removal leaves no meaningful alteration; do not assume it applies.
A clip system may be no-sew and no-puncture on the textile while still requiring wall-mounted brackets. A sewn support may be removable while leaving stitch holes or changes in already stressed fibers.
Do not select a method solely because the rug is described as small, medium, or heavy. The governing factors are its actual condition, complete installed weight, wall construction, rod stiffness, bracket design, and documented fastener ratings.
Method 1: Hang the Rug With a Sewn Sleeve and Rigid Rod
A sleeve—also called a casing or rod pocket—is sewn across the rug’s upper back. A rod passes through it and rests in wall-mounted brackets. The broad support can reduce reliance on isolated attachment points, provided the textile can accept the stitching and the rod remains sufficiently rigid. Published instructions describe sturdy cotton, linen, or cotton-twill casing fabric and emphasize using a rod that will not bow under the load (wikiHow’s sleeve-and-rod instructions).
Materials
Gather:
- Sturdy cotton, canvas, linen, or cotton-twill fabric
- A hand-sewing needle appropriate to the textile
- Suitable strong thread
- A sufficiently rigid rod or dowel
- Compatible brackets
- Measuring tape
- Level
- Pencil or removable wall-marking tool
- Suitable wall-assessment tools
- Fasteners documented for the substrate and complete load
- Clean sheeting or another protective work surface
Do not assume an ordinary decorative curtain rod is adequate.
1. Prepare the rug
Clean and dry the rug, inspect it, and decide its orientation. Place it face down on a protected surface large enough to prevent dragging or tight folding.
Confirm that the proposed upper edge is structurally sound. Move fringe out of the work area without taping it to the rug or pulling it taut.
2. Prepare and position the sleeve
Construct a tube-shaped sleeve that accepts the chosen rod without binding. Position it across the upper back so it:
- Supports a broad area
- Does not trap fringe
- Does not rely on a damaged hem
- Does not pull on a narrow line of weak threads
- Allows the rod to engage the brackets correctly
There is no universal sleeve depth, seam allowance, offset, or conservation-safe stitch path. Placement depends on the rug’s foundation, weave direction, pile, edge finish, repairs, and mounting geometry.
Place the rod temporarily inside the unstitched sleeve and identify where brackets need access. Some bracket arrangements require separate sleeve sections rather than one uninterrupted pocket.
3. Hand-sew the support
Use removable hand stitching appropriate to the construction. Maintain even tension: loose stitching may permit sagging, while excessive tension can gather or distort the upper edge.
Do not sew through brittle yarns, tears, loose sections, or old repairs merely to keep the sleeve straight. If the foundation cannot accept stitching evenly, stop and seek a textile conservator.
4. Check the rod and sleeve geometry
Insert the rod fully while the rug remains supported. Position temporary supports where the brackets will sit and inspect the rod for visible deflection.
A wall anchor cannot compensate for a flexible rod. If the rod bows, change the rod, shorten its unsupported spans through an appropriately designed bracket arrangement, or obtain professional design help. Do not treat the absence of visible bowing as proof of a rated capacity.
Prevent direct contact between the rug and raw wood, rough edges, or corrosion-prone metal. Use smooth, appropriately isolated components rather than assuming that any finish or coating is textile-compatible.
5. Install the brackets
Mark a level bracket line and identify suitable structural attachment points. Install the brackets exactly as required by the manufacturers of the brackets and fasteners.
Do not prescribe bracket spacing from a generic rule. The required number and positions depend on the rod, unsupported span, complete load, sleeve layout, substrate, and product documentation.
6. Lift and seat the assembly
Use enough helpers to prevent the rug from folding, dragging, or pulling sideways on the sleeve. Lift the rod and rug together, seat the rod fully in the brackets, and engage any retainers specified by the bracket manufacturer.
While the rug remains supported, confirm that:
- The upper edge is level.
- The sleeve appears to share the load across its width.
- No isolated stitch line is pulling harder than adjacent areas.
- The rug is not twisting away from the wall.
- Fringe and side edges hang freely.
- The rod is fully seated in every bracket.
7. Complete a visual and seating inspection
Inspect the rod, brackets, fasteners, wall surface, stitching, and textile alignment while helpers continue to carry the rug’s weight. If a component is not fully seated, the rod visibly flexes, a fastener rotates, or the wall surface changes, remove the assembly and reassess it.
This is a visual installation check, not a capacity test. An assembly can appear motionless without having a verified safe rating. Do not leave an uncertain or unusually heavy installation unattended; have it assessed by a qualified installer.
Method 2: Use a Buffered Hook-and-Loop Batten for a Flush Display
A buffered hook-and-loop system places the rug close to the wall while keeping adhesive and the rough hook surface away from its fibers. It has three layers:
- Soft loop tape sewn to unbleached muslin or suitable canvas
- The support fabric hand-sewn to the rug
- Mating hook tape attached to a straight wooden batten secured to the wall
Commercial rug-care guidance describes this layered arrangement and advises treating or isolating the wooden strip rather than allowing untreated wood to contact the textile (Love Your Rug’s batten-mounting guide).
Materials
You will generally need:
- Wide, sew-on hook-and-loop tape
- Unbleached muslin or suitable canvas
- Appropriate hand-sewing thread and needle
- A straight wooden strip approximately matching the supported width
- A suitable isolation layer or appropriate finish for the wood
- Staples or another documented tape-to-board fastening method
- Level and measuring tape
- Screws and fasteners documented for the wall and load
- Tools appropriate to the identified wall construction
Do not apply self-adhesive hook-and-loop tape directly to valuable fibers. Adhesive may catch yarn, leave residue, or complicate removal.
1. Prepare the textile-side interface
Cut the muslin or canvas wider than the loop tape so fastener edges cannot readily catch adjacent pile or loose yarn. Finish rough fabric edges where appropriate.
Sew the soft loop side to the support fabric before attaching the fabric to the rug. Keep the tape flat and avoid puckering that could translate into wrinkles.
Position the completed strip across a sound area on the upper back. Confirm that it will not trap fringe and that the wall-side batten can align directly behind it.
2. Sew the support fabric to the rug
Hand-sew the support fabric with a removable stitch pattern suited to the rug’s construction. The attachment should distribute load rather than pull on a narrow row of yarns or permit the support fabric to peel downward.
A removable fabric interface reduces direct contact between the rug and fastener, but it does not make the method harmless or appropriate for every textile. Stop if the foundation is brittle, torn, repaired, loosely woven, or unable to hold stitches evenly.
3. Prepare the batten
Choose a straight board that remains rigid across the supported width. Isolate the wood from the textile. If an appropriate finish is used, follow its manufacturer’s preparation and curing instructions before bringing the board near the rug.
Attach the rough hook side using the specified fastening method. Seat staples completely, if used, and inspect for projecting points. Keep staple ends, splinters, cut tape edges, and rough board corners away from the rug.
4. Secure the batten to the wall
Mark a level line and attach the batten to suitable wall structure using exact product instructions.
No universal board thickness, screw interval, anchor spacing, or hook-and-loop capacity applies to every rug. Large or heavy textiles may require a professionally designed support arrangement, additional support levels, or a different system.
5. Join the fastener progressively
With helpers carrying the rug’s full weight, align its center or another controlled reference point with the batten. Join the two fastener surfaces progressively across the width rather than attaching one corner and stretching the remainder toward it.
Check for:
- A level upper edge
- Local wrinkles or buckling
- Unequal side lengths
- Areas of incomplete engagement
- Uneven tension
- Fibers caught against the rough hook surface
Do not use the fastener to pull a misshapen rug flat. If the textile requires substantial tension to look even, remove it and reassess its condition and support.
Removing the rug
Support the rug before separating the fastener. With a helper carrying the released portion, separate the surfaces gradually across the width. Do not yank one corner away or allow the detached section to peel downward under its own weight.
Inspect the support fabric, stitches, fastener edges, batten, and wall attachments before rehanging.
Method 3: Use Padded Clips or a Wooden Clamp Hanger Cautiously
Padded clips and clamp hangers avoid sewing into the rug, but they replace stitch-related concerns with compression and concentrated loading. Reserve them for sound textiles that can tolerate gripping pressure and be inspected regularly.
Padded clips on a rod or rail
Padded clips grip the upper edge and connect to a securely mounted rod, rail, cleat, or another documented structural system. Although the textile attachment is no-sew, the rail or rod usually still requires verified wall connections.
Distribute clips evenly instead of relying on one or two points. Vendors publish different spacing and weight-based rules of thumb, but those figures are product-specific and do not replace textile assessment or rated hardware.
Choose clips with smooth, rounded, or padded contact surfaces. A clean muslin or other suitable barrier may reduce direct abrasion or material transfer, but it cannot eliminate compression, slipping, or deformation.
To install them:
- Lay the rug flat on a protected surface.
- Plan consistent clip locations without marking or puncturing valuable fibers.
- Position the clips at equal heights.
- Add an appropriate protective barrier where needed.
- Tighten only enough to prevent slipping.
- Lift the rug while supporting its lower area.
- Connect the clips to the mounted rod or rail.
- Check that the top edge remains straight and the load appears evenly shared.
Inspect immediately for dents, pile crushing, abrasion, color transfer, stretching, scalloping, or slipping. If a clip loosens, do not automatically overtighten it. The clip design, contact surface, rug construction, or number of support points may be unsuitable.
Remove or reposition the rug if loading becomes uneven. Choose a broader support system if the textile repeatedly slips, develops a wavy upper edge, or pulls downward between clips.
Wooden clamp or quilt hanger
A wooden clamp hanger uses two planks to sandwich the upper edge. Connecting screws draw the planks together without passing through the rug, but compression still holds the textile in place.
Before using one:
- Confirm that the pile and upper edge can tolerate compression.
- Check that every contact surface is clean and smooth.
- Isolate questionable wood finishes from the textile.
- Keep fringe, repairs, and unstable edges outside the gripping area.
- Tighten the clamp gradually and evenly.
- Include the hanger’s weight in the complete wall load.
One commercial oak-hanger seller states that its frame adds weight, that included wall hardware may not suit every wall or combined load, and that its product is not recommended for fragile, expensive, or irreplaceable art (Quilt Hangers’ product cautions).
After tightening, inspect for flattened pile, finish transfer, abrasion, pressure marks, or edge deformation. If the rug must be clamped hard to prevent slipping, choose another method.
Anchor the Mount to the Wall Without Guessing at Capacity
A wall-hung rug forms a continuous load path:
Rug → sleeve, support fabric, clips, or clamp → rod, rail, batten, or frame → brackets or cleat → screws or anchors → wall structure
Every component must be adequate. A strong anchor cannot compensate for weak rug fibers, failing stitches, a bowing rod, an undersized bracket, or deteriorated wall material.
Calculate the complete load
Base the design on the combined measured weight of:
- The rug
- Sleeve and support fabrics
- Rod, rail, batten, or frame
- Clips or hook-and-loop material
- Brackets and related hardware
- Any lower support or decorative component
Do not select anchors using the rug’s weight alone.
Follow exact product documentation
Use manufacturer instructions and ratings for the exact rod, brackets, screws, anchors, rail, and substrate. Check whether a stated rating depends on:
- Wall material and thickness
- Fastener size
- Installation direction
- Edge distance
- Number of fasteners
- Bracket geometry
- Other stated installation conditions
Do not create a safety margin from generic web guidance. If the documentation does not address the identified substrate and loading direction, it is not enough to specify the installation.
Match the fastener to the substrate
For framed drywall, attachment to studs is generally preferable where the system permits. Hollow drywall, plaster and lath, brick, stone, block, concrete, and tile require different assessments and product documentation. Drywall anchors, plaster fasteners, masonry anchors, and cleat systems are not interchangeable.
Commercial wall-hanging guidance likewise distinguishes stud or drywall attachment from plaster-safe and masonry-specific arrangements, but its figures are vendor guidance rather than structural standards (Wise Linkers’ wall-type overview).
This guide does not specify the correct fastener for any listed substrate. Consult a qualified installer when the wall construction is uncertain, applicable documentation is unavailable, the wall is deteriorated, the rod flexes, or the assembly is unusually heavy.
Conduct a supported pre-release inspection
After installation according to the relevant product instructions:
- Keep the rug supported by helpers.
- Confirm that the rod, brackets, or board are fully seated.
- Check whether any fastener has visibly rotated or withdrawn.
- Inspect the wall surface for new cracking, crushing, or movement.
- Sight along the rod or batten for visible bowing or twisting.
- Confirm that the textile attachment remains even.
- Remove the assembly if any visible change occurs.
This inspection can identify obvious installation problems; it does not prove hidden anchor capacity or replace rated documentation.
Avoid Shortcuts That Can Damage the Rug or Wall
Convenient hardware is not necessarily suitable for a textile or its mounting surface.
Avoid driving nails, staples, upholstery tacks, brads, grommets, or similar fasteners directly through a valuable or fragile rug. Commercial rug-hanging guidance also warns against direct nails and adhesives and notes that clips can become uneven and distort a rug over time (Rugs Direct’s mounting precautions).
Do not use carpet tack strips as a preservation-minded alternative. The method relies on numerous sharp points, so broad, non-puncturing support is the more cautious choice for a valuable textile.
Avoid glue, construction adhesive, carpet tape, and pressure-sensitive adhesive directly on valuable fibers.
Do not describe removable wall strips as reliably damage-free. Their performance depends on the exact product, complete load, installation direction, wall finish, paint condition, preparation, and removal method. Unless the manufacturer documents the complete assembly and substrate for the intended use, choose a structural mounting method or display the rug another way.
Keep raw wood away from the textile, and prevent contact with rough or corrosion-prone metal. Do not overtighten clips or clamps to compensate for repeated slipping.
Avoid suspending a rug from one or two concentrated points when broad support is practical. Keep the display away from direct sunlight, strong heat, and damp walls. Rug-care guidance recommends physical light control and avoiding damp, poorly ventilated mounting locations because of fading and moisture-related concerns (Rug Masters’ care recommendations).
Shortcut risk matrix
| Shortcut or condition | Primary risk | Better approach |
|---|---|---|
| Nails, staples, tacks, or grommets through the rug | Puncture, abrasion, concentrated stress | Sleeve, buffered fastener, or suitable non-puncturing support |
| Adhesive directly on fibers | Residue, fiber pull, difficult removal | Sew the fastener to removable support fabric |
| One or two support points | Sagging, stretching, edge distortion | Distribute support across the width |
| Overtightened clips or clamps | Compression, pile crushing, deformation | Use moderate pressure and change systems if slipping continues |
| Raw wood contact | Material transfer or contact damage | Isolate the wood from the textile |
| Rough or corrosion-prone metal | Abrasion or staining | Use smooth, compatible, isolated hardware |
| Undocumented or mismatched anchors | Mounting failure | Follow exact product documentation |
| Removable strips carrying an uncertain load | Adhesive failure or finish damage | Use a verified structural mounting method |
| Direct sunlight or strong heat | Fading and fiber deterioration | Relocate the display or control incoming light |
| Damp wall or poor ventilation | Mildew, staining, or distortion | Correct the moisture problem before installation |
Inspect and Maintain the Rug After It Is Hung
Inspect the installation shortly after hanging and periodically thereafter. The appropriate interval depends on the rug, mounting method, environment, and consequences of failure; there is no universal schedule.
Look for:
- Rod bowing
- A tilting, twisting, or separating batten
- Moving anchors or screws
- New wall cracks or crumbling material
- Loose brackets
- Failed, tightened, or broken stitches
- Separating hook-and-loop surfaces
- Slipping clips
- Compressed or abraded pile
- Uneven upper or side edges
- New sagging, scalloping, or distortion
- Dust lines or discoloration
- Dampness, musty odor, or wall staining
- Insect activity, webbing, shed fibers, or unexplained loss
If a rod bows, a fastener moves, or the wall surface changes, remove the rug with its weight supported and have the system reassessed. Do not interpret an earlier visual inspection as proof that the installation remains adequate.
Remove dust gently
Use gentle, low-suction dust removal with a suitable brushless or soft attachment.
Avoid aggressive brushing, beating, or household stain treatment while the rug is hanging. Periodically examine the back, upper edge, wall, and all textile-to-hardware interfaces. Remove the rug with assistance when the wall needs cleaning or the mounting components require close inspection.
Control light and moisture
Use placement, blinds, curtains, shades, or another physical form of light control to limit direct sunlight. Do not rely on an unverified spray treatment to prevent fading.
Investigate dampness rather than covering it with the rug. A musty odor, recurring condensation, discoloration, or visible spotting is reason to remove the textile and address the source before rehanging it.
Know when to take it down
Remove the rug and seek specialist help if you find:
- Progressive fading or discoloration
- Moisture or suspected mildew
- Active insects
- Loose or breaking foundation threads
- A growing tear
- Progressive stretching or distortion
- Moving fasteners or wall cracking
- Repeated fastener separation
- Clips that repeatedly slip or damage the edge
- Rod or batten deformation
A textile conservator or experienced rug professional should assess antique, silk, brittle, torn, historically significant, high-value, or irreplaceable rugs. Use a qualified installer for unusually heavy assemblies, uncertain walls, undocumented fastening conditions, and installations above occupied areas.
Frequently Asked Questions
Can I hang a rug without putting nails or staples through it?
Yes. A sewn sleeve, buffered hook-and-loop interface, padded clips, or wooden clamp hanger can avoid nails and staples passing through the textile.
The tradeoffs differ. Sleeves and buffered fasteners require stitching, while clips and clamps apply compression and can distort the upper edge. The wall side may still require screws, brackets, or another verified structural connection. “No punctures through the rug” does not mean “no drilling into the wall.”
What is the best method for a heavy rug?
There is no universally best method based on weight alone. A structurally sound rug may be suitable for a broad-support sleeve on a sufficiently rigid rod. Another may require a professionally designed batten, reinforced interface, multiple support levels, or custom frame.
Measure the complete installed weight, assess the foundation, and verify every component in the load path. If the rug is difficult to handle, its foundation is weak, or the rod flexes, obtain professional help rather than enlarging a light-duty DIY arrangement.
Can I attach hook-and-loop tape directly to the rug?
Avoid adhesive-backed hook-and-loop tape directly on valuable fibers. For a buffered installation, sew the soft loop side to a wider strip of unbleached muslin or suitable canvas, then hand-sew that support fabric to a sound area of the rug. Attach the rough hook side to an isolated wooden batten.
Specialist mounting services describe both sewn sleeves and sewn hook-and-loop systems, but claims that either method is completely harmless or fully reversible should not be accepted without assessing the individual textile (Renaissance Rug Cleaning’s mounting-system description).
Can a renter hang a rug without drilling into the wall?
A lightweight rug can be hung without drilling by mounting a tension rod inside a window frame or niche How to Hang a Rug on the Wall Without Causing Damage. For example, an existing picture rail may be considered only after verifying the rail itself, its attachment to the wall, and every connecting component.
Do not assume removable adhesive strips are adequate or will leave the finish unchanged. Review the property’s rules and ask the owner or manager before altering the wall. If no documented, suitable support is available, use a different display approach rather than improvising a no-drill wall mount.
When should an antique or valuable rug be mounted by a professional?
Seek professional assessment when a rug is antique, silk, brittle, torn, loosely woven, repaired near the proposed upper edge, historically important, unusually heavy, high-value, or irreplaceable.
Professional help is also appropriate when:
- The rug’s value or prior treatment is uncertain.
- Its foundation cannot clearly accept stitching or compression.
- The wall construction cannot be identified.
- Hardware documentation does not cover the intended installation.
- The complete assembly is difficult to handle.
- The display would be above an occupied area.
Choose Broad Support and Verify the Entire Load Path
A successful rug display begins with assessment rather than a preferred piece of hardware. Use a sleeve and rigid rod, buffered hook-and-loop batten, or carefully selected clip or clamp arrangement only when it suits the textile.
Then verify the complete load path—from the rug and textile interface through the rod or batten to the brackets, fasteners, and wall structure. When condition, value, stitching suitability, wall construction, or structural capacity remains uncertain, preserving the rug and preventing a mounting failure matter more than completing the installation as a DIY project.